Are you looking to build strong and sculpted arms but don't have access to a gym or weights? Look no further! In this article, we will guide you through a 30-minute resistance band arm workout to build muscle and tone and strengthen your biceps, triceps, and shoulders.
Resistance bands (also called exercise bands) are affordable, portable, and versatile, making them an excellent tool for effective strength training. So, let's grab our resistance bands and get started on those arms!
Try This 8-Step Resistance Band Arm Workout
This resistance band arm workout has eight steps to it. Each step has a different workout, so you’ll be doing multiple resistance band arm exercises to tone your upper body. Let’s get started!
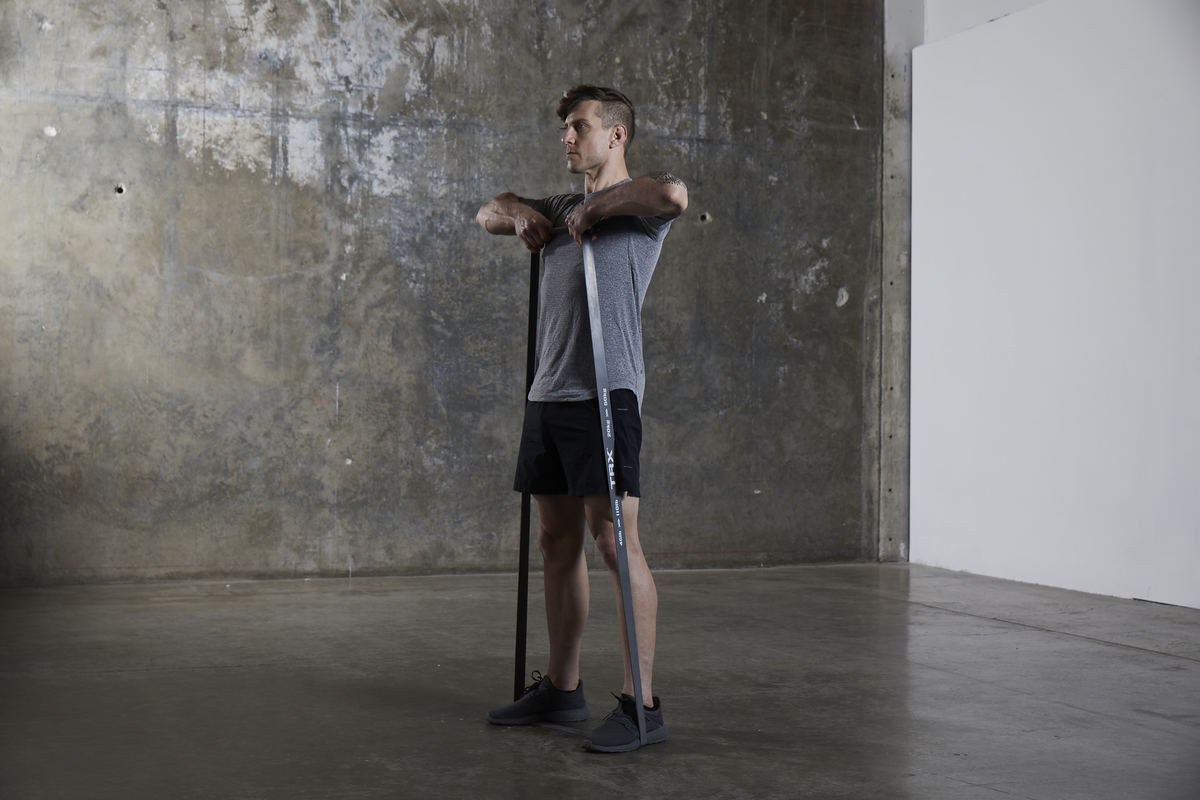
Step One: Overhead Pull-Apart
Benefits: The overhead pull-apart targets the muscles in your shoulders and upper back, primarily the lats, helping improve posture and upper body strength.
- Reps: 15
- Sets: 3
- Rest Time: 15-20 seconds between sets
How To:
- Stand with your feet shoulder-width apart and hold the resistance band with a wide grip above your head.
- Engage your core and keep your arms straight.
- Slowly pull the band apart, bringing your hands out to the sides and squeezing your shoulder blades together.
- Pause for a moment, then return to the starting position.
Tip: To make the move more challenging, start with a more narrow grip on the band, with the hands closer together to create more resistance!
Related: See more exercises for this area with this shoulder and back workout.
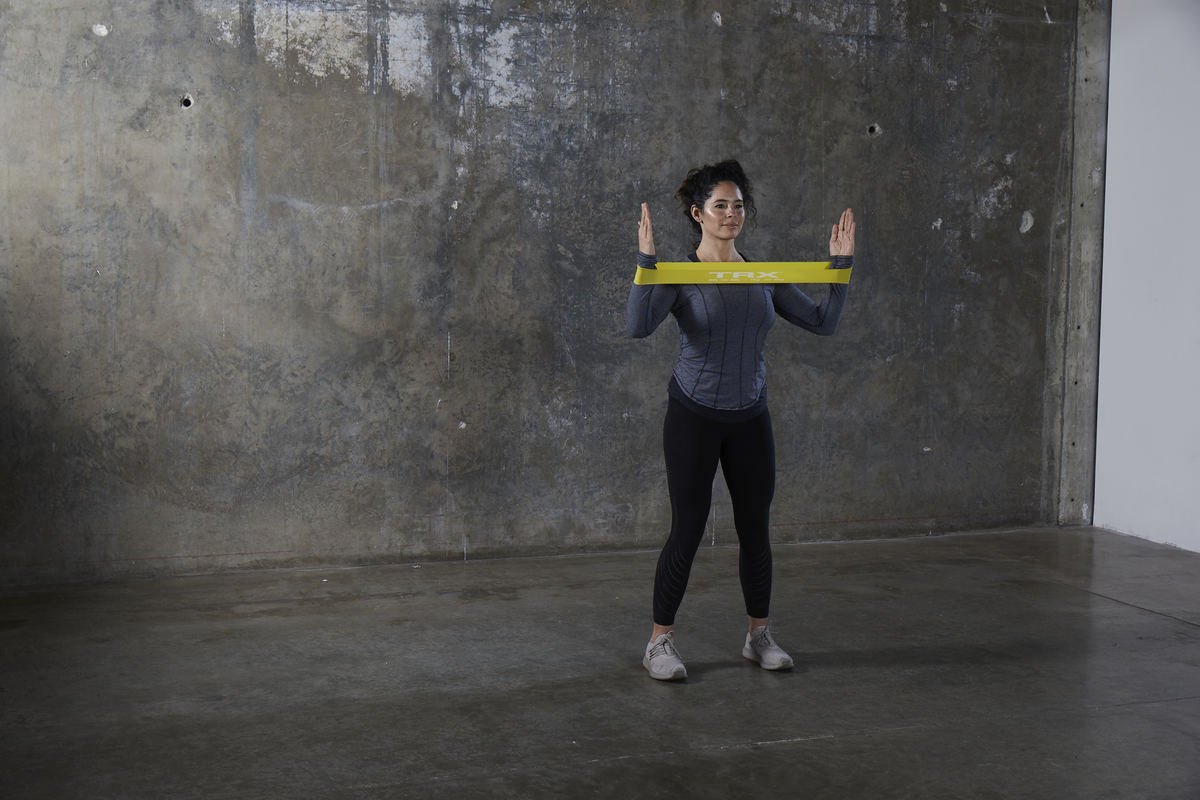
Step Two: Resistance Band Pull-Apart
Benefits: This exercise engages the muscles in your upper back and rear delts, enhancing shoulder stability and posture. Sitting up straight and pulling the arms and shoulders backward helps to counteract poor posture and the hunching effect we get throughout the day if we’re bent over our phones, steering wheels, and computers too often!
- Reps: 12
- Sets: 3
- Rest Time: 15-20 seconds between sets
How To:
- Stand with your feet shoulder-width apart and hold the resistance band with a shoulder-width grip in front of you at chest/shoulder level.
- Keeping your arms straight, slowly pull the band apart by bringing your hands out to the sides, squeezing your shoulder blades back and together.
- Pause for a moment, then return to the starting position with control.
Tip: To make the move more challenging, start with a more narrow grip on the band, with the hands closer together to create more resistance!
Step Three: Lateral Raises
Benefits: Lateral raises primarily target the lateral deltoids, the small muscle group at the shoulders, and help shape and strengthen the area. This is a small muscle group, so it’s best to start with light resistance to make sure you can do this with no pain in the shoulder joint(s).
- Reps: 12
- Sets: 3
- Rest Time: 15-20 seconds between sets
How To:
- Stand with your feet hip-width apart, holding the resistance band with your palms facing inward.
- Keep your arms straight and slightly in front of your thighs.
- Keep still in the torso and raise your arms out to the sides, maintaining a slight bend in your elbows.
- Continue lifting your arms until they are parallel to the floor.
- Slowly lower your arms back to the starting position.
Step Four: Seated Resistance Band Bicep Curl
Benefits: Seated bicep curls isolate the biceps, promoting muscle growth and definition in the front of your arms.
- Reps: 15
- Sets: 3
- Rest Time: 15-20 seconds between sets
How To:
- Sit on a chair or bench with your feet flat on the floor and the middle of the band under your feet, holding the handles with an underhand grip.
- Keep your elbows close to your sides and your palms facing upward.
- Begin with your arms fully extended.
- Slowly curl the band upward, bending your elbows and bringing your hands toward your shoulders.
- Slowly lower the band back to the starting position, fully extending your arms.
Tip: Turning the arms and palms outward during this curl is a variation that can simultaneously work the small rotator cuff muscles in the back of the shoulders, which helps with shoulder joint health and also definition!
Step Five: Banded Single Arm Row
Benefits: The single-arm row works your back muscles, including the lats, rhomboids, and rear delts, contributing to a well-rounded upper body and better posture! It’s great to work one side at a time for increased core challenge and to also note if there’s any strength imbalance between your right and left sides.
- Reps: 12 per arm
- Sets: 3
- Rest Time: 15-20 seconds between sets
How To:
- Stand with your feet shoulder-width apart, placing one end of the resistance band under your foot.
- Hold the other end of the band with one hand, palm facing in toward your body.
- Bend your knees slightly, hinge forward at the hips, and keep your back straight.
- Pull the band toward your waist, keeping your elbow close to your body and squeezing your shoulder blade.
- Pause for a moment at the top, feeling the contraction in your back.
- Slowly release the band to return to the starting position.
Tip: If you need more challenge, place the middle of the band under your foot, creating more resistance.
Step Six: Resistance Band Tricep Kickback
Benefits: Tricep kickbacks target the triceps, helping you achieve toned and defined arms. Having to keep a flat back in the hinge position also incorporates the muscles in your back and core.
- Reps: 15
- Sets: 3
- Rest Time: 15-20 seconds between sets
How To:
- Stand with your feet hip-width apart, holding the resistance band with one hand.
- Step forward with the opposite foot, maintaining a slight bend in your knee.
- Bend forward at the waist, keeping your back straight and parallel to the ground.
- Bring your upper arm close to your torso, with your elbow bent at a 90-degree angle and pointing backward.
- Extend your forearm backward, straightening your arm and squeezing your tricep.
- Pause for a moment, feeling the contraction in your tricep.
- Slowly bring your forearm back to the starting position, maintaining control and keeping the upper arm right next to your side.
Tip: Your shoulder should not shift forward as you straighten the arm (you may feel pinching pain in the shoulder if this happens). So roll the shoulder back and down and try to keep it there as you move through the movement.
Step Seven: Single-Arm Front Raise
Benefits: The single-arm front raise engages the front deltoids, contributing to stronger and shapelier shoulders. If you’ve had shoulder pain or injuries in the past, start with a lighter band and then progress to heavier so you can do this pain-free!
- Reps: 12 per arm
- Sets: 3
- Rest Time: 15-20 seconds between sets
How To:
- Stand with your feet shoulder-width apart, holding the resistance band with one hand.
- Keep your arm extended straight down in front of your thigh, palm facing your body.
- Keep a stiff torso and lift your arm forward, raising it straight in front of you.
- Continue lifting until your arm is parallel to the ground.
- Slowly lower your arm back to the starting position with control.
- Repeat for the prescribed number of reps on one side before switching to the other arm.
Tip: Stay as still as possible in the torso and hips, so you don’t use momentum to help you out. If you can’t stay still in the rest of the body, use a lighter resistance band.
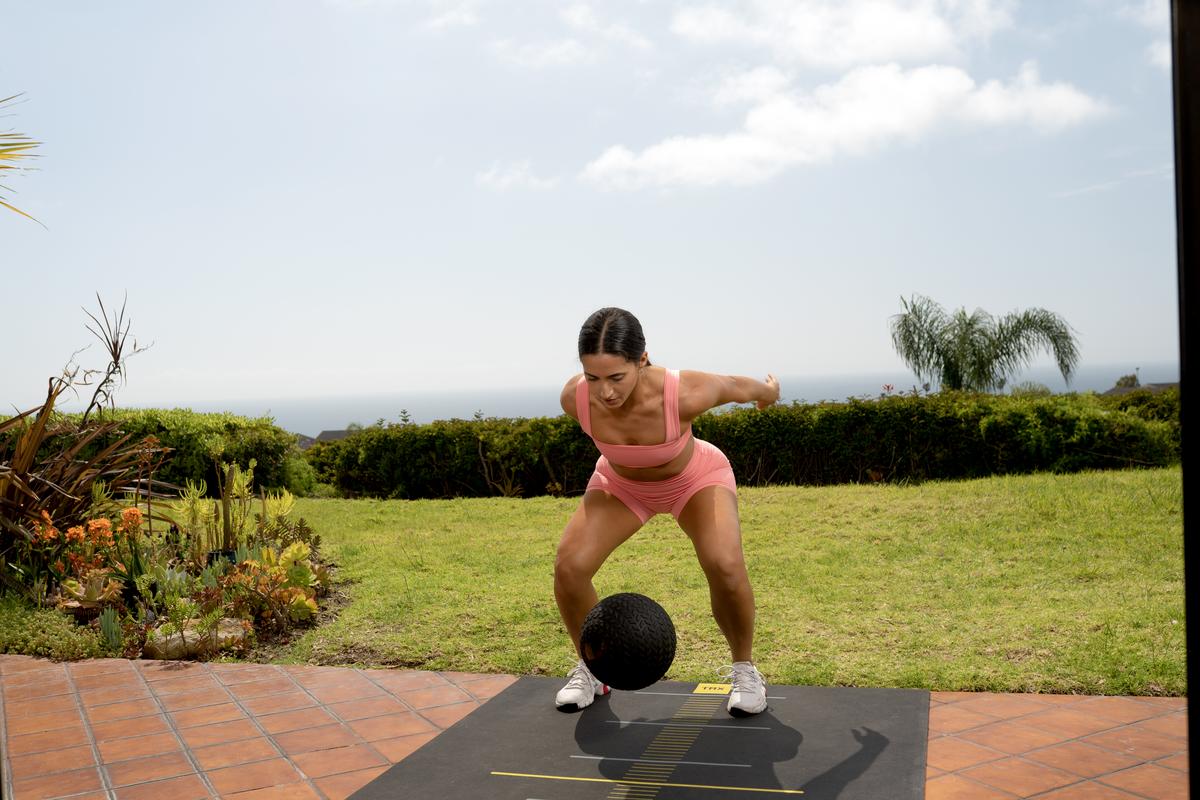
Step Eight: Single-Leg Resistance Band Deadlift
Benefits: This exercise targets the muscles in your hamstrings, glutes, and lower back, promoting lower body and core strength and stability. Although this is considered a lower body exercise, keeping the shoulders back and the torso stiff while holding the band taut incorporates muscles in the back and shoulders. Also, because it’s a single-sided move, you get a balance/stability challenge in the ankles, knees, hips, and torso. More bang for your buck!
- Reps: 12 per leg
- Sets: 3
- Rest Time: 15-20 seconds between sets
How To:
- Stand with your feet hip-width apart, placing one end of the resistance band under your foot.
- Hold the other end of the band with both hands, palms facing your thighs.
- Lift one leg slightly off the ground, maintaining a slight bend in your standing leg.
- Hinge forward at the hips, keeping your back straight and your core engaged.
- Lower the resistance band toward the ground, allowing your arms to hang naturally.
- Keeping a slight bend in your standing leg, push through your standing heel and straighten the hips to return to the starting position.
- Repeat on the other leg.
Tip: If you’re having trouble keeping your balance, leave the back toe barely touching the ground to give you more stability. Just keep all the weight on the standing leg!
For more workouts like the one we've covered above, try the TRX Training Club:
Can You Get an Effective Workout with Resistance Bands?
Absolutely! Resistance bands provide constant tension throughout the exercises, challenging your muscles and promoting muscle growth. They offer a wide range of resistance levels, allowing you to adjust the intensity of your workout. Additionally, resistance bands enable you to perform various exercises targeting different muscle groups, providing a full-body workout experience.
How to Choose Your Resistance Bands
If you want a high-quality resistance band arm workout, you’ll need to choose the right resistance bands. The first thing you should look for is a pack of resistance bands, not a singular band.
Packs come with resistance bands of differing weights. This allows you to train at different intensity levels. Once you’ve found the right pack of resistance bands, here’s what to look for in each resistance band to know if it’s for you:
- All-natural rubber latex for maximum stretch
- Length of 10” or above to allow for the full range of movement
- A proper thickness that allows for more intensity through the movement
Your resistance bands should have the following qualities if you want to feel the burn from your at-home strength workout.
If you want resistance bands that meet the requirements above, try the TRX Training resistance bands today.
Build Your Arms with Resistance Bands Today
By following the above step-by-step instructions and incorporating this 30-minute resistance band arm workout into your fitness routine, you can build muscle, improve strength, and enhance the definition of your arms. Remember to maintain proper form and control throughout each movement to maximize the benefits and minimize the risk of injury. Start with bands of appropriate resistance for your fitness level and gradually increase the intensity as you progress. Give it a try during your next workout session and experience the benefits of resistance band training firsthand!