Resistance bands transform ordinary bodyweight squats into intensive muscle-building exercises, cranking up the intensity without requiring a single weight plate.
Picture this: better glute activation, improved form, and a comprehensive lower body workout using nothing more than a lightweight band you can toss in any bag. Whether you're at home, traveling, or just want to spice up your routine, resistance bands and tools like the TRX Suspension Trainer™ can take your squat game to the next level.
Ready to discover how this simple addition can revolutionize your leg day? Let's dive in and help you move better, so you can grow stronger and live longer.
What Are Resistance Band Squats?
Resistance band squats are regular squats with an elastic band added for extra resistance. The band creates tension that fights against your muscles as you move up and down.
Unlike free weights that provide consistent downward resistance due to gravity, these bands create variable resistance that increases as the band stretches during the complete squat movement.
Your muscles must work harder both during the descent and the ascent of each repetition.
Think of it as making your body your machine - the band becomes part of your resistance system, challenging your muscles in ways that gravity alone can't match.
Understanding how to use resistance bands opens up countless possibilities beyond basic squats.
Types of Resistance Training Equipment for Squats
You have several options when it comes to adding resistance to your squats:
-
Loop bands (mini loop bands) - Small circular bands that wrap around your legs, usually above the knees.
-
Long resistance bands - Longer bands you can step on and hold with your hands for upper body resistance.
-
Free bands - Flat, stretchy bands you can tie into loops or wrap around anchor points.
-
TRX Suspension Trainer™ - Adjustable straps that hang from above, perfect for assisted squats and bodyweight variations that challenge your stability and strength simultaneously. This doesn’t fit the traditional resistance band definition, but it’s very effective when used in tandem.
Benefits of Squats With Resistance Bands
Regular squats rely on gravity and your body weight for resistance, but resistance bands completely transform the exercise.
These bands create variable tension that increases as the band stretches during movement - both when you're lowering down and pushing back up.
Your glutes, quads, and other leg muscles experience continuous engagement, leading to enhanced muscle activation compared to bodyweight squats alone.
The constant tension forces your muscles to stay engaged throughout the entire range of motion, building the functional strength you need for real-life activities.
Strong glutes provide benefits that extend far beyond aesthetics, including improved hip stability and reduced back pain.
Improved Form and Stability
One of the biggest benefits of banded squats is how they correct common form errors. The band naturally forces you to push your knees outward, which prevents them from caving inward - a problem that can lead to injury.
This external resistance teaches your body proper movement patterns while you're actually performing the exercise.
Resistance band squats offer exceptional convenience since you can do them anywhere, eliminating the need for a gym or heavy equipment.
They're also easier on your joints than loaded barbell squats when using comparable resistance levels while still providing the stimulus your muscles need to grow stronger.
You get all the benefits of progressive training while minimizing wear and tear on your knees, hips, and back.
The movement patterns you develop through resistance band squats translate directly to everyday activities like getting up from chairs, climbing stairs, and lifting objects from the ground. These functional strength training exercises ensure you're building strength that actually improves your quality of life.
Convenience and Portability
Our highly portable, low-impact, full-body training tools give you control over when and where you work out.
Resistance bands are a total workout solution for people who want effective workouts while maintaining training flexibility.
These lightweight bands take up almost no space and can fit in any bag, making them ideal for travel, home workouts, or even outdoor exercise sessions.
You can get a demanding leg workout in your living room, hotel room, or at the park using only portable equipment.
This convenience means you never have to skip leg day, no matter where you are. It's about creating consistency in your training - and consistency is what builds real strength.
Joint-Friendly Resistance
Unlike heavy weights that can put stress on your joints, resistance bands provide a gentler form of resistance that's easier on your knees, hips, and back.
The elastic nature of bands creates smooth, controlled resistance that doesn't jar your joints like dropping into a heavy squat might.
Despite being easier on your body, bands still provide progressive overload - meaning you can gradually increase the intensity as you get stronger by using thicker bands or combining multiple bands.
These qualities make them ideal for beginners, experienced athletes looking for variety, or anyone who wants to develop strength without excessive wear and tear.
For people recovering from injuries, resistance bands can be useful as part of a training program when recommended by qualified healthcare professionals - though remember to always consult your physician before starting any new exercise routine.
How to Do Basic Resistance Band Squats
Setup and Band Placement
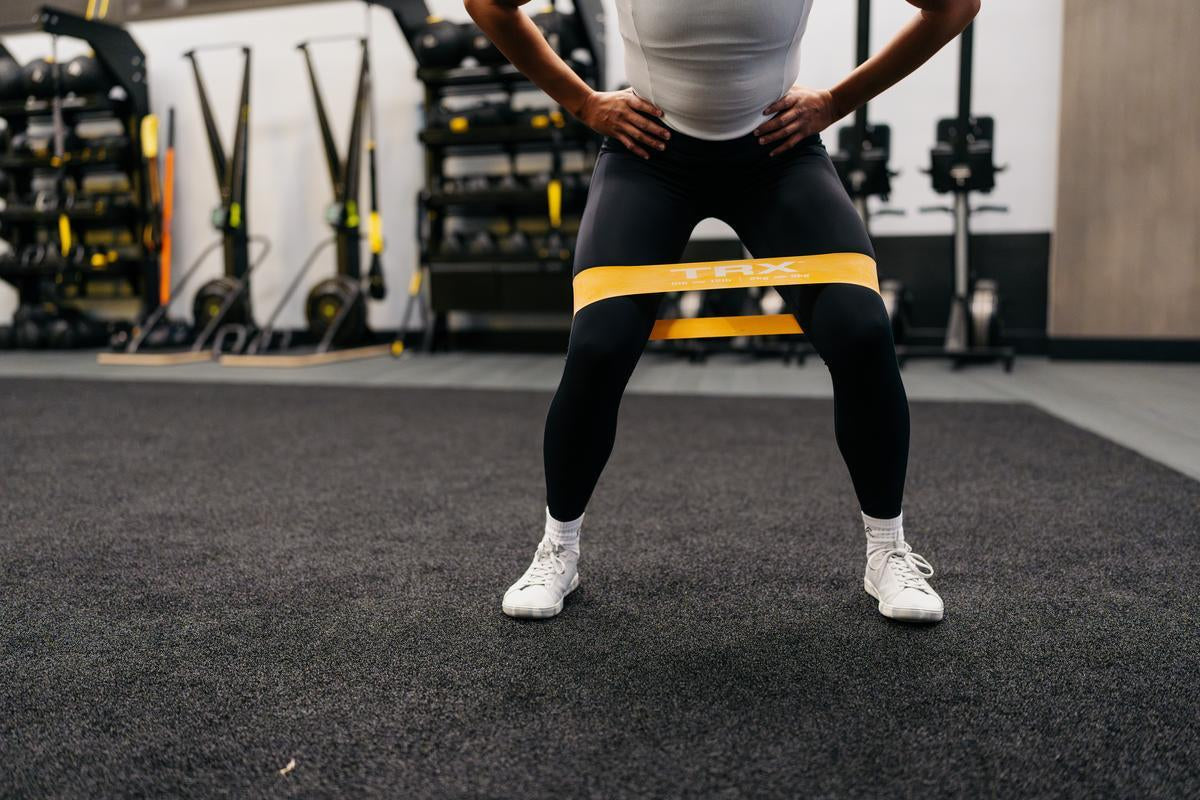
Proper resistance band squat setup is crucial for safety and results. Place the band on your lower thighs above your kneecaps - not on your kneecaps, but on your thighs above them. Position your feet slightly wider than shoulder-width apart, adjusting based on your comfort and hip mobility, with your toes pointing slightly outward.
Stand tall with your shoulders back, chest up, and your core muscles lightly engaged. Make sure the band has light tension even in the starting position, so it's ready to work as soon as you begin moving. This isn't about fighting the band - it's about working with it to create better movement patterns.
Step-by-Step Technique
Here's how to execute the perfect banded squat:
-
Begin by pushing your hips back like you're sitting in an invisible chair, then bend your knees to lower into the squat
-
Keep your knees pushing outward against the band as you go down - don't let them cave inward
-
Lower until your thighs are parallel to the floor, maintaining tension in the band during the entire range of motion
-
Push through your heels to stand back up, squeezing your glutes at the top
-
Breathe in as you lower down and breathe out as you push back up
Execute the movement keeping your chest up, back straight, and your weight balanced on your heels rather than your toes. Think of it as a controlled descent and powerful ascent - every rep should feel deliberate and strong.
Proper Form Cues
The key to effective resistance band squats lies in maintaining proper form across all repetitions. Keep your knees actively pushing out against the band - never let them cave inward toward each other. Maintain an upright chest and flat back by keeping your shoulders pulled back and avoiding any forward lean or rounding.
Distribute your weight on your heels rather than your toes, and engage your core muscles to provide stability and support for your spine. Remember to breathe steadily: inhale as you lower down into the squat and exhale as you push back up to standing. Your breathing should be as controlled as your movement.
Common Mistakes to Avoid
Knees Caving Inward
When your knees cave inward during squats, it usually means your glute muscles are weak or not firing properly. This common mistake puts harmful stress on your knee joints and can lead to injury with repeated exposure. Resistance bands are actually excellent tools for addressing this problem because they force you to actively push your knees outward against the band's pull.
This action strengthens your glutes and trains your brain to keep proper knee alignment. The constant outward pressure from the band teaches your muscles the correct movement pattern, making you stronger and safer with every rep. It's like having a coach constantly reminding you to maintain proper form.
Using Too Much Resistance Too Soon
One of the biggest mistakes beginners make is jumping straight to thick resistance bands before mastering the basic movement. Starting with excessive resistance will break down your form, reduce the exercise's effectiveness, and increase your risk of injury.
Begin with a light band that provides manageable resistance and allows you to complete 12-15 reps with flawless form - you should feel moderately challenged but still be able to maintain proper knee tracking and posture. As you develop strength and your form becomes automatic, you can gradually progress to thicker bands or combine multiple bands for more resistance. Remember, strength development requires consistent progression, and good form always beats heavy resistance.
Incomplete Range of Motion
Many people don't squat deep enough to get the full benefits of the exercise. For optimal muscle activation and strength gains, you need to lower until your thighs are parallel to the ground - or even slightly below if you have good mobility. Stopping halfway down might feel easier, but it cheats your muscles out of the full workout they need.
Going to full depth ensures your glutes and hamstrings work harder, improves your hip flexibility, and develops functional strength for real-life movements like getting up from chairs or climbing stairs. Full range of motion isn't just about the exercise - it's about building strength that transfers to everything you do.
Poor Band Positioning
Where you place your resistance band makes a huge difference in how effective your squats will be. The optimal placement is on your lower thighs just above your kneecaps - not on your kneecaps where it can cause discomfort or restrict movement. If you place the band too high on your thighs, it will be less effective for glute activation during squats. Too low on your shins, and it can interfere with your ankle mobility and squat depth.
The band should have light tension even when you're standing upright, so adjust your foot width accordingly. Correct placement ensures your glutes fire correctly and you get optimal benefit from every rep. Think of band placement as setting up your success from the very beginning.
8 Resistance Band Squat Variations to Build Lower Body Strength
1. Basic Banded Squat
The basic banded squat serves as your foundation exercise, teaching proper squat mechanics while adding external resistance to activate your glutes and prevent knee valgus. This movement builds lower body strength, improves hip mobility, and helps establish the movement patterns that all other squat variations build upon.
How to perform:
-
Place a loop band on your lower thighs above your knees
-
Stand with feet slightly wider than shoulder-width apart
-
Point your toes slightly outward and maintain tension in the band
-
Lower yourself by pushing your hips back and bending your knees
-
Descend until your thighs are parallel to the floor
-
Push your knees outward against the band's resistance throughout the movement
-
Drive through your heels to return to starting position
-
Squeeze your glutes at the top to complete the rep
2. Sumo Squat with Band
The sumo squat targets your inner thigh muscles and glutes from a different angle while challenging your mobility. This wider stance variation allows for deeper hip flexion and builds strength in often-neglected muscle groups, providing an excellent glute burn that's more intense than regular squats.
How to perform:
-
Position feet significantly wider than shoulder-width apart
-
Turn your toes out at a 45-degree angle
-
Keep the resistance band positioned above your knees
-
Sit back deeper into the squat while maintaining an upright torso
-
Focus on pushing your knees outward against the band's resistance
-
Lower until you reach your maximum comfortable depth
-
Drive through your heels to return to starting position
-
Squeeze your glutes and inner thighs at the top
3. TRX Assisted Squat
The TRX assisted squat is perfect for beginners or anyone working on improving squat form and depth. This variation allows you to focus on movement quality, build confidence in the squat pattern, and achieve greater depth while building the mobility and strength needed for unassisted squats.
How to perform:
-
Hold the TRX straps with both hands
-
Lean back slightly to create tension in the straps
-
Use the straps for balance and support as you begin your descent
-
Lower into your squat while focusing on proper hip movement
-
Ensure your knees track properly over your toes
-
Descend as deep as comfortable, using the straps to maintain balance
-
Use the straps for assistance as you drive back up to starting position
-
Gradually reduce reliance on the straps as you get stronger
Related: Try These 10 TRX Leg Exercises for Lower Body Strength
4. Pulse Squats with Band
Pulse squats amplify training intensity by keeping your muscles under constant tension for extended periods. This variation tests muscular endurance and mental toughness while providing an intense burn in your glutes and quadriceps, as your muscles never get a chance to rest during the set.
How to perform:
-
Set up in your regular banded squat position
-
Lower until your thighs are parallel to the floor
-
Instead of standing up, perform 5-10 small pulse movements
-
Stay in the bottom squat position throughout the pulses
-
Move up and down in small ranges while maintaining tension
-
Keep the resistance band engaged throughout all pulses
-
After completing your pulses, stand all the way back up
-
This completes one full repetition
5. Goblet Squat with Band
The goblet squat with band combines resistance band training with added weight, creating a comprehensive lower body and core challenge. This variation teaches proper squat mechanics while the weight forces your core to work harder for stability, and the band continues targeting your glutes and preventing knee cave.
How to perform:
-
Hold a dumbbell or kettlebell close to your chest with both hands
-
Position the resistance band above your knees
-
Stand with feet shoulder-width apart or slightly wider
-
Keep your core engaged to support the added weight
-
Lower into a squat while pushing your knees outward against the band
-
Descend until your thighs reach parallel or your comfortable depth
-
Drive through your heels to return to starting position
-
Keep the weight close to your chest throughout the entire movement
6. TRX Jump Squat
The TRX jump squat adds explosive power training to your workout while providing safety and balance support. This variation builds explosive leg strength that transfers to sports performance and daily activities, while the straps help you land safely and maintain proper form throughout the jumping movement.
How to perform:
-
Hold the TRX straps lightly for balance support
-
Lower into a squat position with proper form
-
Explode upward into a jump using maximum power
-
Use the straps for balance and control during the jump
-
Land softly with your knees slightly bent
-
Absorb the landing by immediately going into the next squat
-
Focus on landing mechanics to protect your joints
-
Start with few reps and progress gradually
7. Single-Leg Squat with Band
The single-leg squat with band is an advanced unilateral exercise that tests balance, strength, and coordination simultaneously. This variation reveals strength imbalances between legs while building single-leg strength and forcing your core muscles to work overtime for stability.
How to perform:
-
Place resistance band above your knees (optional - many prefer without band)
-
Lift one foot off the ground, either in front or behind you
-
Engage your core for stability on your standing leg
-
Slowly lower yourself down while maintaining proper knee tracking
-
Keep your standing knee aligned over your toe
-
Descend only as far as you can maintain good form
-
Drive through your heel to return to starting position
-
Complete all reps on one leg before switching sides
8. TRX Pistol Squat Progression
The TRX pistol squat progression makes the challenging pistol squat achievable for most people by providing crucial balance support. This exercise safely builds the ankle mobility, leg strength, and balance needed for advanced single-leg movements, with adjustable assistance based on your current ability level.
How to perform:
-
Hold the TRX straps with both hands
-
Extend one leg straight out in front of you
-
Begin lowering down on your standing leg slowly
-
Use the straps for balance support and to control your descent
-
Lower as far as your mobility and strength allow
-
Keep your extended leg straight and off the ground
-
Use the straps to assist your return to starting position
-
Adjust grip or body angle to modify the amount of assistance needed
Adding Suspension Training into the Picture
TRX suspension training takes your squats to the next level by adding instability and functional movement patterns that mirror real-life activities. Unlike traditional squats where you're planted firmly on the ground, TRX squats challenge your balance and force your stabilizing muscles to work harder.
The unstable nature of the straps means your core, ankles, and smaller support muscles must constantly adjust to keep you balanced, creating a more complete workout. This type of training improves your coordination and builds strength that transfers better to everyday movements like getting up from low chairs or navigating uneven surfaces. It's functional training at its finest - building strength that actually helps you live better.
Programming and Progression
Your workout volume should match your current fitness level to ensure proper recovery and steady progress.
Beginners should start with 2-3 sets of 8-12 reps using light resistance, emphasizing proper form rather than pushing for high difficulty.
Intermediate exercisers can handle 3-4 sets of 12-15 reps with medium resistance, while advanced athletes can perform 4 or more sets and mix in different variations to keep stimulating their muscles.
Always prioritize good form over high rep counts - it's better to do fewer reps correctly than many reps with poor technique.
Quality trumps quantity every single time, and your body will thank you for it in the long run.
Progressive Training Strategies
Building strength takes smart progression. Start by increasing your reps, then add extra sets, and when that feels easy, level up to thicker resistance bands. Once you’ve nailed the basics, challenge yourself with advanced moves like single-leg squats or pulse squats to keep your muscles guessing and growing.
When you're ready for more, TRX suspension training adds instability and functional movement to take your squat game to the next level.
It’s all about making small, intentional changes as your body adapts. Progress isn’t always a straight line, but with purpose and consistency, it’s always possible.
New to fitness? Our bodyweight workout program for beginners helps you build a solid foundation so you can get the most out of every resistance band and TRX workout.
The Future of Your Fitness is Portable
Remember when squats felt too easy, but the idea of adding weights seemed intimidating or just plain inconvenient? You were caught between boring bodyweight moves and the hassle of heavy equipment. Now, resistance bands have changed the game—turning simple squats into serious strength-builders you can do anywhere.
From banded basics to advanced TRX variations, you’ve got a full toolkit for building lower body strength without a gym. Start with resistance bands to dial in your form, then level up with TRX for a full-body challenge. Whether you're at home, on the go, or just mixing things up, you're not just training legs—you’re building strength for real life.

