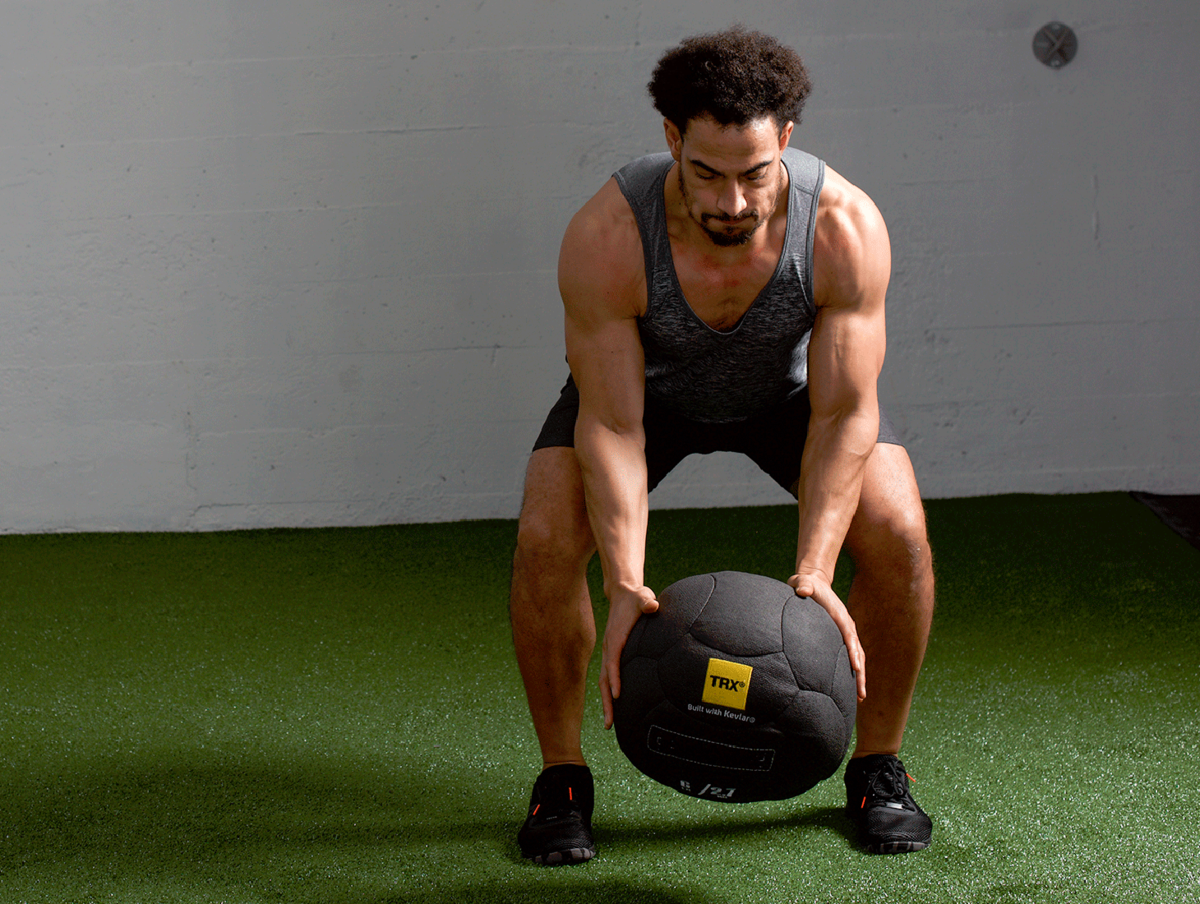
The lower trap muscles are often neglected in workout routines, but they play a crucial role in improving overall functional fitness. As we know, functional fitness is all about training your body to perform everyday activities with ease. Lower trap exercises can significantly improve your functional fitness by enhancing your ability to lift, carry, and move objects with proper form and technique.
Today, we’ll take a look at ten lower trap exercises you can incorporate into your workouts to build your upper body. We’ll look at the anatomy of the traps, and even leave you with a sample workout that you can try yourself. Are you ready? Let’s get started!
What are the Trapezius Muscles?
The trapezius muscles are a group of three muscles located on the upper back and neck region of the body. These muscles work together to support the shoulder blades' movement and help stabilize the neck and head. The trapezius muscles are divided into three regions:
- The upper traps
- Middle traps
- Lower traps
Strengthening these muscles through targeted exercises can have a positive impact on overall posture, shoulder strength, and injury prevention.
Neglecting any of the three sections of the trapezius muscles can lead to imbalances and potential injury. Pairing trap work with lower back stretching exercises ensures your entire back stays balanced and pain-free.
In order to achieve a well-rounded and functional upper back and shoulder region, you should target each section. Let’s take a look at the anatomy of each part of the trapezius first.
Upper Traps
The upper traps are responsible for elevating the shoulders and helping with neck extension. They are often the most visible part of the trapezius muscles and are commonly targeted in strength training exercises. Running from the base of the skull to the top of the shoulder, they also help in the rotation and lateral flexion of the neck. They are commonly used during exercises such as shoulder shrugs and upright rows.
Middle Traps
The middle traps are located between the shoulder blades and are responsible for retracting the shoulder blades toward the spine. This helps improve posture and reduces the risk of shoulder injuries. Rows are the most common exercises associated with working your middle traps specifically.
Lower Traps
The lower traps are located at the bottom of the shoulder blades and are responsible for depressing and retracting the shoulder blades. Working in opposition to the function of the upper traps. This helps in improving the stability and strength of the shoulders. They are commonly used during exercises such as overhead farmer’s walk and rear deltoid cable raise.
Best Lower Trap Exercises
Now that you understand the importance of the lower trapezius muscles, let's explore some of the most effective exercises to target this crucial area. (Want to find the perfect trap exercises for your fitness level and goals? Our quick assessment quiz can create a personalized training plan just for you!) These proven movements will help you build balanced strength throughout your entire trapezius region.
TAKE OUR TRAINING QUIZ
10. Face Pulls
Face pulls can be used as an effective warm-up movement or to build strength. They can be performed with a resistance band, but if you’re looking to add load use a cable pulley machine with a rope attachment. Whilst the rear deltoids are the primary muscle targeted, face pulls will also hit rhomboids and middle traps. Use this exercise to build a stable upper body. Improving the mind-muscle connection of drawing the shoulders back helps to combat poor posture whilst building healthier, more injury-resistant shoulders.
How to do Face Pulls
- Hold the rope/handles with an overhand grip, palms facing in
- Take a few steps back and fully extend your arms.
- Pull the rope towards you to lift the weight from the stack, brace your core and
- draw your shoulders back and down to set your start position.
- Pull the handles of the rope toward your forehead, squeezing your shoulder
- blades together and elbows flared wide.
- Slowly return to the starting position
- If you don’t have access to a cable machine a resistance band can be used as an alternative
9. Rear Delt Cable Raise
The rear deltoid cable raise exercise involves using a cable machine with a low pulley to perform a reverse fly movement. The rear deltoids are often neglected in traditional strength training exercises, which makes this exercise a great addition to your upper body workout. This exercise can also engage the trapezius and rhomboid muscles, making it a great compound movement for overall shoulder development.
How to Do Rear Delt Cable Raise
- Stand facing the cable machine, with your feet shoulder-width apart and your knees slightly bent. The cable machine should be set to a low height.
- Hold the handle with your palms facing down, and your arms fully extended in front of you.
- From this starting position, slowly raise your arms out to the sides, keeping your elbows slightly bent, until your arms are parallel to the floor.
- Slowly lower your arms back down to the starting position and repeat for the desired rep range.
This can also be performed unilaterally by turning the side onto the cable machine and performing one arm at a time. It’s especially important to be aware of the strength and postural imbalances between both sides of the body.
8. Reverse Shrugs
One of the most popular exercises for training traps–and one of the simplest to perform–is shrugs. You’ve probably seen this pull exercise performed with dumbbells to the side of the body or with a barbell in front of the thighs. This movement focuses on developing the upper traps. So how do we switch the emphasis to the lower traps?
With the reverse shrug, the focus is on scapular depressions rather than the elevation used in standard shrugs. This is achieved by placing the barbell behind the back. You can use a rack or a Smith machine, keep in mind the goal is to minimize momentum in the movement.
How to Do Reverse Shrugs
- Begin with your feet shoulder-width apart facing away from the barbell
- Take hold of the barbell in an overhand grip, with your hands shoulder-width apart,
- Keeping your arms straight, elevate your shoulders as high as you can. Pause and squeeze
- Control the lowering to return to the starting position and repeat.
7. Overhead Farmer’s Walk
The overhead farmers walk is a total body exercise that will increase your upper body strength, stability, and mobility. Being able to stabilize a weight overhead will help your lifts become more efficient and have you hitting new PRs in no time.
How to Do Overhead Farmer's Walk
- Start in a front rack position with your desired weights, brace your core, and lift your arms overhead.
- Stand tall and set your shoulders back and down and keep your arms straight, eyes fixed ahead to aid your balance.
- Start to walk forward with controlled steps, minimizing and side to side motion, continuing for the desired duration before turning around and returning to the start position.
If you’re looking to maximize load, a barbell will allow you to carry heavier weights. If you struggle with your overhead wrist positioning, working with a kettlebell will improve wrist mobility and awareness. If you feel your wrist drop back, imagine you’re revving a motorcycle to punch your knuckles skyward. Dumbbells can also be used to train bilaterally and unilaterally to improve muscular imbalances.
6. Chin-Ups
Chin-ups are a compound movement targeting a variety of muscles, which can be adapted depending on hand placement. The movement involves pulling your body weight up to a hanging bar, making it an excellent exercise for increasing grip strength. Chin-ups are also easy to scale depending on your fitness level.
How to Do Chin-Ups
- Grab a pull-up bar with your hands shoulder-width apart and palms facing toward you (supinated grip)
- Start by hanging from the bar with your arms extended. Hang from the bar with your arms extended. Brace your core to prevent your body from swinging.
- Pull your elbows down towards your hips to lift your body up. Squeeze your shoulder blades and work to bring your chin over the bar to complete the rep.
- Pause at the top, and slowly reverse the movement to lower back to the starting position.
If you need assistance, use a resistance band to help you develop your technique and strength. Once you’ve mastered bodyweight chin-ups, add load via a weighted vest or chain belt.
5. Cable Y Raise
Once you’ve mastered the prone Y raise, try adding resistance by using a cable machine. Transfer the skills you learned lying down to a standing position and develop your lower traps by emphasizing the contraction to draw your shoulders back and down.
This is a versatile exercise because you can manipulate the angle of the Y raise to focus on different parts of the deltoid.
How to Do Cable Y Raise
- Attach handles to the low pulleys on a cable crossover machine.
- Stand with your feet shoulder-width apart facing the pulley cables.
- Hold each handle in the opposite hand
- Step back to create tension on the cables.
- Maintain a soft bend in your elbows as you raise your arms up and out to create a Y shape with your body.
- Pause at the end range.
- Lower your arms with control back to the start position and repeat.
4. Overhead Press
Pressing a weight overhead sounds simple, right? It’s harder than you might think. You’ll need high shoulder mobility and stability to perform it safely. The upright position requires core stabilization too because you challenge your traps, deltoids, triceps, and pecs. Developing overhead strength is key to developing proficiency in many of your gym lifts, but also for injury prevention in daily life. Master your overhead press and you’ll be able to lift anything with ease.
How to Do Overhead Press
- Start in a standing position, with the weight at collarbone height
- Keep your elbows tucked, imagine a straight line from the elbow up through the wrist and towards the ceiling, maintain this line as you press your arms overhead. Extend the elbows and pause at the top
- Keep your core braced, head, and spine natural throughout.
- Lower with control along the same path to return to the start position.
3. Prone Y Raise
If you struggle to get your arms overhead when standing, this is the exercise for you. Our pull muscles become weak when we spend too much time hunched over This exercise helps to prevent imbalances that can lead to injury by focusing on the lower traps to pull your shoulders back and down. The prone Y raise may look simple, but don’t be fooled! Start bodyweight and then progress to using weights, a bench, or dumbbells.
How to Do Prone Y Raise
- Lie face-down on the floor. Create a neutral spine by gently tucking your chin and keeping your pelvis stable.
- Create a Y shape with your body by extending your arms to the diagonal with your thumbs pointing up, and palms facing each other.
- Squeeze your shoulder blades together so that both arms raise off of the floor.
- Maintain your natural spine by keeping the head and hips still throughout the movement
- Pause at the top, then lower with control and repeat.
2. Straight Arm Dips
The straight arm dip is an excellent exercise to equalize your balance if you’re dominant in your upper traps. If shrugs are featured heavily in your workouts, then the straight arm dip provides the perfect balance to improve shoulder stability and mobility. This exercise focuses on the lower traps to retract and depress the shoulders. Start by utilizing your own body weight. When you feel more comfortable, try a weighted vest or plates attached to a waisted chain belt to increase the challenge.
How to Do Straight Arm Dips
- For this exercise, set up on the parallel bars as if you were going to perform regular dips.
- Instead of moving your shoulders and elbows, keep your arms straight.
- Allow your body to sink down as low as you can.
- Pause. Then, focusing on your lower traps, pull your shoulders down and in, lift your body back to the start position, and repeat.
Here's the gear we'll use:
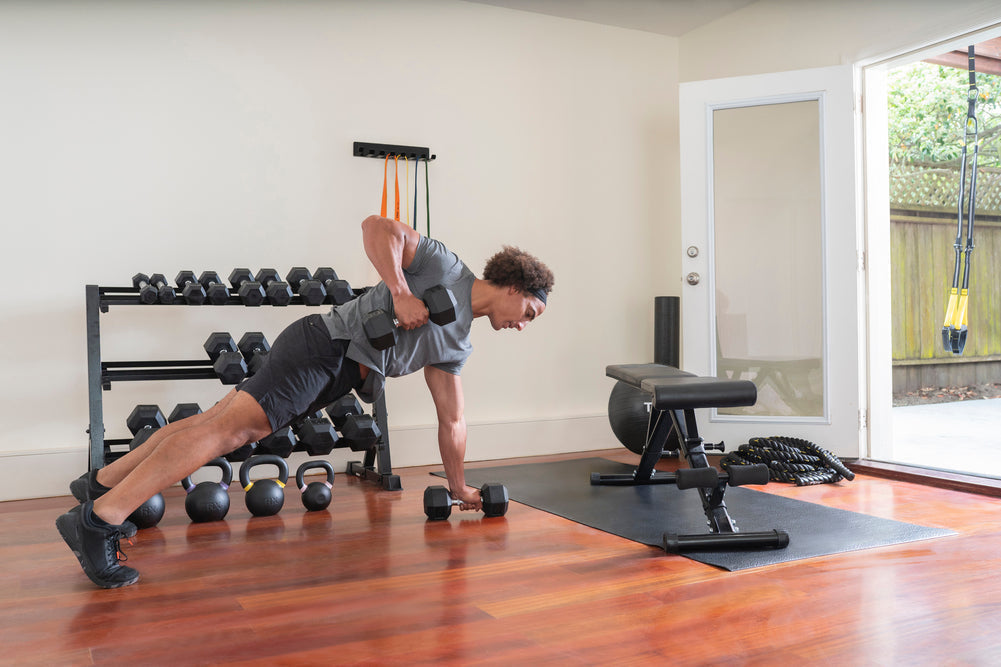
1. Single Straight Arm Pulldowns
The main benefit of any single-arm exercise is the ability to strengthen muscular imbalances within the body and the single-arm pulldown is no exception. This exercise differs from the lat pull-down because it is performed standing. Therefore, you put more emphasis on your posture and maintaining core engagement.
How to Do Single Straight Arm Pulldowns
- Adjust a cable pulley to the top of the machine. Attach your preferred handle and desired weight.
- Stand in front of the cable with feet around shoulder width apart with knees slightly bent.
- This exercise can be performed from an upright standing position or a slightly leaned forward hip hinge position.
- Step back from the machine to move the weight off of the cable stack.
- Set your shoulder, hip, and core position and maintain it throughout the set.
- Squeeze your lats to initiate the downward movement, pulling the handle towards your hip, whilst keeping your back and arm straight.
- Pause when your arm is in line with the rest of your body.
- Control the return back to the starting position and repeat.
The straight arm position means you’ll work with a greater range of motion to strengthen your lats. Your lower and middle traps assist, during the concentric phase the shoulders elevate, and as you contract to lower the arms the shoulders retract and depress. It’s important to resist rotation and focus on the squeeze between your shoulder blades to keep your torso rigid and avoid other muscle groups from compensating.
Here's the gear we'll use:

Sample Lower Trap Workout
If you're looking to improve your posture and strengthen your back muscles, building your lower traps is a great place to start. We’ve established it’s important not to fall into the trap (see what I did there…) of solely training your upper traps for aesthetics. Focusing on lower traps will help to avoid shoulder problems and poor scapular movement.
|
Exercise |
Reps |
Sets |
Tip |
|
Prone Y Raise |
10-12 reps |
2-3 sets |
use the body weight variations as a warm-up or add weight as part of a shoulder or back workout |
|
Cable Y Raise |
10-15 reps |
2-3 sets |
1-2 minutes rest between sets |
|
Single Straight Arm Pulldown |
10-15 reps |
2-3 sets |
1-2 minutes rest between sets |
|
Straight Arm Dips |
10-15 reps |
2-3 sets |
Once you can do 15 bodyweight dips with ease, increase the intensity by adding a weighted vest. |
|
Reverse Shrug |
3-5 reps for heavier loads. Increase reps to 10-12 if using a lighter load. |
3-5 sets |
Take 2 minutes rest between sets |
|
Overhead press |
5-10 reps |
1-2 sets |
Use this movement as a primer for the overhead farmer’s walk |
|
Overhead press farmers walk |
Your reps will be based on the distance covered |
2-3 sets |
Take at least 2-3 minutes of adequate rest between sets |
P.S. Try other workouts that engage your lower lats on the TRX App. There are hundreds of free workouts for you to try today.

Build Your Lower Traps Today
The benefits of building your lower traps go beyond just improving your posture. Stronger back muscles play a part in everyday life. You use them for tasks as simple as carrying groceries to lifting heavy objects.
Start training your back today using the lower trap exercises above and if you use our workout, let us know how it goes!