
Are you ready to take your bicep workout to the next level without even stepping foot outside your front door? We've got just the solution for you! In this article, we’ll give you a back workout at home that you can do with these twelve simple exercises.
Say hello to a convenient bicep-blasting routine that seamlessly fits into your daily schedule and delivers real results!
Anatomy of the Biceps
When it comes to arm strength and aesthetics, few muscles are as prominent and coveted as the biceps. Did you know that the term "biceps" actually refers to the two muscles that make up this prominent upper arm muscle? Derived from the Latin word "bi" meaning "two," the biceps brachii consists of two main heads: the long head and the short head. Situated at the front of the upper arm, the biceps brachii muscle plays a crucial role in not only the physical strength of your arms but also their visual appeal.
The long head of the biceps originates from the supraglenoid tubercle of the scapula, while the short head emerges from the coracoid process of the scapula. These two heads work in harmony, converging to form a single tendon that attaches to the radius bone of the forearm. Together, they create the distinct bulge commonly referred to as the biceps.
One of the primary functions of the biceps is elbow flexion, allowing you to perform essential movements like lifting, curling, and pulling objects toward your body. Additionally, the biceps also contribute to forearm supination, which enables you to rotate your palm upward, as if you were holding a bowl of soup. This combination of elbow flexion and forearm supination makes the biceps muscle essential for various day-to-day activities, as well as more specialized exercises targeting the arms.
The Best Bicep Exercises to Do at Home
12. Diamond Pushups
Looking to target your biceps with a challenging bodyweight exercise? Look no further than diamond pushups. This variation of the traditional pushup puts a unique emphasis on your biceps, helping you develop strength and definition in this key muscle group.
How to do a Diamond Pushup:
- Start in a high plank position with your hands close together, forming a diamond shape with your index fingers and thumbs.
- Engage your core and glutes to maintain a stable plank position throughout the exercise.
- Lower your body down by bending your elbows while keeping them close to your sides. Aim to bring your chest as close to your hands as possible.
- Pause for a moment at the bottom position, feeling the stretch in your chest and the activation in your biceps.
- Push through your palms and extend your elbows, returning to the starting position.
- Repeat for the desired number of reps
Diamond pushups offer specific benefits for targeting your biceps. Here are a few key advantages of incorporating diamond pushups into your workout routine:
- Bicep Activation: The narrow hand placement during diamond pushups places a greater emphasis on the biceps, leading to increased muscle activation and growth.
- Definition and Strength: By targeting the biceps directly, diamond pushups help sculpt and define the muscles, giving your arms a more toned appearance.
- Upper Body Engagement: While primarily targeting the biceps, diamond pushups also engage the chest and triceps, providing a comprehensive upper body workout.
- Convenience and Accessibility: Diamond pushups require no equipment and can be performed anywhere, making them a convenient option for an effective bicep-focused exercise.
Diamond pushups can be modified to accommodate different fitness levels. Here are a few variations and modifications you can try:
- Modified Diamond Pushups: If you're a beginner or find the standard diamond pushup challenging, perform the exercise with your knees on the ground instead of a full plank position. This modification reduces the load on your upper body while still targeting the biceps effectively.
- Elevated Diamond Pushups: To increase the intensity, elevate your feet on an elevated surface, such as a bench or step. This modification engages the biceps and upper body muscles to a greater degree.
- Reps and Sets: Adjust the number of repetitions and sets based on your fitness level and goals. Start with a manageable number and gradually increase as you build strength and endurance.
11. Chin-ups
Chin-ups are a powerhouse exercise for targeting your biceps. This dynamic exercise not only puts your biceps to work but also engages a range of other major muscles. Get ready to strengthen your back, shoulders, and core, all while achieving those enviable biceps you've been aiming for.
- Begin by gripping the bar with your palms facing towards you, slightly wider than shoulder-width apart.
- Hang from the bar with your arms fully extended, maintaining a firm grip.
- Initiate the movement by engaging your biceps and back muscles, pulling your body upward.
- Focus on bringing your chin above the bar while keeping your elbows close to your sides.
- Lower yourself back down in a controlled manner, maintaining tension in your muscles throughout the descent.
- Repeat the movement for the desired number of repetitions, maintaining proper form and engaging the targeted muscles throughout.
- To further intensify your bicep engagement during chin-ups, you can explore various progressions and variations:
Here are some variations of the chin-up you can try:
- Weighted Chin-ups: Add resistance by wearing a weight belt or holding a dumbbell between your feet, increasing the load on your biceps.
- Close Grip Chin-ups: Bring your hands closer together on the bar, emphasizing bicep activation by reducing the involvement of other muscles.
- Negative Chin-ups: Jump or use a bench to get to the top position, then slowly lower yourself down, focusing on the eccentric (negative) phase of the exercise, which strengthens the biceps effectively.
- Assisted Chin-ups: If you're a beginner or working towards your first unassisted chin-up, use a resistance band or an assisted chin-up machine to reduce the weight you're pulling, gradually building bicep strength over time.
10. Bicep Curls
Bicep curls are a classic strength training exercise you can do at home. They’re known for their ability to isolate and strengthen the biceps. The movement involves flexing the elbow joint while holding a weight, such as dumbbells or a barbell, with an underhand grip. By bringing the weight toward your shoulder, you engage the biceps and initiate their growth. Bicep curls serve as a foundation for developing both strength and aesthetics in your biceps, making them a staple exercise in many workout routines.
To add variety and challenge to your bicep workouts, you can experiment with different variations of bicep curls. Here are a few options using various equipment:
- Dumbbell Bicep Curls: Hold a dumbbell in each hand, palms facing forward, and curl the weights simultaneously toward your shoulders. Dumbbell curls allow for a greater range of motion and enable each arm to work independently, helping to correct muscle imbalances.
- Barbell Bicep Curls: With an underhand grip, grasp a barbell shoulder-width apart. Keep your elbows close to your sides and curl the barbell upward. Barbell curls provide stability and allow you to lift heavier weights, facilitating overall bicep strength.
- Resistance Band Bicep Curls: Step on the center of a resistance band while holding the ends, palms facing forward. Curl the bands toward your shoulders, maintaining tension throughout the movement. Resistance band curls offer variable resistance, challenging your biceps through the entire range of motion.
To get the most out of your bicep curls and ensure optimal bicep activation, consider the following tips:
- Maintain Posture: Stand tall with your feet shoulder-width apart, core engaged, and shoulders relaxed. Avoid excessive swinging or using momentum to lift weights.
- Focus on the Biceps: Keep your elbows stationary and close to your sides throughout the movement. This ensures that the biceps are doing the majority of the work.
- Control the Movement: Lift the weights in a controlled manner, emphasizing the eccentric (lowering) phase to maximize muscle activation and growth. Avoid letting the weights drop quickly.
- Mind-Muscle Connection: Concentrate on feeling the biceps contract and engage with each repetition. Visualize the muscle working and squeeze it at the top of the curl.
9. Hammer Curls
If you're looking to spice up your bicep workout routine, it's time to introduce hammer curls. By holding the weights in a neutral grip, with palms facing each other throughout the movement, you engage the brachialis and forearms to a greater extent, creating a more balanced and robust arm physique.
- Stand with your feet shoulder-width apart, maintaining a tall posture and engaging your core.
- Hold a dumbbell in each hand with a neutral grip (palms facing each other) and let your arms hang at your sides.
- Keeping your elbows close to your torso, exhale and slowly curl the weights upward, contracting your biceps and forearms.
- Pause briefly at the top of the movement, ensuring a strong squeeze in your biceps and forearms.
- With control, slowly lower the weights back down to the starting position, maintaining control and tension in your muscles.
- Repeat for the desired number of reps
To add variety and challenge to your bicep workout, you can explore different variations of hammer curls. Here are a few options to consider:
- Alternating Hammer Curls: Instead of curling both arms simultaneously, perform the exercise by alternating arms. This allows you to focus on each arm individually, improving muscle balance and coordination.
- Cross-Body Hammer Curls: During the curling motion, bring the weights across your body towards the opposite shoulder. This variation places a unique stress on the biceps and forearms, engaging them in a slightly different way.
8. TRX Single Arm Bicep Curls
When it comes to home workouts, TRX single-arm bicep curls are an excellent choice for targeting your biceps effectively. This exercise utilizes the TRX suspension trainer, offering unique advantages such as stability training and adjustable difficulty levels. Using the TRX suspension trainer allows you to perform the exercise using your body weight, eliminating the need for bulky/heavy equipment.
This makes it a convenient option for home training. Secondly, TRX training engages multiple muscle groups, including the biceps, forearms, and core, providing a comprehensive upper-body workout. Lastly, the instability introduced by the TRX forces your muscles to work harder to maintain balance and stability, leading to increased muscle activation and improved functional strength.
- Securely anchor the TRX suspension trainer to a sturdy overhead point or door using the door anchor, ensuring it can support your body weight.
- Stand facing the anchor point with your feet shoulder-width apart.
- Hold the rubber handles and lean back in the straps, palm facing up, and keep your shoulders set down your back.
- Curl your hand to the side of your temple. Your elbow should stay at shoulder height to isolate your bicep.
- Pause briefly at the top, feeling the contraction in your bicep.
- Slowly extend your arm back to the starting position, maintaining control and tension throughout the movement.
- Resist rotation by keeping your hips and shoulders squared to the anchor point
- Repeat for the desired number of reps, then switch arms to work the other side.
To adjust the difficulty level and target specific areas of the biceps, consider the following tips:
- Foot Position: Altering your foot position can affect the angle and intensity of the exercise. Stepping closer to the anchor point increases resistance, making the exercise more challenging. Stepping farther away reduces resistance, making it easier. You can also use an offset stance to provide more stability and balance.
- Grip Position: Adjust your grip on the TRX handle to target different areas of the biceps. A neutral grip (palms facing each other) emphasizes the brachialis and outer biceps, while an underhand grip (palm facing up) targets the inner biceps more intensively.
- Slow and Controlled Movements: Focus on executing the exercise with deliberate, slow, and controlled movements. This increases time under tension and enhances muscle activation for greater bicep development.
- Tempo Variations: Experiment with different tempos, such as a slow eccentric (lowering) phase or a pause at the peak contraction. These variations can stimulate muscle growth and increase the challenge.
7. TRX Reverse Bicep Curls
TRX reverse bicep curls specifically target the biceps while engaging other muscles of the upper body. By using the TRX suspension trainer, you add an element of instability to the exercise, challenging your biceps to work harder for stability and control. This variation places greater emphasis on the brachialis muscle, which lies beneath the biceps, promoting overall bicep development and strength. Additionally, reverse curls also engage the forearms, contributing to better grip strength and muscular balance in the arms.
- Securely anchor the TRX suspension trainer to a sturdy overhead point or door using the door anchor, ensuring it can support your body weight.
- Stand facing the anchor point with your feet shoulder-width apart.
- Hold the TRX handles with an overhand grip (palms facing down) and extend your arms fully in front of you.
- Lean back slightly, maintaining a straight line from your head to your heels, engaging your core for stability.
- Initiate the movement by flexing your elbows and pulling your hands towards your temple, maintaining control throughout the exercise.
- Keep your elbows in a fixed position ensuring they don’t lift or lower throughout the exercise
- Pause briefly at the top, feeling the contraction in your biceps and forearms.
- Slowly extend your arms back to the starting position while maintaining tension and control.
- Repeat for the desired number of reps
To adjust the difficulty level or modify TRX reverse bicep curls, consider the following progressions and modifications:
- Single-Arm Reverse Bicep Curls: Perform the exercise using one arm at a time, alternating between each arm. This variation increases the challenge and promotes muscular balance by working each bicep individually.
- Tempo Variations: Experiment with different tempos, such as slowing down the eccentric (lowering) phase or adding a pause at the top of the movement. These variations increase time under tension and intensify the bicep workout.
- Foot Position: Adjust your foot position to change the angle and intensity of the exercise. Stepping closer to the anchor point increases resistance, making it more challenging, while stepping farther away decreases resistance, making it easier.
6. Reverse Curls
Reverse curls are a powerful exercise for strengthening and sculpting your biceps. Unlike traditional bicep curls, where the palms face upward, reverse curls involve a grip with palms facing downward. This simple adjustment alters the muscle recruitment pattern, primarily targeting the brachialis and brachioradialis muscles in the forearm, while still engaging the biceps. By incorporating reverse curls into your routine, you can add variety and challenge to your bicep training, promoting balanced development and overall arm strength.
- Stand with your feet shoulder-width apart, maintaining a tall posture and engaging your core.
- Grasp a barbell, dumbbells, or an EZ curl bar with an overhand grip (palms facing downward) that is slightly narrower than shoulder-width.
- Let your arms hang straight down in front of your body, maintaining a firm grip on the weights.
- Keeping your elbows close to your sides, slowly curl the weights upward, until your biceps are fully contracted and the weights are close to your shoulders.
- Pause briefly at the top, feeling the squeeze in your forearms and biceps.
- Slowly lower the weights back down to the starting position, maintaining control and tension throughout the movement.
- Repeat for the desired number of reps
Reverse curls differ from traditional bicep curls in a few notable ways:
- Grip: The most apparent difference is the grip. Reverse curls utilize an overhand grip with palms facing downward, targeting the brachialis, brachioradialis, and forearms more prominently, while still engaging the biceps. Traditional bicep curls use an underhand grip with palms facing upward, primarily emphasizing the biceps.
- Muscle Activation: Reverse curls shift the emphasis from the biceps to the brachialis and brachioradialis muscles, leading to a more balanced development of the arm muscles. Traditional bicep curls primarily isolate the biceps brachii, focusing on its strength and size.
- Forearm Strength: Reverse curls provide an additional benefit of strengthening the forearm muscles, which is advantageous for gripping exercises and has tremendous carryover for exercises such as deadlifts and pull-ups
5. Resistance Band External Rotation
The Resistance Band External Rotation exercise is a powerful addition to any bicep training routine, offering a specific benefit that sets it apart from traditional practices. By incorporating a resistance band into this movement, you introduce dynamic tension to your biceps, enhancing their activation and promoting more significant muscle development. The unique advantage of using a resistance band lies in its ability to provide variable resistance, creating a challenging and effective workout for your biceps. This exercise also engages the forearms and stabilizes the shoulder joint, making it a beneficial exercise for overall arm strength and stability.
How to do Resistance Band External Rotations:
- Stand sideways to the anchor point, with the arm furthest away from the anchor holding the resistance band. Keep your feet shoulder-width apart for stability.
- Start with your forearm across the front of your torso, with the resistance band held at waist height. Your elbow should be bent at a 90-degree angle.
- Begin by externally rotating your forearm away from your body, keeping your elbow pinned to your torso and maintaining tension in the resistance band throughout the motion.
- Continue rotating your forearm, parallel to the floor, until your fist is away from your torso.
- Slowly and in a controlled manner, rotate your forearm back to the starting position, maintaining resistance in the band.
- Repeat for the desired number of reps
- Switch sides and repeat: After completing the desired number of repetitions on one side, switch to the other side and perform the same movement.
To target different areas of the biceps and add variety to your workout, consider the following variations and tips:
- Gripping Variations: Experiment with different grips on the resistance band, such as an overhand grip or an underhand supine grip. This can target different parts of the biceps and create additional challenges.
- Tempo Changes: Adjust the speed of the movement to increase the time under tension. Slow down the eccentric (lowering) phase or add a pause at the peak contraction to intensify the exercise.
- Band Resistance: Use different resistance bands to vary the level of difficulty. Thicker bands offer more resistance, challenging the biceps further, while lighter bands are suitable for beginners or those focusing on endurance.
4. Side Planks
Side planks are renowned for their ability to develop core stability, particularly targeting the obliques and deep abdominal muscles. By holding your body in a side-lying position, you engage the muscles that support your spine and improve overall balance and posture. In addition to core activation, side planks also engage the biceps as they work to stabilize the supporting arm, adding an extra dimension to this exercise. By incorporating side planks into your routine, you'll experience improved core strength, enhanced stability, and increased bicep engagement.
- Begin by lying on your side, aligning your elbow directly beneath your shoulder.
- Stack your feet on top of each other, ensuring your body forms a straight line from your head to your heels.
- Engage your core muscles by drawing your navel in towards your spine.
- Lift your hips off the ground, supporting your body weight on your forearm and the side of your bottom foot.
- Keep your shoulder blades retracted and your neck in a neutral position.
- Hold the position for the desired amount of time while maintaining proper form and breathing steadily.
- Repeat on the other side to ensure balanced development.
Side planks provide an opportunity to activate and engage your biceps while focusing on core stability. Here are some tips to maximize the activation of your biceps during side planks:
- Focus on Arm Position: Position your supporting arm slightly in front of your body, allowing your biceps to engage more actively. Keep your forearm planted firmly on the ground and avoid collapsing into your shoulder.
- Squeeze the Biceps: While maintaining the side plank position, consciously squeeze and engage your biceps. This intensifies the activation of the muscle group, leading to increased strength and definition.
- Maintain Proper Alignment: Ensure your body forms a straight line from head to heels, with your hips lifted and your core engaged. This alignment maximizes the stability challenge and encourages greater bicep involvement.
- Gradual Progression: If you find side planks challenging, start with shorter hold times and gradually increase the duration as your strength improves, you can also bend your knees if you find the straight leg variation a challenge. As you progress, you can also explore more challenging variations, such as lifting the top leg, adding arm movements, or utilizing a TRX suspension trainer.
3. Pull-ups
If you want to get a full body workout at home, then you need pull-ups. Pull-ups are a compound exercise that primarily targets the back muscles, including the latissimus dorsi (lats), but they also provide significant stimulation to the biceps. As you pull your body weight up towards the bar, your biceps are responsible for elbow flexion, which contracts the muscles and contributes to their growth. Regularly incorporating pull-ups into your workout routine can lead to enhanced bicep development, increasing both strength and size.
- Stand beneath a pull-up bar with your hands slightly wider than shoulder-width apart, palms facing away from you (overhand grip).
- Jump up or use a bench to grab onto the bar with your arms fully extended. Your body should hang freely.
- Engage your core and initiate the movement by pulling your body up towards the bar, focusing on using your biceps and back muscles.
- Aim to bring your chin above the bar while keeping your elbows close to your sides.
- Pause briefly at the top of the movement, feeling the contraction in your biceps and back muscles.
- Lower yourself back down in a controlled manner, maintaining tension in your muscles throughout the descent.
- Repeat for the desired number of repetitions, ensuring proper form and engaging the targeted muscles throughout the exercise.
Choose the modification or progression that aligns with your current fitness level and gradually work your way towards unassisted pull-ups. Remember to prioritize proper form, engage your biceps and back muscles, and challenge yourself within your capabilities.
- Assisted Pull-ups: Use a suspension trainer, resistance band or an assisted pull-up machine to reduce the amount of body weight you're lifting. This allows you to gradually build strength until you can perform unassisted pull-ups.
- Negative Pull-ups: Start at the top position with your chin above the bar, then slowly lower yourself down in a controlled manner. Emphasizing the eccentric (lowering) phase builds strength and prepares you for full pull-ups.
- Band-Assisted Pull-ups: Loop a resistance band around the pull-up bar and place your foot or knee into the band for support as you perform the pull-up. Adjust the band's thickness to vary the assistance level.
- Weighted Pull-ups: Once you've mastered bodyweight pull-ups, you can add extra resistance by wearing a weight belt or holding a dumbbell between your feet, increasing the load on your biceps.
2. Zottman Curl
Zottman curls are a unique exercise that simultaneously targets the biceps and forearms. Named after the legendary strongman George Zottman, this exercise involves a combination of supination and pronation of the wrists during the curling motion. By incorporating these movements, Zottman curls effectively engage and develop the biceps, brachialis, brachioradialis, and forearm muscles, providing a well-rounded arm workout.
- Stand with your feet shoulder-width apart, maintaining a tall posture and engaging your core.
- Hold a dumbbell in each hand with an underhand (supinated) grip, palms facing upward.
- Begin the movement by curling the dumbbells toward your shoulders, keeping your elbows close to your sides.
- At the top of the curl, rotate your wrists so that your palms are facing downward (pronated grip).
- Lower the dumbbells back down to the starting position while maintaining the pronated grip.
- Once your arms are fully extended, rotate your wrists back to the supinated grip, preparing for the next repetition.
- Repeat for the desired number of repetitions, alternating between supination and pronation of the wrists.
Zottman curls offer numerous benefits and variations for a complete arm workout:
- Bicep and Forearm Development: Zottman curls target both the biceps and forearms, promoting balanced development and strength in these muscle groups. The supination and pronation of the wrists engage the different muscles, creating a comprehensive arm workout.
- Enhanced Grip Strength: The wrist movements in Zottman curls specifically target the forearm muscles, contributing to improved grip strength. This is particularly beneficial for activities that require grip endurance, such as lifting weights or performing sports-related tasks.
- Variations for Intensity: You can adjust the intensity of Zottman curls by using different weights, increasing the number of repetitions, or altering the tempo of the exercise. Slowing down the eccentric (lowering) phase or incorporating pauses can intensify the challenge.
- Single-Arm Zottman Curls: Perform Zottman curls one arm at a time to focus on each side individually, promoting muscle balance and addressing any imbalances that may exist.
- Alternating Zottman Curls: Instead of curling both arms simultaneously, alternate the curls between each arm. This variation allows for greater focus and control, promoting better mind-muscle connection.
1. TRX Bicep Curls
This exercise leverages the power of suspension training to target your biceps effectively, all from the comfort of your own home. TRX training allows for adjustable intensity, accommodating individuals of various fitness levels. The instability introduced by the suspension system further engages your core, promoting overall stability and strength. With TRX bicep curls, you can achieve remarkable bicep development without the need for bulky equipment.
- Securely anchor the TRX suspension trainer to a sturdy overhead point or door anchor, ensuring it can support your body weight.
- Stand facing the anchor point and grasp the TRX handles with an underhand grip (palms facing upward).
- Take a step back to create tension in the straps, keeping your feet shoulder-width apart.
- Lean back slightly, maintaining a straight line from your head to your heels, engaging your core for stability.
- Initiate the movement by bending your elbows and curling your hands toward your temples, focusing on flexing your biceps.
- Keep your elbows in line with your shoulders, and maintain control throughout the movement.
- Pause briefly at the top, feeling the contraction in your biceps.
- Slowly extend your arms back to the starting position while maintaining tension and control.
- Repeat for the desired number of reps
To adjust the intensity and target different areas of the biceps during TRX bicep curls, consider the following tips:
- Adjusting Foot Position: Altering your foot position can change the angle and intensity of the exercise. Stepping closer to the anchor point increases resistance, making the exercise more challenging. Stepping farther away reduces resistance, making it easier.
- Varying Grip Width: Experiment with different grip widths on the TRX handles to target different areas of the biceps. A narrower grip emphasizes the outer portion of the biceps, while a wider grip engages the inner biceps.
- Tempo Variations: Modify the tempo of your movements to increase the time under tension and intensify the exercise. Slowing down the eccentric (lowering) phase or adding pauses at different points in the range of motion can challenge your biceps further.
- Single-Arm TRX Bicep Curls: Perform the exercise one arm at a time to focus on each bicep individually. This variation promotes muscle balance and coordination.
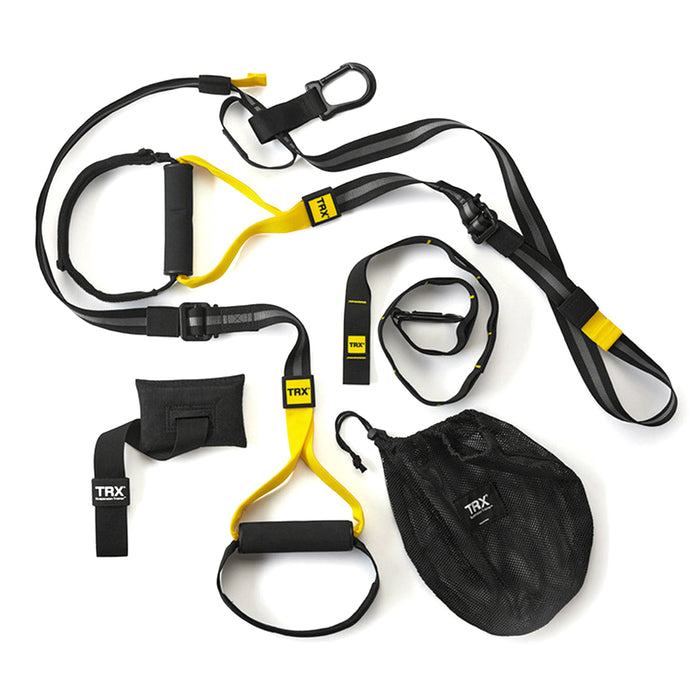
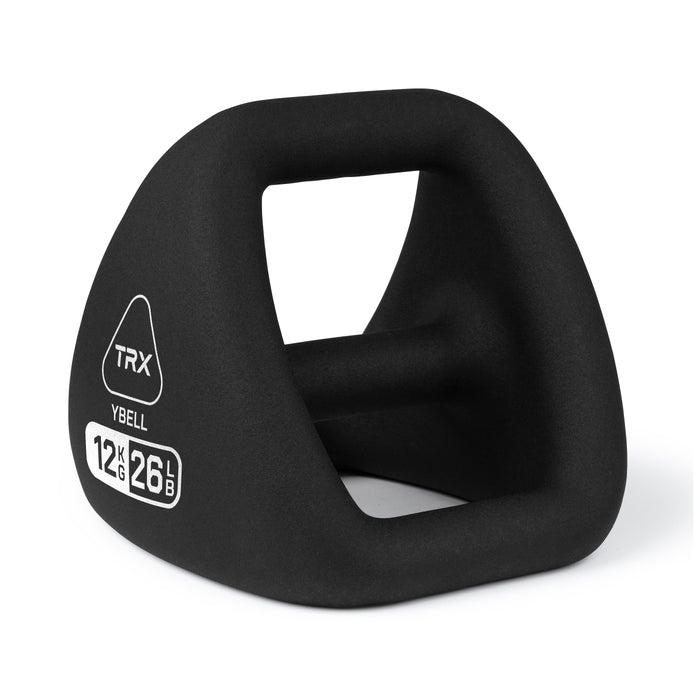
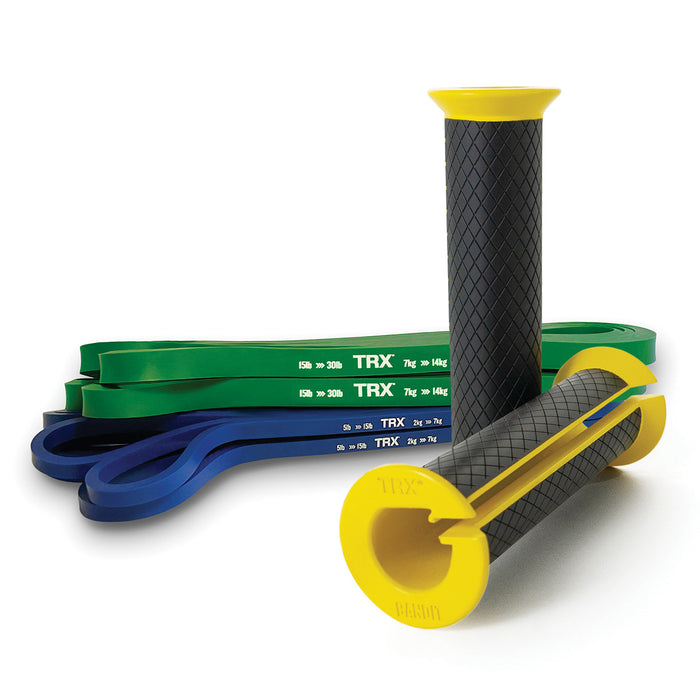
Try one of our TRX products today:
Try This Bicep Workout at Home
Ready to sculpt your biceps and achieve strong, defined arms? Look no further than this at-home bicep workout. It incorporates the exercises mentioned above, targeting the biceps effectively while offering variety and challenge. Remember to warm up before starting the workout and adjust the weights and intensity according to your fitness level.
Diamond Pushups:
- Reps: 10-12
- Sets: 3
- Rest: 60 seconds
Chin-ups:
- Reps: 6-8
- Sets: 3
- Rest: 90 seconds
Bicep Curls:
- Reps: 10-12
- Sets: 4
- Rest: 60 seconds
Hammer Curls:
- Reps: 12-15
- Sets: 3
- Rest: 45 seconds
TRX Single Arm Bicep Curls:
- Reps: 10-12 per arm
- Sets: 3
- Rest: 60 seconds
Reverse Curls:
- Reps: 12-15
- Sets: 3
- Rest: 45 seconds
You can find more workouts like this on the TRX App!

Conclusion
Now, you have everything you need to start practicing bicep exercises at home. We all have busy schedules that can be unpredictable. But now you know that you can get your workout in no matter what’s on your plate.
If you’re looking for more workouts that you can do from the comfort of your home, check out TRX Training’s free daily workout classes from certified professionals.
Similarly, if you don't have a home gym set up yet, check out our guide on how to build a home gym to get started.

