These at-home back exercises prove that effective back exercise gear does not require a full gym setup. We’ve got what you’re looking for. Today, we’re going to cover an at-home shoulder workout that you can do to maximize your strength and muscle gains.
Our goal is to help you reach the fitness levels you want no matter the environment, so let’s get into it!
Why Should YOU Exercise at Home?
Picture this: no commute, no waiting for equipment, and no judgmental glances. Instead, you have the luxury of working out on your own terms, at your own pace, and in an environment that suits your preferences. With at-home workouts, flexibility becomes your closest companion. Oh, and did we mention the cost-effectiveness? You don't need a gym membership. With just a few simple pieces of equipment or even just your body weight, you can embark on a transformative fitness journey without breaking the bank.
One of the greatest advantages of exercising at home is the ability to tailor your workouts to your individual goals and preferences. Have a specific focus on your back? No problem!
By incorporating targeted at-home back exercises into your routine, you can strengthen those often-neglected muscles and improve your overall posture and stability. Whether you're aiming to alleviate back pain, enhance athletic performance, or simply sculpt a toned and defined back, the power lies in your hands. With a variety of exercises and modifications at your disposal, you can create a workout regimen that suits your unique needs and aspirations.
What You'll Need for a Back Workout at Home
The beauty of an at-home workout lies in its simplicity. You don't need a fully equipped gym to strengthen your back and achieve remarkable results. Here's a list of essential equipment and items that will help you embark on an effective at-home back workout:
- Exercise Mat: A comfortable and supportive exercise mat will provide cushioning for floor exercises and protect your joints.
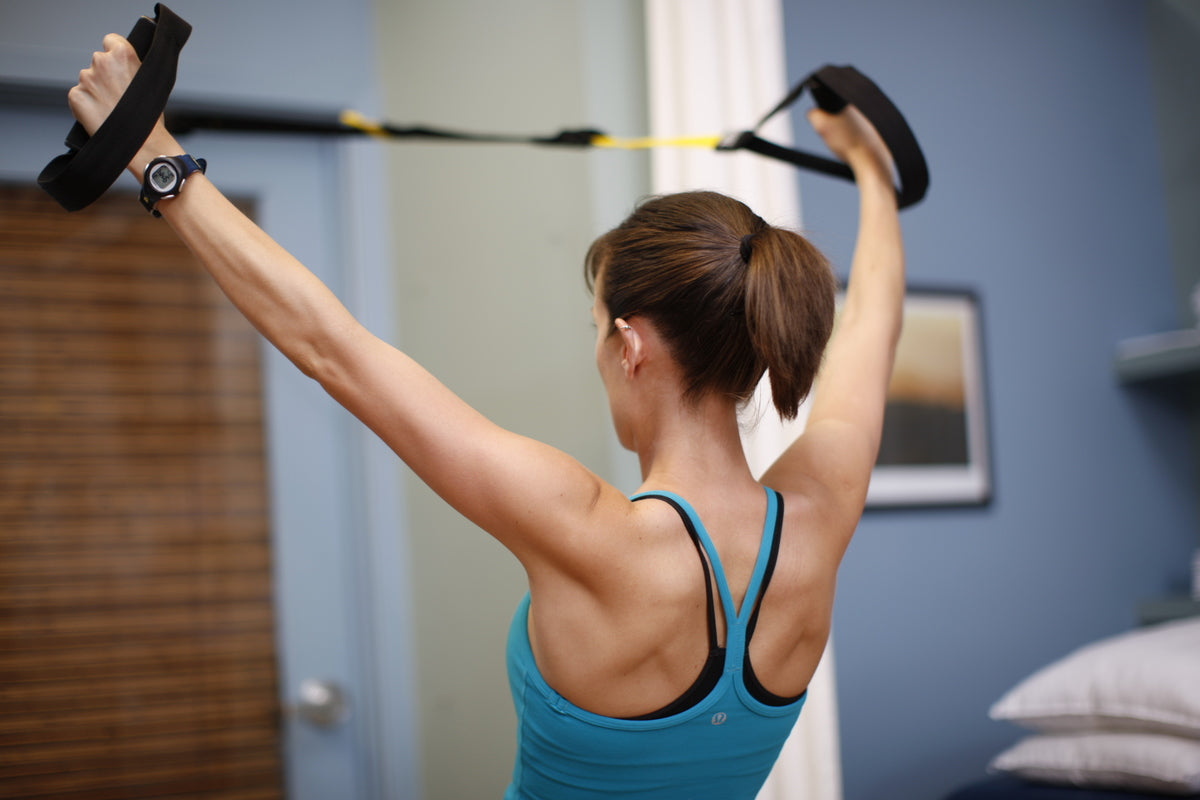
- Suspension Trainer: A TRX suspension trainer is a versatile tool that allows for a wide range of bodyweight exercises targeting the shoulders. It provides stability challenges and helps develop strength and control. If you want to get a full body workout at home, this is the one piece of equipment you need.
- Resistance Bands: These versatile bands are a fantastic addition to your at-home workout arsenal. They come in different levels of resistance and can be used to target various back muscles effectively. Many people underestimate the power of resistance bands but a resistance band back workout can be just as effective as weight training if used correctly.
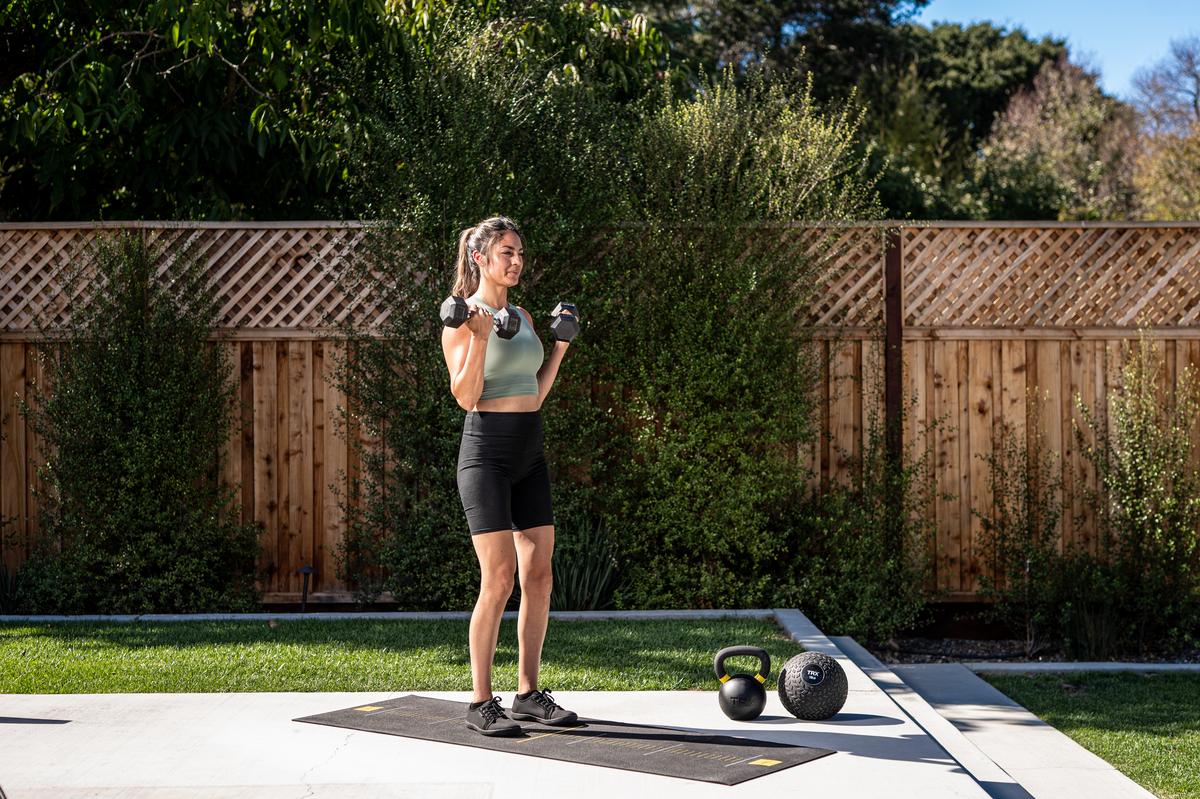
- Dumbbells: A pair of dumbbells will add resistance and intensity to your back exercises. Start with a weight that challenges you but allows you to maintain proper form. Gradually increase the weight as you become stronger.
Optional equipment can be used to add variety and challenge to your at-home back exercises:
- Stability Ball: A stability ball is a fantastic tool for engaging your core and working multiple muscles simultaneously. It can be used for exercises like back extensions and stability ball rows, adding an extra dimension to your back workout.
- Pull-Up Bar: If you have a sturdy doorway or access to a pull-up bar, it can be a game-changer for your back routine. Pull-ups and chin-ups are highly effective exercises for building upper body strength and targeting various back muscles.
- Kettlebells: Kettlebells provide a unique way to challenge your back muscles and improve your overall strength. Swings, single-arm rows, and renegade rows are just a few examples of exercises you can incorporate with kettlebells.
Don't worry if you don't have access to specific equipment. Alternatives and modifications can be made to ensure you can still perform effective exercises:
- Substitute Resistance Bands: If you don't have resistance bands, you can use household items like tights.
- Replace Dumbbells: If dumbbells aren't available, you can use household objects with some weight, such as water jugs, canned goods, or even bags filled with books.
10. Wide-Grip Pushup
This powerful exercise not only engages your chest and arms but also targets those often-neglected muscles in your back, helping you achieve a strong, sculpted upper body. The wide-grip pushup is an excellent choice for individuals looking to specifically target their back muscles. By positioning your hands wider than shoulder-width apart, you create a greater range of motion and place increased emphasis on your lats, rhomboids, and rear deltoids. These muscles play a crucial role in maintaining good posture, improving upper body strength, and supporting overall back health. Incorporating wide-grip pushups into your routine can help you build a balanced, defined back and enhance your overall athletic performance.
- Start in a traditional pushup position with your hands positioned slightly wider than shoulder-width apart. Your fingers should be pointing forward or slightly outward.
- Keep your body in a straight line from head to toe, engaging your core and glutes for stability.
- Lower your chest towards the ground, focus on maintaining a controlled descent, ensuring your elbows point outward throughout the movement.
- Push through your palms to extend your arms and return to the starting position.
- Repeat for the desired number of reps
If you're just starting or want to modify the wide-grip pushup to suit your fitness level, here are some variations and progressions:
- Knee Wide-Grip Pushup: Begin on your knees instead of your toes to reduce the load and intensity. Focus on maintaining a straight line from your head to your knees as you perform the exercise.
- Incline Wide-Grip Pushup: Place your hands on an elevated surface such as a step, bench, or sturdy chair. This modification decreases the resistance and allows you to gradually build strength in your back muscles.
- Wide-Grip Plyometric Pushup: Once you've mastered the standard wide-grip pushup, you can add an explosive element to your workout. Push off the ground forcefully, allowing your hands to momentarily leave the ground. Land softly and immediately go into the next repetition. This variation increases the challenge and engages your fast-twitch muscle fibers.
9. T-Raises
Introducing T-raises, the superhero exercise that will take your upper back and shoulder game to soaring heights! If you're looking to strengthen and sculpt those hard-to-reach areas, T-raises are here to save the day. This exercise specifically targets the upper back and shoulders, helping you build definition and develop a powerful posture. By extending your arms out to the sides like a mighty T, you'll activate the muscles in your upper back, including the rhomboids and rear deltoids, while also engaging the shoulders. Get ready to unleash your inner superhero and transform your upper body with T-raises!
- Stand tall with your feet shoulder-width apart, maintaining good posture and engaging your core.
- Hold a dumbbell in each hand and begin by slightly bending your knees and hinging forward at the hips, maintaining a flat back. Your upper body should be at a slight angle to the ground.
- Extend your arms out to the sides, forming a "T" shape. Keep your elbows slightly bent and maintain a slight forward lean to activate your upper back muscles.
- With control, raise your arms upward until they are parallel to the ground, squeezing your shoulder blades together as you lift.
- Pause for a brief moment at the top of the movement, focusing on the contraction in your upper back and shoulders.
- Slowly lower the dumbbells back to the starting position, maintaining control and engaging your muscles throughout the descent.
- Repeat the movement for the desired number of reps
Try using these T-raise variations to get the most out of your movement:
- Lighter Weights or Resistance Bands: If you're new to T-raises or want to focus on perfecting your form, start with lighter dumbbells or resistance bands. As you become more comfortable and confident, gradually increase the weight or resistance to continue challenging your muscles.
- Alternating T-Raises: Instead of raising both arms simultaneously, perform the T-raises with one arm at a time. This variation adds an element of instability, engaging your core and shoulder stabilizers even more.
- Prone T-Raises: Lie face down on a bench or stability ball, holding dumbbells in each hand. Lift your arms out to the sides, creating a "T" shape with your body. This variation increases the range of motion and intensifies the engagement of your upper back muscles.
8. TRX Rows
If you train mainly with bodyweight alone, chances are you’re missing an element of pull in your workouts. Training your back is essential, leaving you standing taller and feeling more confident. This exercise primarily targets your lats, rhomboids, rear delts, and biceps while also engaging your core for stability. By incorporating TRX rows into your routine, you'll improve your posture, strengthen your upper body, and enhance your overall back aesthetics.
- Secure the TRX straps to an anchor point such as a sturdy door frame, beam, or pull-up bar. Make sure it can support your body weight.
- Set the straps for your row variations, low row - short straps, mid row - mid length, high row - fully lengthened
- Facing your anchor point, hold the rubber handles with your palms facing each other.
- Lean back, weight in your heels with your tailbone tucked and core engaged
- Walk forwards to make your rows heavier, backwards to make it lighter
-
Pull your chest through your hands and squeeze your shoulder blades together, keep your neck long
and shoulders low - Lowering with control to return to the start position
- Repeat the movement for the desired number of reps
Maintaining proper form is crucial for maximizing the benefits of TRX rows. Avoid shrugging your shoulders or arching your lower back. Instead, focus on maintaining a strong and stable core, keeping your body in alignment throughout the exercise.
TRX rows offer various progressions and modifications to suit different fitness levels:
- Body Angle: Adjust the difficulty level by changing your body angle. The more horizontal your body, the more challenging the exercise becomes. Gradually increase the angle as you gain strength and stability.
- Single-Arm Rows: To intensify the exercise further, try performing TRX rows with one arm at a time. This variation increases the demand on your core and challenges your stability.
- Feet-Elevated Rows: Elevate your feet on a stable surface such as a bench or step to increase the difficulty level and engage your back muscles even more.
Related: Hamstring Exercises at Home
7. Single-Arm Dumbbell Row
If you're looking to develop back strength, improve stability, and enhance your posture, it's time to incorporate single-arm dumbbell rows into your workout routine. This exercise offers a range of benefits, targeting the major muscles in your back while also engaging your core and stabilizer muscles for a well-rounded and effective workout.
One of the primary advantages of single-arm dumbbell rows is their ability to isolate and develop individual sides of your back. By performing the exercise unilaterally, you can address muscle imbalances, strengthen weaker areas, and improve overall symmetry.
- Start by placing a dumbbell on the floor next to a flat bench or sturdy elevated surface. Position yourself next to the bench, with your knees slightly bent and your back straight.
- Place your left hand on the bench for support. Hinge from your hips while maintaining a neutral spine and grab the dumbbell with your right hand, palm facing inwards.
- Brace your core and keep your head in line with your spine. Your torso should be nearly parallel to the ground.
- With your right arm fully extended, initiate the movement by pulling the dumbbell upward in a rowing motion. Focus on squeezing your back muscles, specifically your lats and rhomboids.
- Pause for a moment when the dumbbell reaches your ribcage, ensuring a strong contraction in your back muscles.
- Slowly lower the dumbbell back to the starting position, maintaining control and tension in your back.
- Repeat the movement for the desired number of reps
When performing single-arm dumbbell rows, it's important to choose an appropriate weight. Start with a weight that allows you to maintain proper form and complete the desired number of repetitions with control. As you become stronger, gradually increase the weight to continue challenging your muscles.
When it comes to targeting different areas of your back with dumbbell bent-over rows, the key lies in incorporating variations that emphasize specific muscle groups. Here are some variations to add variety and target different areas of your back:
- Overhand Grip Rows: Perform the exercise with an overhand grip, palms facing down. This variation places increased emphasis on the upper back muscles, including the trapezius and rhomboids.
- Underhand Grip Rows: Use an underhand grip, palms facing up. This variation targets the lower portion of your back and helps engage the biceps more.
- Pause or Hold Rows: During the rowing motion, pause for a moment at the top of the movement, squeezing your shoulder blades together. This intensifies the muscle engagement and promotes better mind-muscle connection.
- Reverse Grip Rows: Hold the dumbbells with an underhand grip, palms facing up. With this variation, the focus shifts to the lower traps, lower back, and biceps.
- Tempo Rows: Slow down the tempo of the movement, taking more time to perform the rowing motion. This variation increases time under tension, leading to enhanced muscle recruitment and development.
6. TRX Pullups
TRX pullups effectively target your back muscles, including the latissimus dorsi (lats), rhomboids, and rear deltoids, without the need for a dedicated pull-up bar. The suspension trainer serves as your anchor point, providing the stability and support required to perform the exercise. By adjusting your body angle and grip position, you can tailor the intensity to suit your fitness level and target specific areas of your back.
- Begin by adjusting the length of the TRX straps so that they hang at approximately waist height. Ensure the straps are securely attached to an anchor point, such as a sturdy door frame, beam, or pull-up bar.
- Stand facing the anchor point and grasp the TRX handles with an overhand grip, palms facing away from you. Walk your feet forward, leaning back slightly, until your body is at an angle and your arms are fully extended. Your body should form a straight line from head to heels.
- Engage your core, squeeze your shoulder blades together, and initiate the movement by pulling your chest toward the handles. Keep your elbows close to your body throughout the exercise.
- Pause at the top of the movement when your hands are near your ribs, feeling the contraction in your back muscles.
- Slowly extend your arms to return to the starting position, maintaining control and tension in your back muscles.
- Repeat the movement for the desired number of reps.
Modifications and progressions for different fitness levels:
- TRX Assisted Pull-Ups: Place your feet on the ground with your knees slightly bent to provide assistance during the pull-up. Gradually decrease the amount of assistance as you gain strength.
- Advanced Variations: Once you've mastered the basic TRX pullup, you can explore more advanced variations. For example, you can perform single-arm TRX pullups by grasping one handle and pulling your body towards it, engaging one side of your back at a time.
5. Plank Pull
Get ready to engage your core and back with the plank pull exercise - a challenging and effective movement that targets multiple muscle groups simultaneously. This exercise combines the stability of the plank position with the strength and control required to perform the pulling motion, making it a fantastic addition to your core and back workout routine.
- Start in a high plank position with your hands directly under your shoulders, fingers spread wide for stability. Engage your core, glutes, and legs, maintaining a straight line from your head to your heels.
- Place a dumbbell or kettlebell slightly wider than shoulder-width apart on the floor next to your right hand.
- While keeping your body stable and rigid, reach your left hand across your body to grab the dumbbell/kettlebell and pull it under your torso and through to the other side, while maintaining your plank position.
- Return your left hand to the floor and repeat by reaching the right arm under the body.
- Keep alternating and repeat the movement for the desired number of reps.
To accommodate different fitness levels, here are variations and regressions of the plank pull exercise:
- Elevated Plank Pull: Perform the exercise with your hands elevated on a stable surface, such as dumbbells or pushup bars. This variation increases the range of motion and intensifies the challenge on your core and back muscles.
- Knee Plank Pull: If the full plank position is too challenging, perform the exercise from your knees instead. Lowering your body closer to the ground reduces the load and allows you to build strength gradually.
4. TRX Power Pull
If you're seeking to develop explosive back strength and improve your athletic performance, look no further than the TRX Power Pull. This dynamic exercise targets your back muscles while emphasizing power and speed, making it an excellent choice for those seeking to enhance their explosiveness and overall strength.
- Begin by adjusting the length of the TRX suspension trainer to short/over short. Ensure the straps are securely attached to an anchor point, such as a sturdy door frame, beam, or pull-up bar.
- Stand facing the anchor point, hold one handle with the right hand with your elbow bend and hand inline with your chest
- Set your feet wider than shoulder width apart, with knees soft. Walk your feet forward towards the anchor point to add resistance to the exercise.
- With the right arm bent reach the left arm up towards the anchor point.
- Initiate the exercise by extending the right arm and simultaneously rotating to the left, as the right arm straightens the left arm bends staying close to the mid line. Once the right arm is fully straight, extend the left arm straight and reach behind you.
- Return to the start position by bending the right elbow to pull your up as you rotate to the right
- Repeat the movement for the desired number of reps.
Tips for maintaining proper form and maximizing the effectiveness of TRX Power Pulls:
- Emphasize Speed and Power: TRX Power Pulls are designed to be explosive movements. Focus on generating power from your back muscles and driving the movement with speed and intensity.
- Engage Your Core: Keep your core engaged throughout the exercise to maintain stability and control. Avoid excessive arching or sagging of your back.
- Shoulder Blade Squeeze: As you pull your body towards the anchor point, focus on squeezing your shoulder blades together to maximize the activation of your back muscles.
- Controlled Eccentric Phase: While the explosive pulling motion is the focus of TRX Power Pulls, it's essential to control the lowering phase as well. Avoid simply letting your body drop back to the starting position; instead, resist the movement and maintain tension in your back muscles.
3. TRX Resisted Rotation
Looking to target your upper back muscles and strengthen your core? TRX-resisted rotations are the answer! This exercise specifically engages your upper back, including the rhomboids and rear deltoids, while also challenging your core stability and rotational strength.
TRX resisted rotations focus on building strength and stability through controlled rotational movements. The exercise requires you to resist the rotational force generated by the TRX straps, activating the muscles responsible for rotation in your upper back and core. By doing so, you'll develop greater strength, control, and muscular balance in these areas.
- Adjust the length of the TRX straps to mid-length. Ensure the straps are securely attached to an anchor point, such as a sturdy door frame, beam, or pull-up bar.
- Stand side on to the anchor point. Place one foot in front of the other, holding one handle with both hands at the center of your chest.
- Position yourself with a slight lean away from the anchor point. Maintain a standing plank position with your hips, knees, shoulders and ears in line.
- Initiate the movement by rotating your body towards the anchor point, allowing your arms and upper back to follow the rotation. Keep your core engaged and maintain a stable lower body throughout the exercise.
- Pause momentarily at the end of the rotation, feeling the contraction in your upper back and core muscles.
- Return to the starting position with control, then repeat for the desired number of reps before repeating on the other side
Variations and progressions to challenge different levels of strength and stability:
- To advance this movement, perform the exercise with the arms extended out at chest height, focusing on the rotation coming from the torso and not by pulling from the arms
- Single-Arm Resisted Rotation: Perform the exercise with one arm while keeping the opposite hand at your side or placed on your hip. This variation increases the demand on your core stability and challenges your rotational strength.
2. Split-Stance Row
Looking to target your back muscles unilaterally and improve your stability? Split-stance rows are the perfect exercise for you. By incorporating this unilateral movement into your routine, you can enhance your back strength, address any muscle imbalances, and improve overall stability and balance.
- Begin by assuming a split stance with one foot positioned forward and the other foot positioned back, creating a stable base of support.
- Hold a dumbbell or kettlebell in the hand opposite to the forward foot. For example, if your right foot is forward, hold the weight in your left hand.
- Bend your front knee and hinge forward at the hips, maintaining a flat back and neutral spine. The back knee should be slightly bent.
- With your arm fully extended, initiate the movement by pulling the weight towards your chest, focusing on squeezing your shoulder blades together.
- Pause at the top of the movement when the weight reaches your ribcage, feeling the contraction in your back muscles.
- Slowly lower the weight back to the starting position, maintaining control and tension in your back muscles.
Tips for maintaining balance and stability during split-stance rows:
- Engage Your Core: Keep your core muscles activated throughout the exercise to enhance stability and maintain proper posture.
- Focus on Your Balance: Distribute your weight evenly between your front and back foot to ensure stability. Avoid shifting too much weight onto the front foot, as this may compromise your balance.
- Stabilize with Your Rear Leg: Keep a slight bend in your back knee and press through the heel to provide stability and support throughout the movement.
- Maintain a Neutral Spine: Avoid excessive rounding or arching of your back. Keep your spine in a neutral position to promote proper alignment and reduce the risk of injury.
1. Half-Kneeling Eccentric Press
The half-kneeling eccentric press offers numerous benefits, including strengthening the muscles of your back, such as the lats and rhomboids, as well as your shoulder muscles, including the deltoids and rotator cuff muscles. This exercise emphasizes control and stability, making it ideal for improving overall upper body strength and enhancing shoulder joint integrity. By focusing on the eccentric (lowering) phase of the movement, you'll enhance muscle control, build strength, and promote stability in your upper body.
- Begin by setting up in a half-kneeling position, with one knee on the ground and the opposite foot planted firmly on the floor in front of you. Maintain an upright posture, engaging your core for stability.
- Hold a dumbbell or kettlebell in one hand at shoulder height, with your elbow bent and palm facing forward.
- Initiate the movement by pressing the weight overhead, fully extending your arm.
- Focus on controlling the eccentric (lowering) phase of the exercise. Slowly lower the weight back to the starting position, resisting the downward movement.
- Repeat the movement for the desired number of repetitions before switching to the other side.
- Single-Arm Half-Kneeling Eccentric Press - Perform the exercise with one arm at a time, allowing you to focus on each side individually. This variation is particularly useful for addressing any muscle imbalances.
- Two-Handed Half-Kneeling Eccentric Press - If you find it challenging to stabilize in the half-kneeling position with one arm, you can perform the exercise with both hands holding the weight. This modification provides additional stability and support.
Try This Back Workout at Home Today
Get ready to ignite your back muscles and build strength with this invigorating back workout that you can do right in the comfort of your own home. Incorporating the exercises we discussed earlier, follow this sample workout to sculpt a strong and defined back. Remember to maintain proper form and adjust the weights according to your fitness level:
Wide-Grip Pushups:
- Reps: 10-12
- Sets: 3
- Rest: 60 seconds
T-Raises:
- Reps: 12-15
- Sets: 3
- Rest: 45 seconds
TRX Rows:
- Reps: 8-10
- Sets: 4
- Rest: 60 seconds
Single-Arm Dumbbell Row:
- Reps: 10-12 per arm
- Sets: 3
- Rest: 45 seconds
TRX Pullups:
- Reps: 6-8
- Sets: 4
- Rest: 90 seconds
Plank Pull:
- Reps: 12-15
- Sets: 3
- Rest: 45 seconds
TRX Power Pull:
- Reps: 8-10
- Sets: 4
- Rest: 60 seconds
TRX Resisted Rotation:
- Reps: 10-12 per side
- Sets: 3
- Rest: 45 seconds
Split-Stance Row:
- Reps: 12-15
- Sets: 3
- Rest: 45 seconds
Half-Kneeling Eccentric Press:
- Reps: 8-10 per arm
- Sets: 4
- Rest: 60 seconds
Remember to listen to your body, push yourself within your limits, and enjoy the burn as you engage your back muscles with each exercise. Adjust the weights and repetitions as needed to suit your fitness level, always maintaining proper form and control.
You can also accompany this workout with our at-home shoulder exercises and bicep workout to maximize your upper-body gains. Now, grab those dumbbells, conquer these exercises, and watch your strength soar to new heights!
Conclusion
The back is one of the largest muscles in your body and you need to cover several groups if you want to thoroughly develop each area. Luckily, the ten exercises highlighted above are perfect for your back workout at home.
If you’d like to try other workouts from the comfort of your home, TRX offers a wide range of classes for every type of fitness goal you want to meet. Whether it’s cardio, strength training at home, or even yoga, our certified professionals have got you covered! Try today.