Want your knees, hips, and shoulders to feel stronger and more reliable?
Joint strengthening simply means training the muscles, mobility, and stability around each joint so they can handle daily life with less strain. Joint strengthening exercises protect your wrists from injury, and the right joint and wrist training gear helps you load these movements progressively. This is especially important as you get older.
In this guide, you'll get 10 beginner-friendly joint strengthening exercises you can do at home using just your bodyweight, a TRX, and YBell resistance. Mild discomfort can be normal, but if you feel sharp or locking pain, stop, modify, and keep reading to find what works for you.
Ready to workout to be able to live life to the fullest?
Why Does Joint Strengthening Matter?
Joint strengthening is essentially about building a stronger support system around each joint. You train the muscles that surround it, improve how smoothly it moves, and make it more stable so it feels less shaky and fragile.
Over time, these joint workouts can lower your risk of injury, make walking, climbing stairs, or getting off the floor easier, and help your posture, balance, and coordination stay on your side instead of fighting you.
The strange part is that joints usually get healthier with regular, low-impact movement, not by hiding from it. Skipping all movement because something feels "off" can make you weaker and stiffer, which is the exact opposite of what you want.
Gentle, consistent work teaches your joints, "You are safe, you can move," and your body slowly believes it.
Before You Begin: Know How to Warm-Up
Before you jump into the main exercises, give your body a short wake-up call.
A simple warm-up for 3 to 5 minutes increases blood flow, raises your body temperature a bit, and helps your joints move more smoothly. It also gives your brain a moment to focus, so you are not going from couch mode straight into "Why are my knees surprised right now" mode.
Keep the moves light and easy. Try small arm circles, marching in place, gentle hip circles, and a few light squats. You should feel a little warmer and more alert, but not tired or out of breath.
When your body feels switched on instead of half asleep, your joints are better protected, and the rest of the workout has a much better chance of feeling good instead of sketchy.
Exercise 1. Glute Bridges
Glute bridges build strong hips, core, and lower back, so your knees and hips feel more supported. It is low-impact and friendly for most joints.
-
Lie on your back with your knees bent and feet flat on the floor.
-
Place your arms by your sides, palms down.
-
Press through your heels and lift your hips until your body forms a straight line from shoulders to knees.
-
Keep your lower back from arching too much.
-
Squeeze your glutes at the top, pause, then lower your hips slowly with control.
Exercise 2. TRX Suspension Squat
TRX suspension squats help you sit deeper with less strain on your knees and hips. The handles act like training wheels for your balance, making them excellent knee joint exercises. If you're new to suspension training, the TRX Training Stick Bundle offers a great foundation for learning proper form.
-
Stand facing the TRX anchor and hold the handles with a light grip.
-
Lean back a little so the straps are tight and your arms are slightly bent.
-
Keep your chest lifted as you sit your hips down and back, like you are aiming for a chair.
-
Let your knees bend and track in line with your toes.
-
Drive through your heels to stand back up, moving slowly and under control.
Exercise 3. YBell Bent-Over Row
YBell bent-over rows strengthen your upper back and shoulders, which helps your shoulder and spine joints handle daily life without complaining.
-
Hold one or two YBells in your hands, arms hanging in front of your thighs.
-
Hinge at your hips and lean your torso forward, keeping your back flat.
-
Let the weights hang straight down from your shoulders.
-
Pull your elbows back along your ribs, squeezing your shoulder blades together.
-
Lower the YBells slowly back to the start.
-
Begin with a light weight and only go heavier when your form feels solid.
Exercise 4. Standing Hip Abductions
Standing hip abductions train the muscles on the outside of your hips. These muscles help keep your knees lined up so they do not cave inward, making them one of the most effective strengthening knee joint exercises.
-
Stand tall with your hands on your hips or lightly holding a wall or TRX anchor.
-
Shift your weight onto one leg without leaning your torso.
-
Lift the other leg out to the side, keeping your toes pointing forward.
-
Pause briefly, then lower the leg slowly with control.
-
Repeat on one side, then switch legs, staying as upright as possible.
Exercise 5. TRX Chest Press
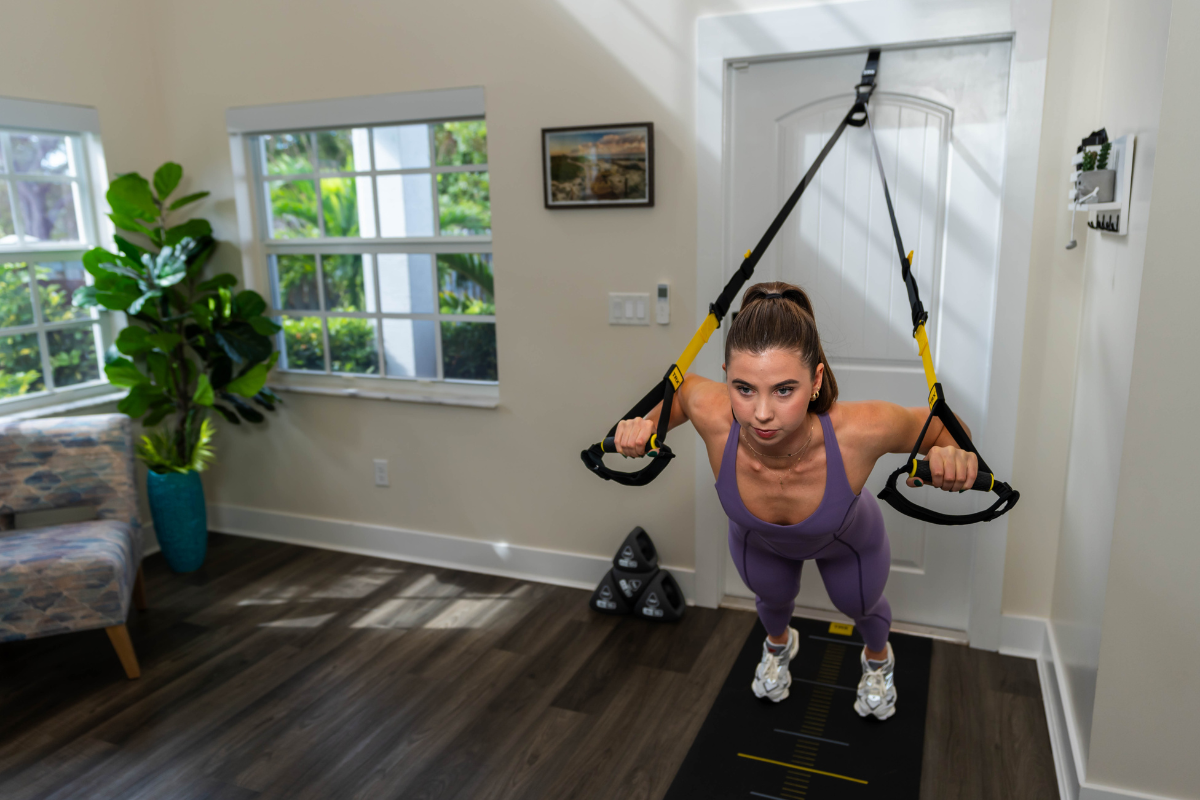
The TRX chest press works your chest and shoulders while training shoulder stability and sparing your wrists from heavy pressure. Looking to add more variety to your shoulder workouts at home? This exercise is a perfect fit.
-
Face away from the TRX anchor and hold the handles in front of you.
-
Walk your feet back and lean forward so your body forms a straight line from head to heels.
-
Keep your core gently tight.
-
Bend your elbows at about 45 degrees from your body and lower your chest between your hands.
-
Push through your palms to return to the start position.
-
Step your feet back to make it harder or forward to make it easier, always keeping your shoulders down away from your ears.
Exercise 6. YBell Farmer's Carry
The YBell farmer's carry is a walking stability drill. It trains your shoulders, wrists, core, and hips so your joints can handle real-world carrying without drama.
-
Pick up one or two YBells and stand tall.
-
Pull your shoulders slightly back and let your arms hang by your sides.
-
Brace your core gently, like you are zipping up tight jeans.
-
Walk forward slowly in a straight line without letting the weights drag you to one side.
-
Keep your steps controlled and your posture tall.
-
Start with light weights and short distances, then build up over time.
Exercise 7. TRX T-Y-I Raises
TRX T-Y-I raises hit the small stabilizer muscles around your shoulders and upper back. These muscles help keep the shoulder joint centered and happy, protecting you from frozen shoulder issues.
-
Face the TRX anchor and hold the handles with straight arms.
-
Lean back slightly so the straps are tight.
-
For the "T": pull your body up by lifting your arms out to the sides to form a T shape.
-
For the "Y": reset, then pull up with your arms at a diagonal to form a Y.
-
For the "I": reset again, then pull up with your arms straight overhead to form an I.
-
Move slowly for each letter and avoid shrugging your shoulders toward your ears.
Exercise 8. Calf Raises
Calf raises strengthen the muscles around your ankle joints and sharpen your balance, which helps with walking, running, and climbing stairs. These joint exercises also support better hip and ankle mobility for runners.
-
Stand with your feet about hip width apart, near a wall or chair if you need support.
-
Keep your knees straight but not locked.
-
Rise up onto your toes, lifting your heels off the floor.
-
Pause at the top and feel your calves working.
-
Lower your heels slowly back to the ground.
-
Use light hand support if you feel wobbly, but let your legs do the main work.
Exercise 9. YBell Deadlift
YBell deadlifts train your hips, glutes, and hamstrings, the big muscles on the back of your body that protect your knees and lower back. When learning how to strengthen knee joints, this move is essential. You can also use rubber-coated kettlebells as an alternative for this exercise if you prefer that grip style.
-
Hold one or two YBells in front of your thighs.
-
Stand with feet about hip width apart, toes pointing forward.
-
Hinge at your hips and slide the weights down close to your legs, keeping your back neutral.
-
Stop when you feel a stretch in your hamstrings and your back is still flat.
-
Drive your feet into the floor and stand up, squeezing your glutes at the top.
-
Start with a light weight to learn the pattern before adding more load.
Exercise 10. TRX Split Squat
The TRX split squat works each leg separately and improves hip mobility. It helps both knees learn to carry their own share of the work. If you're dealing with knee pain, this controlled movement can help rebuild confidence.
-
Face the TRX anchor and hold the handles with your arms slightly bent.
-
Step one foot back into a split stance, like a long walking step.
-
Keep your chest lifted and your front knee lined up over your front foot.
-
Lower your back knee toward the floor in a slow, controlled lunge.
-
Drive up through your front heel to return to standing.
-
Repeat for reps, then switch legs, using the TRX handles to steady your balance and reduce joint pressure.
Joint-Friendly Exercise: Know How to Be Safe
Protect your joints by moving with control, not speed. Warm up for a few minutes first, then focus on smooth, steady motions instead of snapping into and out of positions.
Stay away from deep ranges that feel painful or sketchy, and keep your joints lined up with the rest of your body, like knees tracking over toes and wrists not bent at odd angles.
If you're new to these joint workouts, treat every rep as practice for better form, not a test of how hard you can push. Move slowly, watch how your body feels, and stop short of any range that makes your joints feel sharp or unstable.
Good alignment plus patient, controlled movement is what makes a workout joint-friendly, not brute effort. Learning how to stack joints takes the stress off the joint itself while you are building the muscle to support it. Need more guidance on injury rehab with TRX? Check out our dedicated resource for safe recovery strategies.
What Should You Do If You Feel Discomfort or Pain?
A little mild discomfort can be normal, especially when muscles that are not used to working finally wake up. This can feel like a gentle burn or tired feeling in the muscles while you move or right after you finish. It should ease once you stop the exercise or after a short rest.
Sharp, stabbing, or locking pain is a different story and needs respect. If the pain gets worse as you keep going, stop right away. You can try changing the exercise by making the movement smaller, using more support, or choosing a gentler version if your knees, hips, or shoulders are touchy.
If changing the move does not help, skip that exercise for now. Your body is not being dramatic; it is sending a clear message.
When to Seek Guidance From Your Doctor
Some signs mean it is time to talk with a doctor or other health professional instead of guessing on your own.
Pay attention if you notice:
-
Pain that does not improve over a few days or keeps getting worse
-
Swelling, warmth, or a joint that feels unstable or wobbly
-
Locking, catching, or a joint that gives way under your weight
If you already have long-term joint problems, past injuries, or a medical condition, it is smart to get a professional checkup and okay before you push your training.
A health professional can help you figure out which exercises are safe, which ones to avoid for now, and how to build a plan that fits your joints instead of arguing with them.
Build Stronger Joints with Consistent At-Home Exercise
Before, stiff or achy joints might have made simple things, like climbing stairs or getting off the floor, feel harder than they should.
Now you've got 10 simple exercises to improve mobility, build stability, and support your daily movement at home. The key is consistency, not crushing yourself in one session. If you're looking to expand your joint-friendly toolkit, exercise bands offer additional resistance options that work beautifully with these movements.
Warm up, focus on good form, and progress slowly. Stick with it, listen to your body, and let each workout be a small step toward stronger, more reliable joints. When you understand how to strengthen joints through smart training and intentional movement patterns, everyday life becomes easier and less painful.
References
-
Harvard Health Publishing. "The Importance of Stretching." Harvard Medical School, www.health.harvard.edu/staying-healthy/the-importance-of-stretching.
-
National Institute on Aging. "Exercise and Physical Activity." National Institutes of Health, www.nia.nih.gov/health/exercise-physical-activity.