News
TRX for MMA
The TRX® Suspension Trainer™ allows you to MAKE YOUR BODY YOUR MACHINE by taking bodyweight exercise to almost limitless possibilities for strength, mobility, power and endurance. Want to find the perfect MMA-specific exercises for your level? Take our quick assessment quiz to get a personalized training plan that enhances your fighting performance. The design of the Suspension Trainer ensures you are loading movements properly, using stabilizer muscles along with challenging your core strength and balance for a workout like no other. TRX serves as effective fight training gear by developing the full-body strength and mobility that combat sports demand, so you can withstand the physical demands needed for MMA with much less potential for injury.
TAKE OUR TRAINING QUIZ
Here are some effective moves that I use in my own MMA training:
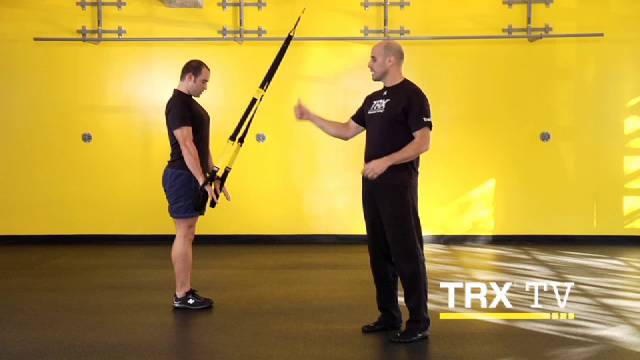
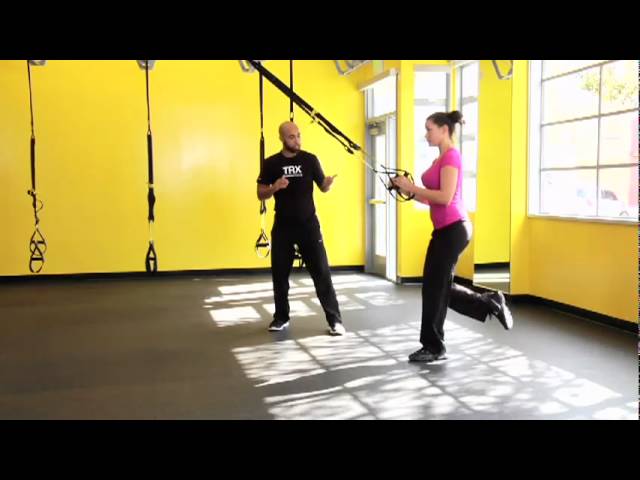
TRX Single Leg Chest Press
TRX Squat to Y-Fly
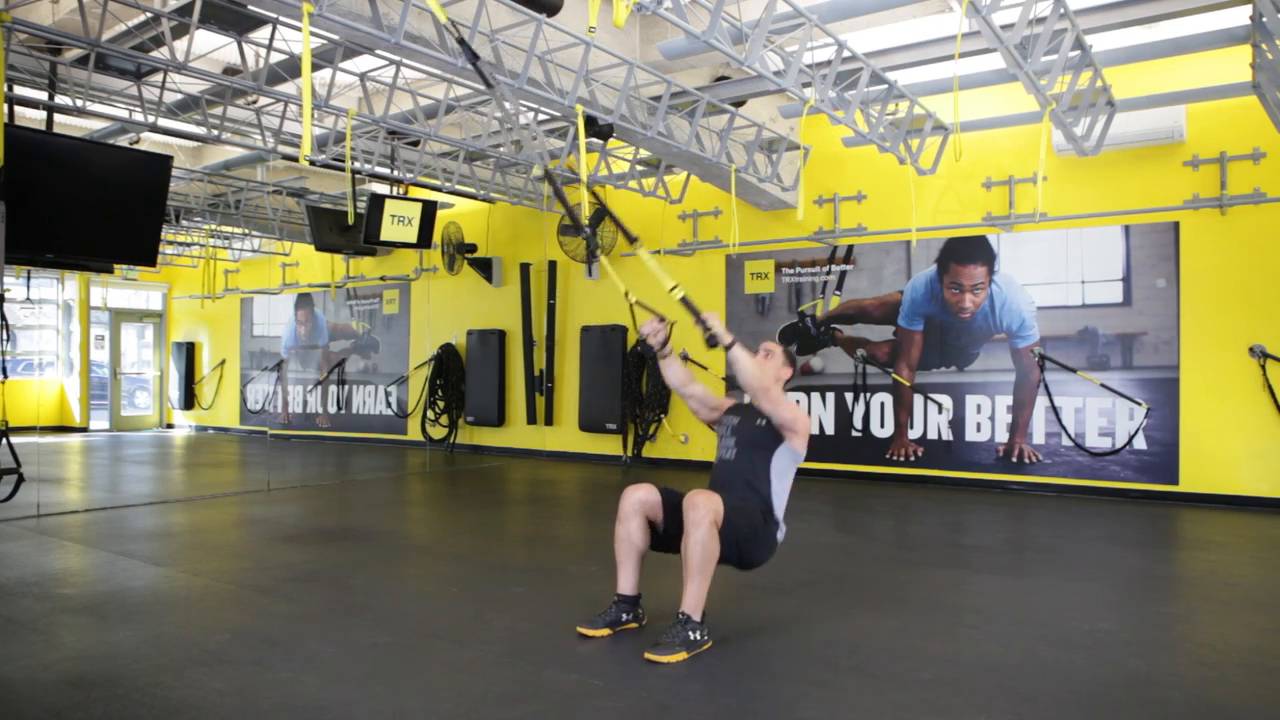
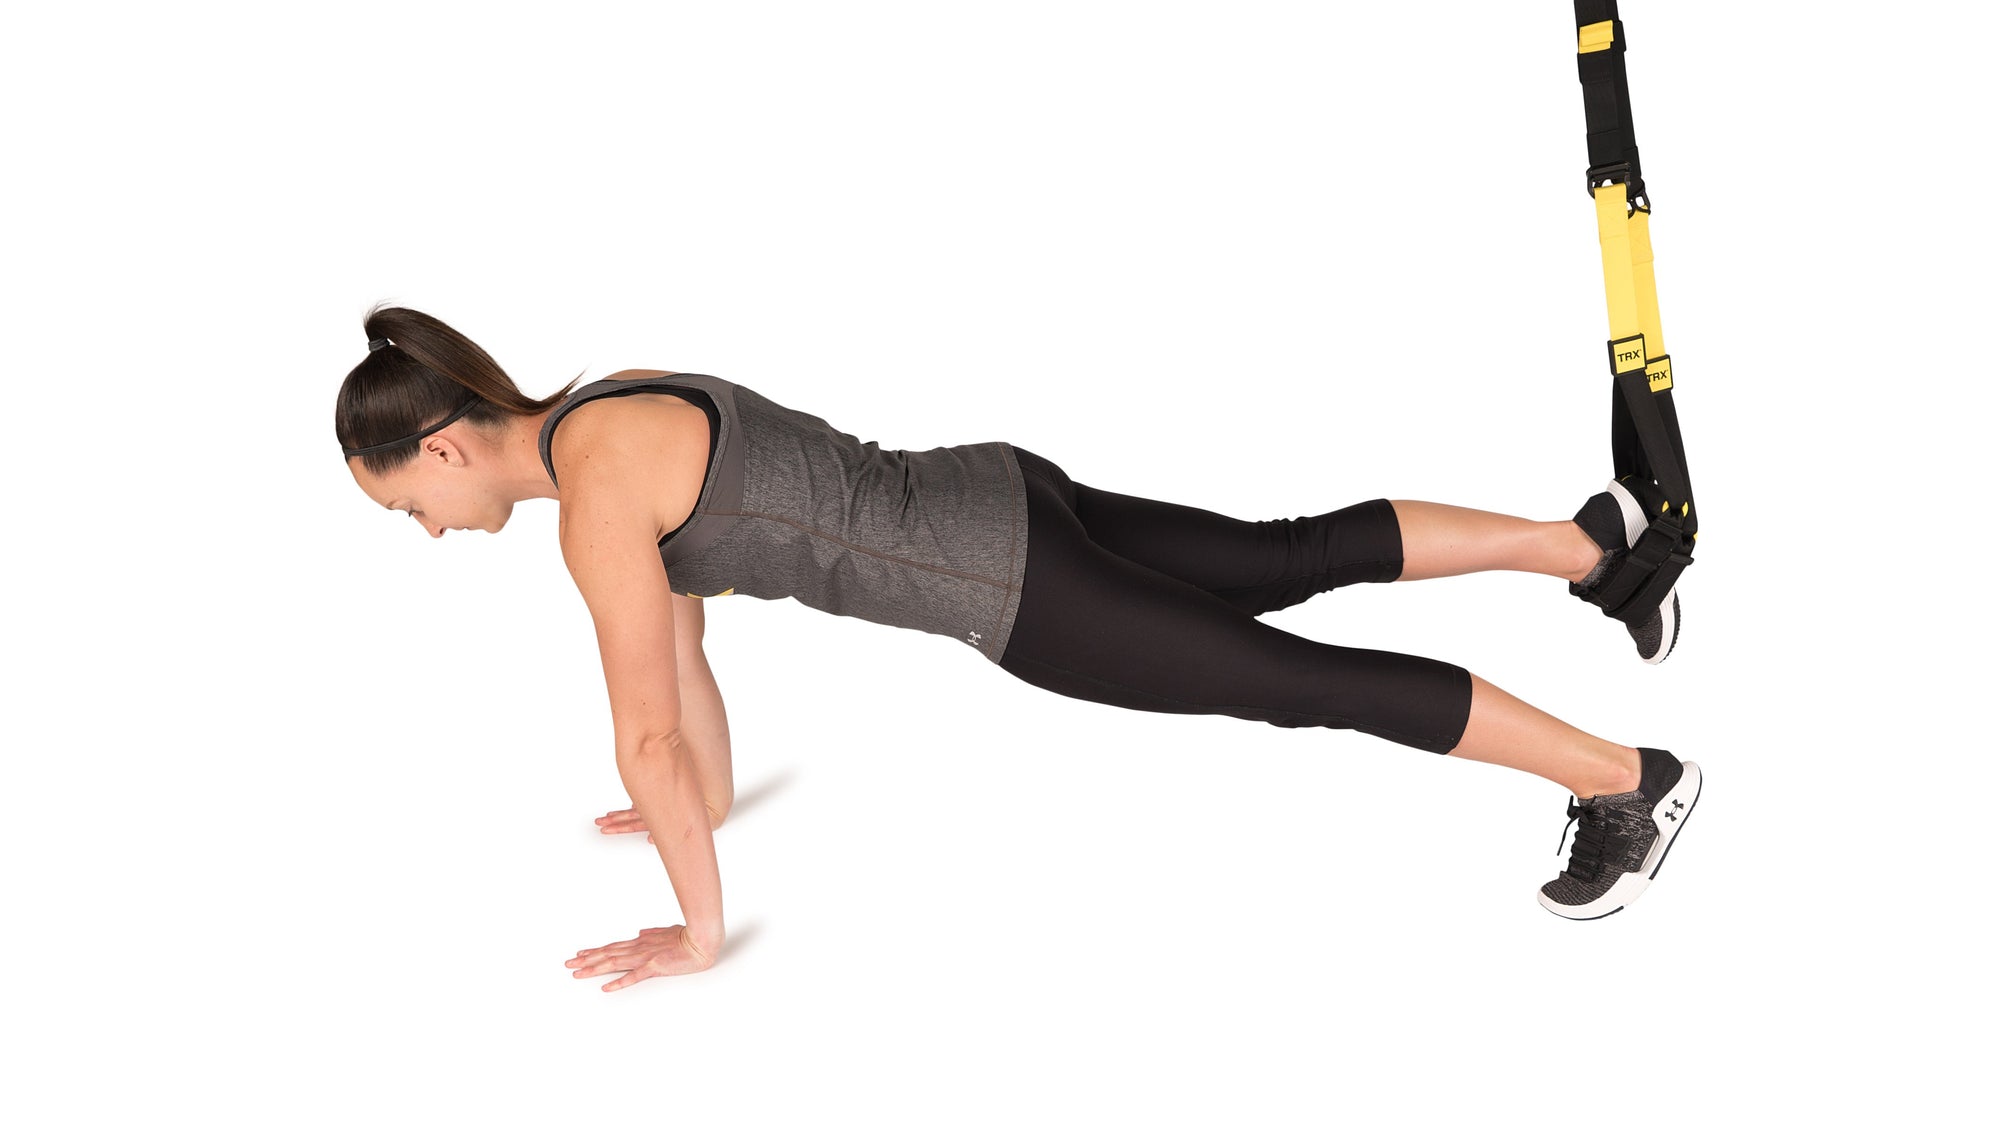
TRX Atomic Push Up
TRX Hamstring Curl to Hip Press
What I love most about these exercises is that they are great for building core strength and balance, two attributes that are extremely important when training in MMA. Not only that, this list hits the major muscle groups of the human body targeting both the upper and lower body, creating what is referred to as peripheral heart action (PHA). PHA has been identified to keep your heart rate up during strength-based exercise, while torching calories with every movement. A win-win right there!
If you’re looking for an exercise that simulates an MMA move, give the TRX Hamstring Curl to Hip Press combo a try. This exercise simulates the muscular function for Jiu Jitsu practitioners of the triangle and armbar. The single anchor point and limited slip locking loop gives you immediate feedback on the quality of your movement and is the perfect combination of instability for balance and coordination work plus enough stability to build high levels of strength. I’ve found that by slowing this down or any of the above exercises down will uncover muscular imbalances immediately.
By, Rob McCullough
Senior MMA Director & International Master Trainer for UFC Gym & TRX Instructor
My name is Rob McCullough my nickname in the MMA world is “Razor Rob”. I am the UFC GYM Corp. Senior MMA Director and International Master Trainer. In my former career I also was the WEC lightweight champion and International Muay Thai Kickboxing Champion. Other accolades include Striking coach on season 11 Team Ortiz and Season 14 Team Bisping on the reality TV show The Ultimate Fighter. Currently a NASM CPT, MMACS, YES, Escape Master Trainer; Bulgarian Bags, kettlebells, American Red Cross Instructor, Master Trainer TRX®.
TRX for Lower Extremity Injury
Dr. Jennifer Reiner incorporates the TRX Suspension Trainer into her sports rehabilitation services at Todd Durkin’s facility, Fitness Quest 10 in San Diego. Looking for exercises tailored to your recovery needs? Take our quick assessment quiz to receive personalized rehabilitation recommendations.
TAKE OUR TRAINING QUIZ
Here she demonstrates her top five exercises for individuals rehabbing a lower extremity injury.
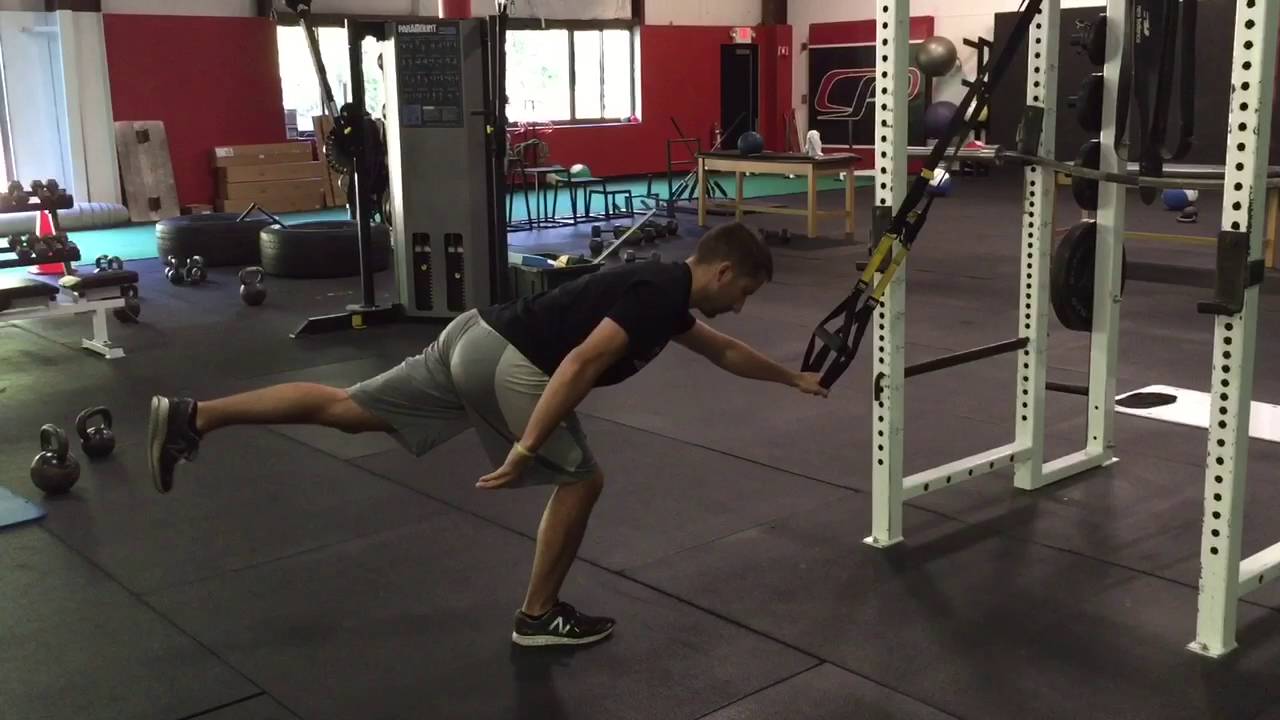
1. TRX Single Leg Squat
Begin with the Suspension Trainer in the mid length position facing the anchor point. Elbows should be under the shoulders and the stance leg should be centered to the anchor point. You may use the opposite heel on the ground for added support.
Lower the hips down and back, maintaining your weight over the stance leg with your chest tall.
Return by driving through the mid foot and heel back to your starting position.
2. TRX Balance Lunge
Maintain your weight on the original stance leg from the TRX Single Leg Squat. Elbows will remain under your shoulders to start.
Drive the opposite leg back, lowering the knee towards the ground. The knee should hover above the ground without the foot touching.
Keeping your chest tall, drive through the mid foot and heel of the front leg, returning to your starting position.
3. TRX Step Side Lunge
Continue to challenge the same leg from the previous two exercises. Begin with the elbows under the shoulders and feet together.
Step to the side moving the same leg from the TRX Single Leg Squat and TRX Balance Lunge that was your stance leg. Lower the hips toward the ground, keeping the opposite leg straight.
Once at the bottom of the lateral lunge, push off the mid foot and heel to return to your startng position.
4. TRX Lunge
Begin with the Suspension Trainer at the mid calf position in single handle mode facing away from the anchor point. Be sure the suspended foot is centered to the anchor point with your shoulders over your hips. For added stability, place both arms directly in front overlapping while providing an isometric contraction to engage the core.
Drive the suspended knee back, lowering your hips until the front knee is at 90 degrees.
Pushing off the front foot, drive through the mid foot and heel as you extend the hip.
5. TRX Abducted Lunge
Maintain the same foot in the Suspension Trainer and turn to face sideways to your anchor point. Again for stability, create tension through the torso by extending the arms in front with an isometric contraction.
Drive suspended leg to the side and lower the hips until the front knee reaches 90 degrees.
Pushing through the mid foot and heel of the stance leg, return to your starting position.
The first three exercises may be used in succession to challenge stability, strength and mobility. Each exercise progressively gets easier, in terms of the muscle activation and stability required, allowing the patient/client to continue exercising as the lower extremity begins to fatigue. The final two exercises are for the advanced client and require more strength and motor control. Depending on your goals for your client, you may perform these exercises for time or repetitions.
Dr. Jennifer Reiner is the chiropractor for Water and Sports Physical Therapy providing sports rehabilitation services Todd Durkin’s facility, Fitness Quest 10. She is also a TRX Sports Medicine instructor. Dr. Jenn obtained a Bachelor's of Science Degree in Exercise Physiology from the University of Florida and went on to pursue a Doctor of Chiropractic degree from Palmer College of Chiropractic West. As a member of the Palmer West Sports Council, Dr. Reiner focused her studies on sports injuries and rehabilitation.
TRX for Knee Pain
In this video, corrective exercise specialist Justin Price shows us how to use the TRX Suspension Trainer to alleviate knee pain. By stretching (both statically and dynamically) and strengthening the supporting muscles in the knee complex and mobilizing the hip and ankle complexes. Want to find safe, effective exercises for your knee issues? Take our quick assessment quiz to get a personalized training plan designed around knee health.
TAKE OUR TRAINING QUIZ
To purchase the TRX Biomechanics: Healthy Back DVD, click here.
Justin Price, MA, is the creator of The BioMechanics Method (www.thebiomechanicsmethod.com), which provides exercise solutions for people in chronic pain. He is an IDEA Personal Trainer of the Year and an educator for the American Council on Exercise, PTontheNET, PTA Global and the National Strength and Conditioning Association.
TRX for Injury Rehab
Even the best preventative measures can’t ensure you won’t end up on the DL at some point. Lucky for you, TRX Suspension Training can be highly beneficial at rehabbing injuries.
In his monthly Ask the Doctor blog posts, Dr. Rajan Perkash has covered several upper extremity injuries including Tennis Elbow, Elbow Tendinosis and Shoulder Dislocation. But the TRX is just as effective at addressing injuries incurred below the belt. Suspension Training and/or instability training has been found to reduce the risk of:
Lower limb injuries by 39%
Acute knee injuries by 54%
ACL injuries by 88%
Ankle sprain by 50%
By leveraging the user's own bodyweight and manipulating the level of stability (i.e., your base of support), you can scale the intensity of any exercise on the Suspension Trainer. Want to find safe, effective exercises for your injury recovery? Take our quick assessment quiz.
TAKE OUR TRAINING QUIZ
Specifically with lower extremity rehab, the TRX can be used as a de-weighting device to allow partial weight-bearing exercise in the early phases of rehab or as a safety device as you progress to full weight-bearing exercise. Here, TRX Director of Rehabilitation Brian Bettendorf gives you his top TRX exercises for two all-too-common lower body injuries.
ACL Repair or Replacement
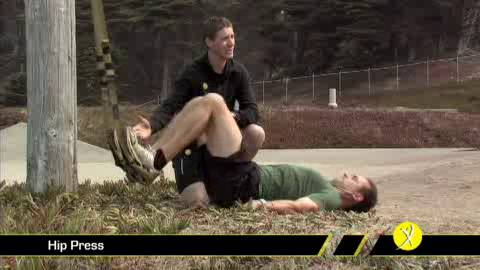
TRX Hip Press (above) - Increases strength and endurance to paraspinals, glutes and hamstrings. Retrains diminished motor control of glutes typical after injury.
TRX Sprinter Start - Increases hip, knee and ankle strength. Integrates triple extension. Facilitates return of full knee range of motion and challenges single leg balance.
TRX Single Leg Squat - Builds strength in the lower body while challenging the glutes to control femoral internal rotation.
Ankle Sprain
TRX Step Side Lunge - Facilitates hip, knee and ankle mobility by unloading exercise.
TRX Lunge - Increases hip and knee strength. Challenges balance and stability.
TRX Skaters - Increases hip, knee and ankle power. Introduces a controlled lateral challenge to the ankles.
But before you grab your TRX and go to town, it is highly recommended you consult a health care professional and get clearance to begin this or any exercise program. To learn more about the science of Suspension Training, visit our Sports Medicine page.
TRX for Iliotibial Band Syndrome (ITBS) - Part 1
With many of you training for running events this year, we wanted to share this article from physical therapist Chris Nentarz on common injuries that plague runners, and what you can do to avoid them. (Hint: it involves the TRX Suspension Trainer.)
Most running injuries stem from overloading, poor recovery, and biomechanical issues. Take our quick assessment quiz for a personalized injury prevention plan. This two-part article addresses Iliotibial Band Syndrome (ITBS), a common runner's injury, examining its root causes and evidence-based solutions.
TAKE OUR TRAINING QUIZ
The Need
ITBS can be a challenging injury to overcome, many times requiring four to six weeks to recover. Many bouts of ITBS return only weeks or months later. Traditional treatment many times fail because they spend too much time focusing on or around the local pain site. As you will learn, the wisdom of resolving ITBS can be found by treating the source of the dysfunction and not the local painful tissue.
ITBS occurs due to a small imbalance in our system. A great analogy is a car. If your tire alignment is off, then we will have early and excessive wear and tear on our tires. So I ask, “What good is it to replace the tires if we don’t address the systems alignment?” We have all fallen victim to this paradigm termed "eductionism." The tires are not to blame in the car's altered performance.
What is the Iliotibial Band?
The Iliotibial Band (ITB) is a thick fibrous tendon that extends from the outside of the pelvis down to the outside of the knee and shinbone. The ITB adds stability to the lower leg and functions to decelerate the internal rotational forces created as we impact the ground during running. In many cases, the ITB is wrongfully blamed for knee pain.
What Goes Wrong?
Classic symptoms of ITBS include pain along the outside of the knee that may be accompanied by a clicking sensation. A popular theory states that problems occur when the joint flexes and extends during running and friction is created between the ITB and outside of the knee. This theory shouldn’t be discounted but our experience and biomechanical understanding tells us that there are many more factors causing the injury.
As with any injury, our bodies will be influenced by factors including overloading, under recovery, poor biomechanics and movement pattern dysfunctions.
Overloading
Most running injuries, including ITBS, are a factor of overloading the body's physiology. As runners, we are prone to overuse injuries for two primary reasons.
First, let’s face it: we enjoy running. Sometimes we ignore our bodies signs of “too much,” “too far” and “too long.” It’s good to go the extra mile, just don’t do it everyday. Dose your runs with intention.
Secondly, running is a repetitive movement by nature. Even the most perfect system when exposed to the same stresses over and over again, will breakdown over time. Add variability to your running routine by changing speeds, surfaces and distances.
In adjunct, lower the risk of overuse injuries by complimenting your running with a functional strength training program that consists of sport specific core stability exercises and stability-based movements.
Check out the video above for a great running workout on the TRX Suspension Trainer, and tune in next week as we share Part 2 of this series.
If you're a runner interested in using the TRX Suspension Trainer to enhance your run performance, check out the online training programs we created in partnership with renowned run coach Matt Dixon. Click here for more info.
Chris Nentarz is Physical Therapy Manager at Athletes’ Performance (www.athletesperformance.com). He is a Physical Therapist, Certified Strength Training Specialist and Performance Enhancement Specialist with over eight years of experience working with athletes of all levels, including providing consultation services to numerous professional and elite organizations in the United States and Canada.
TRX for Hockey Training
Here, Carlos Teasdale from the TRX Programming Department shows us three exercises that will help you to increase your endurance and explosive power as well as your lateral strength and stability, an essential component of an effective hockey training program. Take our hockey assessment quiz for personalized drills based on your position and skill level. These exercises can be used to compliment an existing workout, or they can be done in a triple set format, which takes four minutes per round.
TAKE OUR TRAINING QUIZ
TRX Lunge (with Rock)
Benefits: Increases knee stability and strength
Adjust your TRX Suspension Trainer to mid calf length, stand facing away from the anchor point, place one foot in the foot cradles, centered with the anchor point, your shoulders aligned over your hips.
To perform the movement, drive your suspended knee back, lower your hips until your back knee is two inches from the ground and your front knee is at 90 degrees.
From here, push your front knee back towards the anchor point as far as you can without losing balance, hold and then bring your knee back to 90 degrees.
To return to standing, drive through the heel of the grounded leg and squeeze your glutes. Perform 10 TRX Lunges on each side and then rest for 30 seconds before moving on to the next exercise.
TRX Crossing Balance Lunge
Benefits: Improves lateral stability and strength
Adjust your TRX to mid length, stand facing the anchor point with feet shoulder width apart, grab the TRX with your elbows stacked under your shoulders.
Lift one leg, and with the weight evenly distributed in your grounded foot, drive the free leg behind the heel of the grounded leg, but don’t allow it to touch the ground.
To return to start, drive through the heel of the grounded leg and bring the free leg back to center. Repeat on the opposite side, performing 10 reps on each side. When finished, rest for 30 seconds and then move on to the third and final exercise.
TRX Single Leg Side Plank (with Abduction)
Benefits: Builds core and lateral hip strength
Adjust your TRX back to mid calf, lie on the ground facing sideways to the anchor point, place the bottom foot into both foot cradles, align your elbow under your shoulder.
Lift into a side plank position, keep your weight on your elbow. Keeping your top leg straight, lift it as high as possible, making sure to keep your hips stacked.
Hold for a moment, lower the top leg back down and then lower your hip back to the ground. Continue like this, holding the leg in the raised position for 10 seconds, for a total of three reps and then switch sides.
So there you have it, three great exercises that will help you develop functional strength for the sport of hockey. Performing these exercises slowly and in control is ideal. Remember to focus on form before you progress any of these movements.
TRX for Hip Labrum Tear
Referred to as the new “in” surgery after A-Rod underwent the procedure in March 2009, a torn hip labrum will certainly place you on the DL. In this installment of Ask the Doctor, Dr. Perkash addresses a question from a member of the TRX Community on whether the TRX can be used both pre and post surgery to repair a torn labrum.
Question
I am going to have a surgery to repair a torn labrum in my hip in about a month. Want to find safe, effective exercises for your pre- and post-surgery rehabilitation? Take our quick assessment quiz to get a personalized training plan that works around your hip condition. I've been struggling to stay fit, and I've basically been limited to pull-ups and push-ups (everything else seems to increase my hip pain). What exercises can I do with my TRX Suspension Trainer to help with my rehab, both leading up to the surgery and afterwards? I'm a big fan of the TRX FORCE Program. I just haven't been able to do most of these movements without paying for it later.
TAKE OUR TRAINING QUIZ
Answer
The labrum is a rim of cartilage that helps to form part of the “socket” in the hip and shoulder joints. The cartilage may be torn or damaged and be a source of pain. Injuries to the shoulder labrum have been much more extensively studied, but more recently, minimally invasive hip surgery, known as hip arthroscopy, has become increasingly used.
Typical symptoms of a torn hip labrum include groin pain, clicking or snapping sensations of the hip and limited range of motion of the hip joint. Surgery for a torn hip labrum usually involves placing a camera through a small incision into the hip joint to better visual the joint and to trim or remove the torn portion of the labrum or in some cases, attempt to repair it. Recovery from surgery may take six to 12 weeks with a carefully directed rehabilitation program under the guidance of an orthopedic surgeon and a physical therapist.
Once adequate time has passed in order to recover from surgery, full rehabilitation exercises can be implemented in order to strengthen the musculature around the hip joint (i.e., hip flexors, gluteus muscles, hamstrings, etc…). If you are having pain with range of motion of the hip before your surgery, and physical therapy exercises are aggravating your symptoms rather than helping, I would suggest waiting until an appropriate time after your surgery (under the guidance of your physician) before initiating any new exercises of the affected hip.
Depending upon the findings during surgery and the nature of the excision/repair of the labrum itself, your rehabilitation may progress at a different rate. Again, you must follow the guidelines of your orthopedic surgeon and physical therapist before progressing in any rehabilitation program for your condition.
Ultimately, the following TRX exercises (with progressions) may be beneficial for improving the range of motion of the hip joint and strengthening the surrounding musculature:
TRX Step Side Lunge
TRX Step Back Lunge
TRX Balance Lunge
TRX Crossing Balance Lunge
TRX Hamstring Curl
TRX Hamstring Runner
TRX Plank
TRX Side Plank (with or without Hip Drop)
TRX Crunch
TRX Oblique Crunch
TRX Squat
TRX Single Leg Squat
TRX Low Row
TRX Overhead Back Extension
TRX Standing or Kneeling Roll Out
TRX Hip Hinge (Wide Stance or Single Leg)
For early stage hip rehabilitation, an assisted squat with a chair and an assisted march facing toward and away from a chair may be useful.
For more on how TRX Suspension Training bodyweight exercise is a safe, scalable and effective solution for you or your patients, visit our Sports Medicine page.
NOTE: Any medical information in this blog is of a general nature and not a substitute for the advice of a medical professional. If you need medical advice, see a doctor.

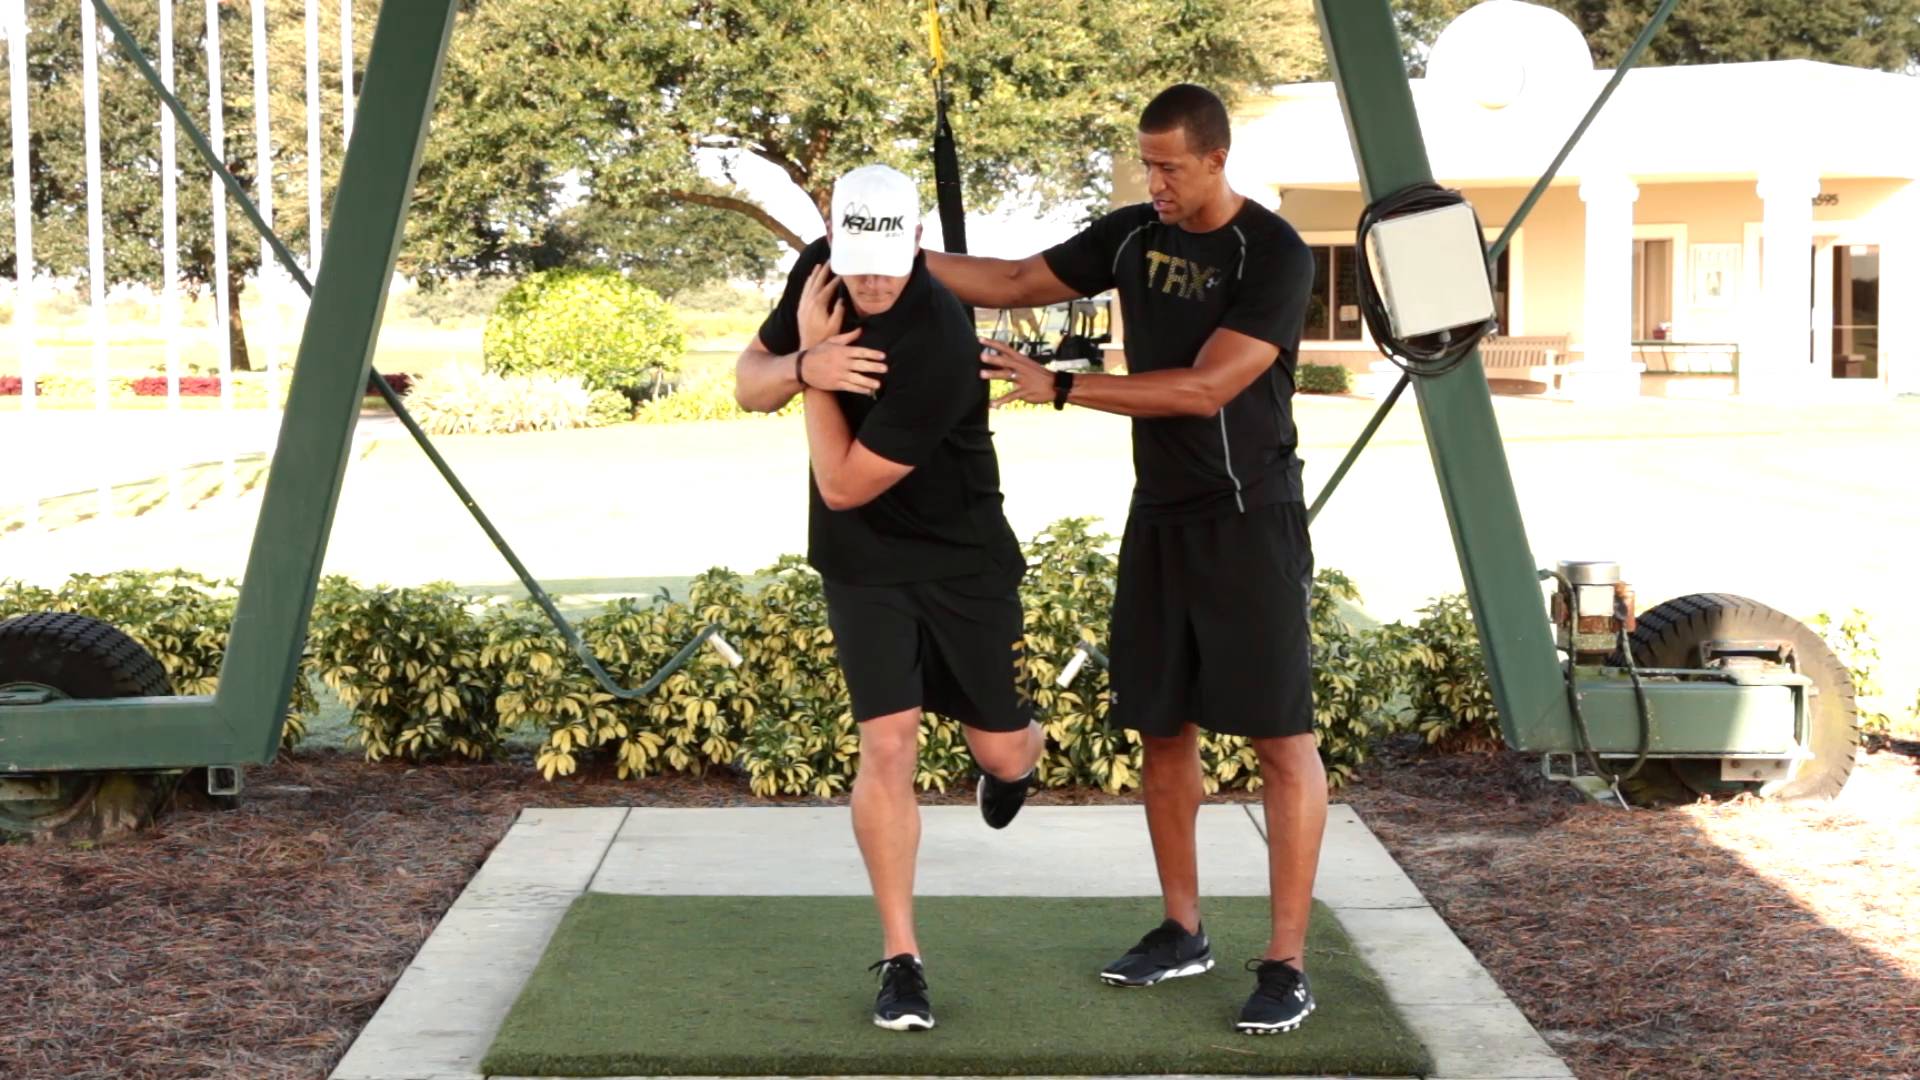
TRX for Golf: TRX Rotational Row To Press
A key to mastering your golf swing is training both rotational power and rotational resistance at impact. Want a golf-specific training plan? Take our quick assessment quiz. In this video, TRX Master Instructor Trevor Anderson demonstrates how the Suspension Trainer builds lower body stability and upper body strength, helping you hit straighter, longer, and more consistent shots through improved core rotation control at impact.
TAKE OUR TRAINING QUIZ
Watch the golf training video above and learn how to deliver your best golf game today
Learn how to put your Suspension Trainer into Single Handle Mode
TRX for Golf: Series 1
TRX for Golf: TRX Lunge with TwistTRX for Golf: TRX Golf Swing (Opposite Hands)TRX for Golf: TRX Rotational Row to PressTRX for Golf: Rip Rapid Response ImpactTRX for Golf: Rip Lunge to Press (with Rotation)TRX for Golf: Rip Backswing Hold (with Squat)
TRX for Golf: TRX Lunge With Twist
The TRX Lunge With Twist demonstrates how golf performance tools help golfers master lower-body stability and upper-body mobility. In this short clip featuring TRX Master Instructor and Golf Performance Expert Trevor Anderson, you will learn how to use the TRX Suspension Trainer to hone lower-body stability and generate upper-body mobility. Trevor shows us how by practicing the TRX Lunge With Twist, golfers can perfect their golf swing by mastering control and generating consistency.
Watch the video above and learn how staying stabile will lead you to your perfect golf swing.
TRX for Golf: Series 1
TRX for Golf: TRX Lunge with TwistTRX for Golf: TRX Golf Swing (Opposite Hands)TRX for Golf: TRX Rotational Row to PressTRX for Golf: Rip Rapid Response ImpactTRX for Golf: Rip Lunge to Press (with Rotation)TRX for Golf: Rip Backswing Hold (with Squat)