News
TRX Functional Training Tools - Build Yourself your Dream Home Gym
Have you ever considered building a home gym? Think your only option is to invest in a treadmill or spin bike that can be placed in the corner of your living room?
The new line of TRX Functional Training Tools combined with the TRX Suspension Trainer provide a low cost and low space investment to bring you an endless variety of killer workouts to your home.
BUILDING YOUR TRX TRAINING HOME GYM
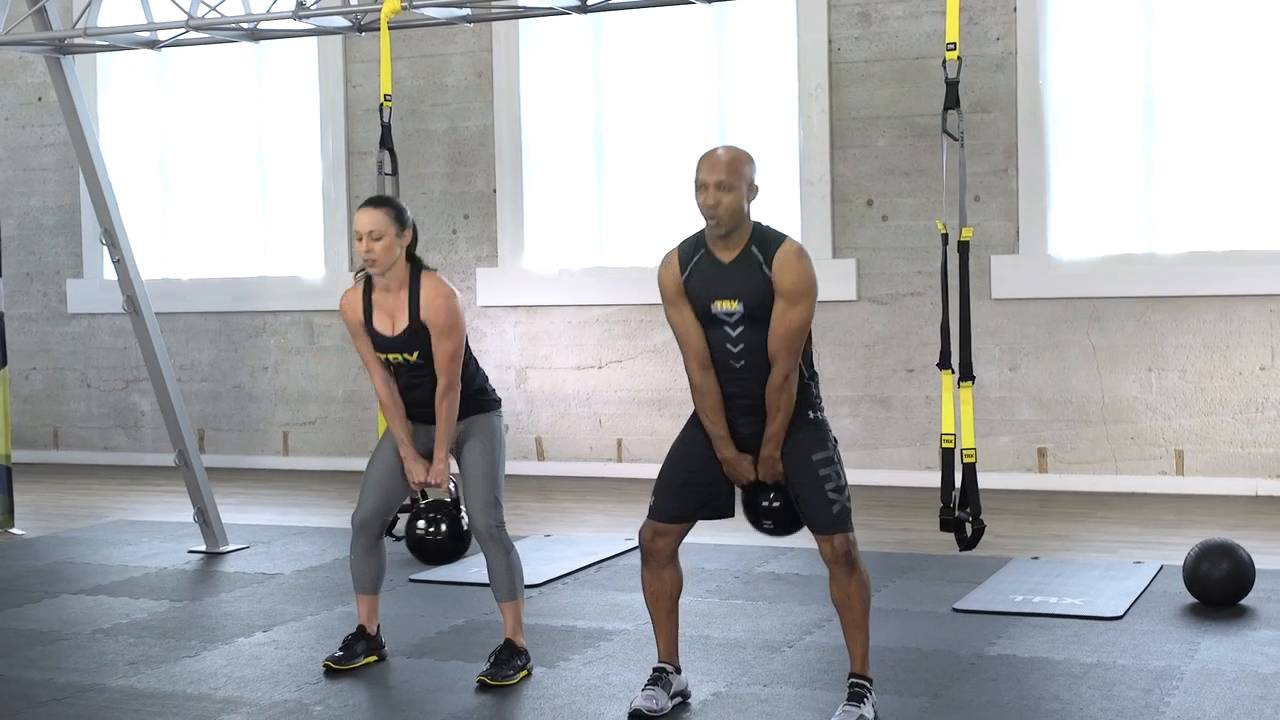
STEP 1- Choose the best TRX Suspension Trainer for you
STEP 2- Couple that with some external weight(s) with either the TRX Medicine Ball, TRX Slam Ball and/or the TRX Kettlebells for an added challenge to almost any bodyweight exercise.
STEP 3- Mix in some conditioning exercises with the TRX Conditioning Rope- or challenge your favorite exercise with the added resistance of the TRX Strength Bands (also great for mobility exercises)
STEP 4- Finish your workout with some core work on the TRX Stability Ball or relax those tired muscles with some rolling on the TRX Foam Roller.
Select the TRX Functional Training Tools that best suit you- combine it with your TRX Suspension Trainer and you have yourself endless possibilities for workouts.
NOW Get Ready to Sweat.
---------------------------------
Try out this below circuit, and then experiment on your own.
4 Exercises, 30 seconds Work, 30 seconds rest.
1)TRX Mountain Climbers
2)TRX Strength Band High Knees
3)TRX Conditioning Rope Alternating Waves
4)TRX Medicine Ball or TRX Slam Ball Slams
Repeat this circuit four times.
Finish this workout by using the TRX Foam Roller to roll through your calves, quads, glutes and back.
--------------------------------
Make Your Body Your Machine with the TRX Suspension Trainer and any combination of the TRX Functional Training Tools to get a killer workout in the convenience of your home, on your own schedule.
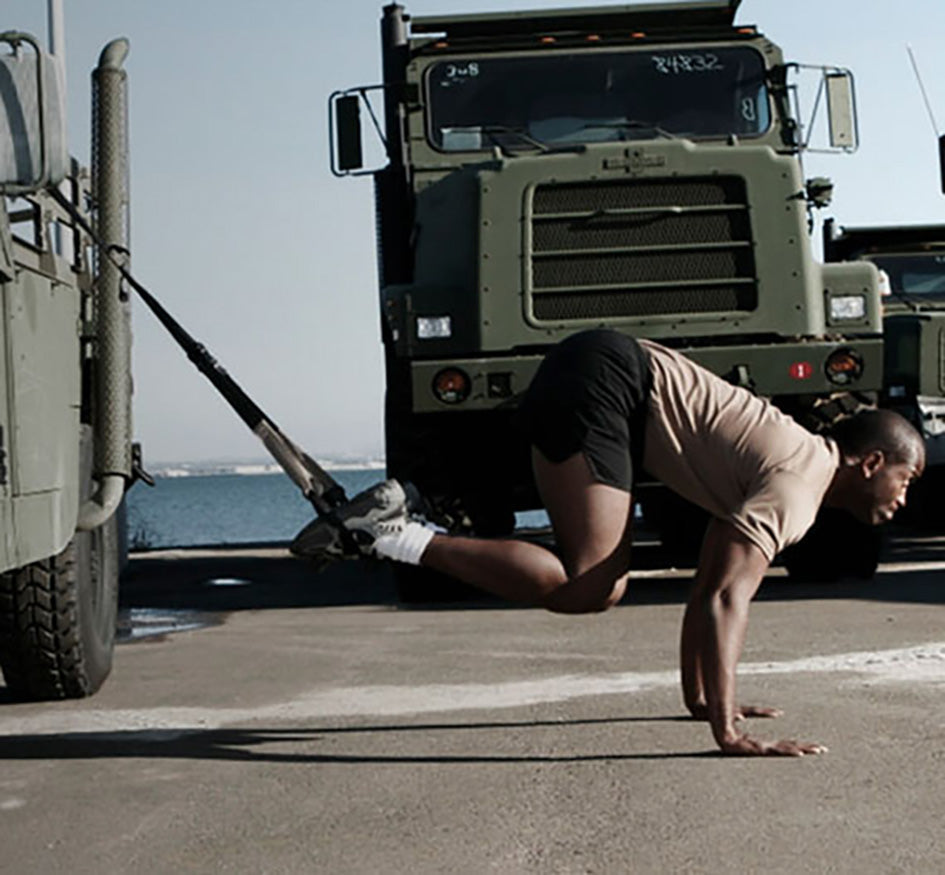
TRX FORCE Kit Contents
With the release of the new TRX FORCE Kit: Tactical, we thought you might want to know exactly how it differs from the previous TRX FORCE Kit. Want to find the right tactical training program for your unit? Take our quick assessment quiz to get personalized recommendations based on your mission needs. As Alex Roodhouse, TRX Director of Military Programs, points out in the video above, the TRX FORCE Kit: Tactical is our most sophisticated product to date, developed out of seven years of best practice research working with users in every branch of the military.
TAKE OUR TRAINING QUIZ
It contains the new 12 week progressive Tactical Conditioning Program, designed to build more durable and higher performing tactical athletes with an emphasis on operational readiness. The program is delivered with an easy to follow guide made from tear proof waterproof paper including four detailed exercise maps clearly illustrating each movement, as well as two DVDs with: three real-time workouts, agility drills and benchmarking challenges and a comprehensive video exercise library. The program is built on periodic built in benchmarking tests allowing users to easily track their progress.
In addition to the new Tactical Conditioning Program, the new TRX Tactical Suspension Trainer was designed around the feedback we received from military, first responders and tactical athletes using TRX in the field. Weighing in at a lean 1.5 pounds, we moved away from using the heavier cam buckles to lighter, easy to use D-rings. We upped the durability, by using textured rubber handles instead of the foam grips used on the previous model, which are both easier to grip and clean.
The new Kit also comes with a TRX Xtender Strap for higher anchor points and more vertical anchor points. This is an incredible resource for use in the field because it instantly adds a ton of potential anchor points. The new TRX FORCE Kit: Tactical comes in a durable, light weight mesh running bag made of ripstop nylon mesh and easily carries the entire system. The mesh running bag can be worn as a backpack and also includes several interior and exterior pockets for gear, ID, phone or whatever your mission demands.
UPDATE: In 2013, we launched the TRX FORCE Super App--the ultra-enhanced, digital 12-week Tactical Conditioning Program accessible anywhere on your Smartphone. It comes with your purchase of the TRX FORCE Kit: Tactical.
Buy your TRX FORCE Kit: Tactical now.
TRX for Yoga: TRX Dancer
The TRX Suspension Trainer provides an excellent tool to scale, complement and improve your yoga practice. We’ve partnered with yoga and fitness instructor, and Under Armour Athlete Shauna Harrison to show you how to incorporate the straps into your yoga.
The Dancer Pose (Lord of the Dance Pose) is an elegant pose that requires balance and flexibility. Let the TRX Suspension Trainer assist you with your balance as you use the straps to go deeper into the pose and increase your flexibility. Following this sequence will transform you into a graceful dancer in no time.
Progression 1
Adjust your straps to mid-length, and begin this progression (TRX Low Lunge) facing away from your anchor point. Place one foot into the foot cradle with the knee on the floor. The opposite foot should be placed in front of you with your knee bent. Carefully place your hands onto the front thigh, and adjust the hips so they face forward. Alignment here is key. If available, you can bend the back knee and reach the same hand back to grab either the straps or the handle. To come out of the pose, carefully release the straps and take the suspended foot out of the foot cradles.
Progression 2
In this progression, place yourself so you are standing in front of the straps with one foot into both foot cradles. Bend the back knee and reach the same hand for the straps. Keep the chest lifted and try not to dump all the weight forward. Use the straps to continue lifting the foot up. Grab the handles to deepen the stretch. Reach the opposite hand forward. To release, carefully return the foot down and remove it from the foot cradles.
Progression 3
From progression 2, reach back with the opposite hand to grab onto the straps. Place your hands along the straps so that they are right next to each other. As you ground through the standing leg, begin to walk the hands down closer to the foot as your flexibility allows. Press the foot into the straps as you create strap-tension by pulling with the hands either in the handles or further up on the straps. Maintain a lifted chest. To unwind, carefully return the foot down to the earth and remove it from the foot cradles. Use the hands on the straps to assist if necessary.
TRX for HandstandTRX for Yoga Warrior IITRX for Eka Pada Koundiyasana 2TRX for DancerTRX for Crow PoseTRX for BackbendsTRX for HeadstandsTRX for Warrior ThreeFor more ways to incorporate TRX into your yoga practice, try our TRX Yoga Fusion Workout.

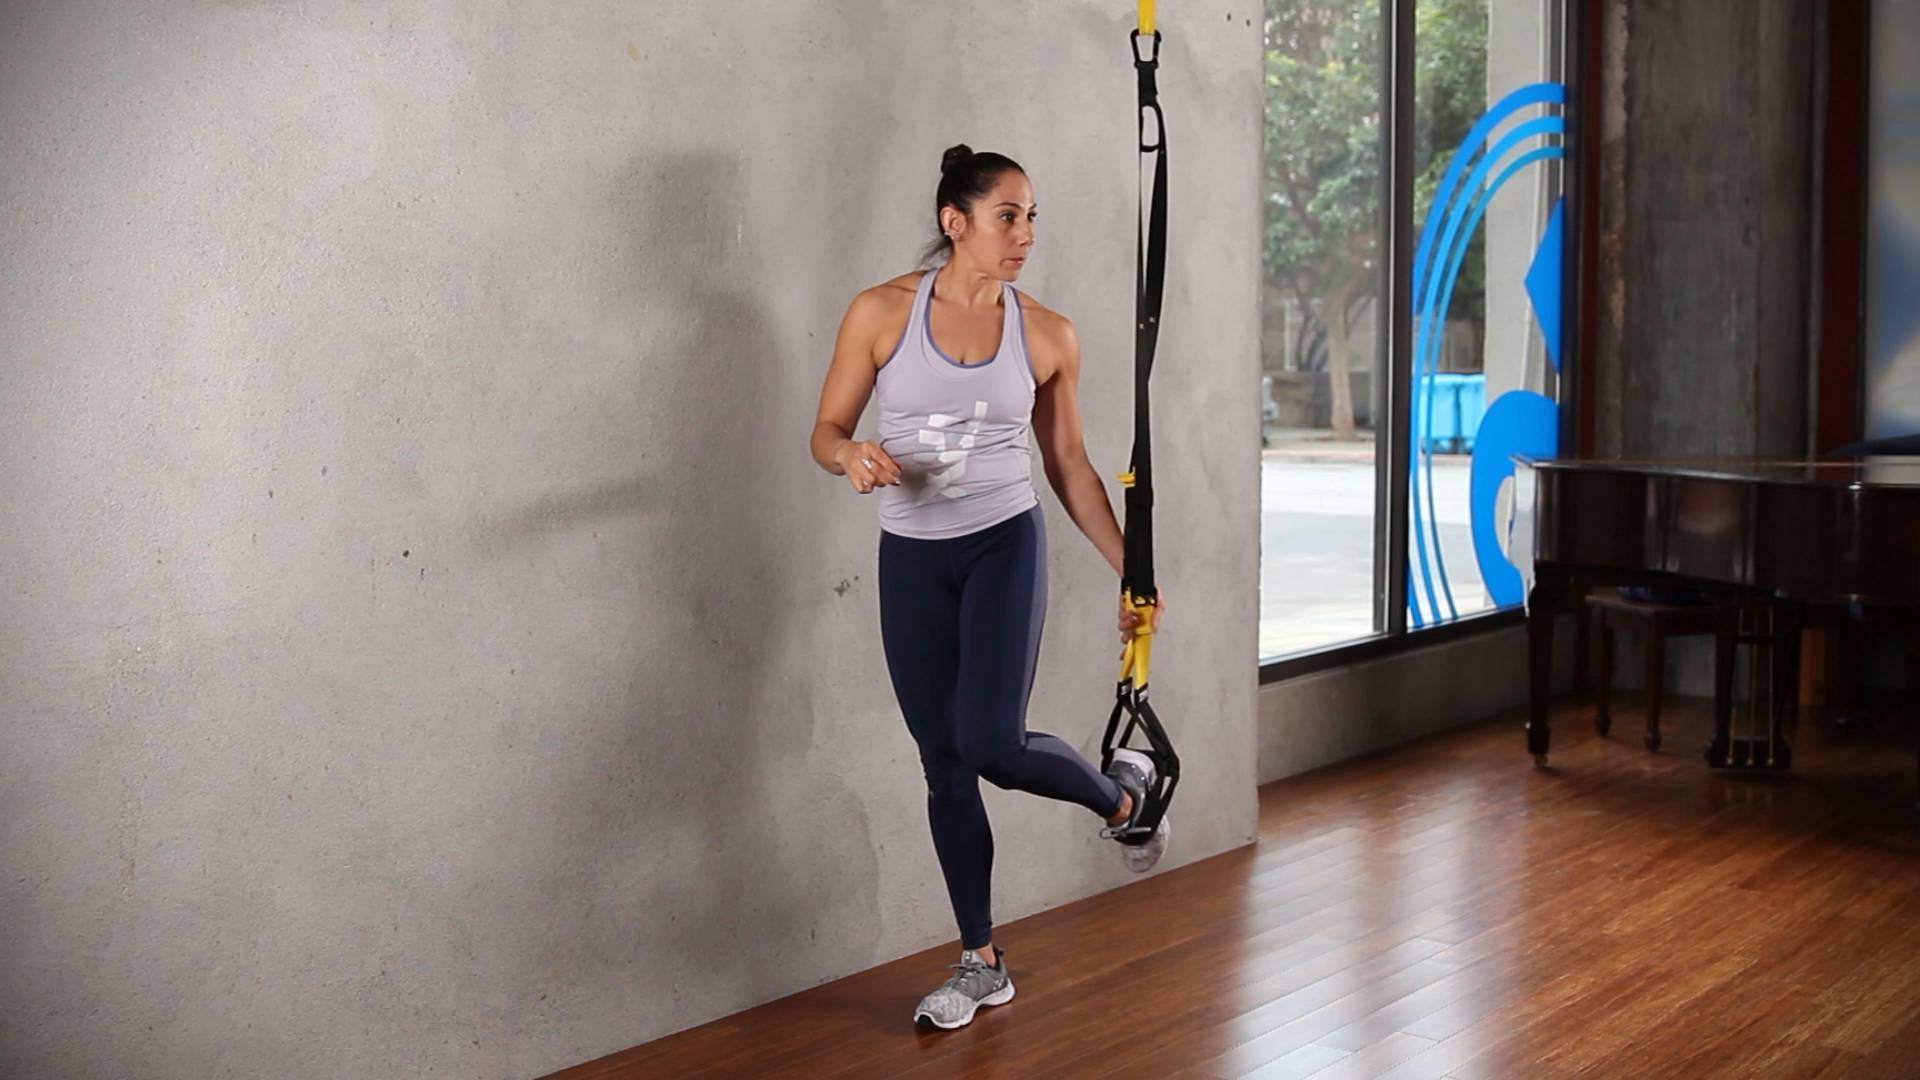
TRX for Yoga: TRX Handstand
The TRX Suspension Trainer provides an excellent tool to scale, complement and improve your yoga practice. We’ve partnered with yoga and fitness instructor, and Under Armour Athlete Shauna Harrison to guide you in incorporating the straps into your yoga.
For most people, inverted poses can be challenging and intimidating. Want to find safe progressions for learning inversions? Take our quick assessment quiz to get a personalized training plan for mastering handstands. Similar to using a wall or partner to assist you into an inverted pose, the TRX Suspension Trainer can serve as a great tool to help you to slide into an inversion and feel confident along the way. By using the following sequence built just for you, there is no doubt you will easily lift into a handstand both independently and for good!
TAKE OUR TRAINING QUIZ
Progression 1
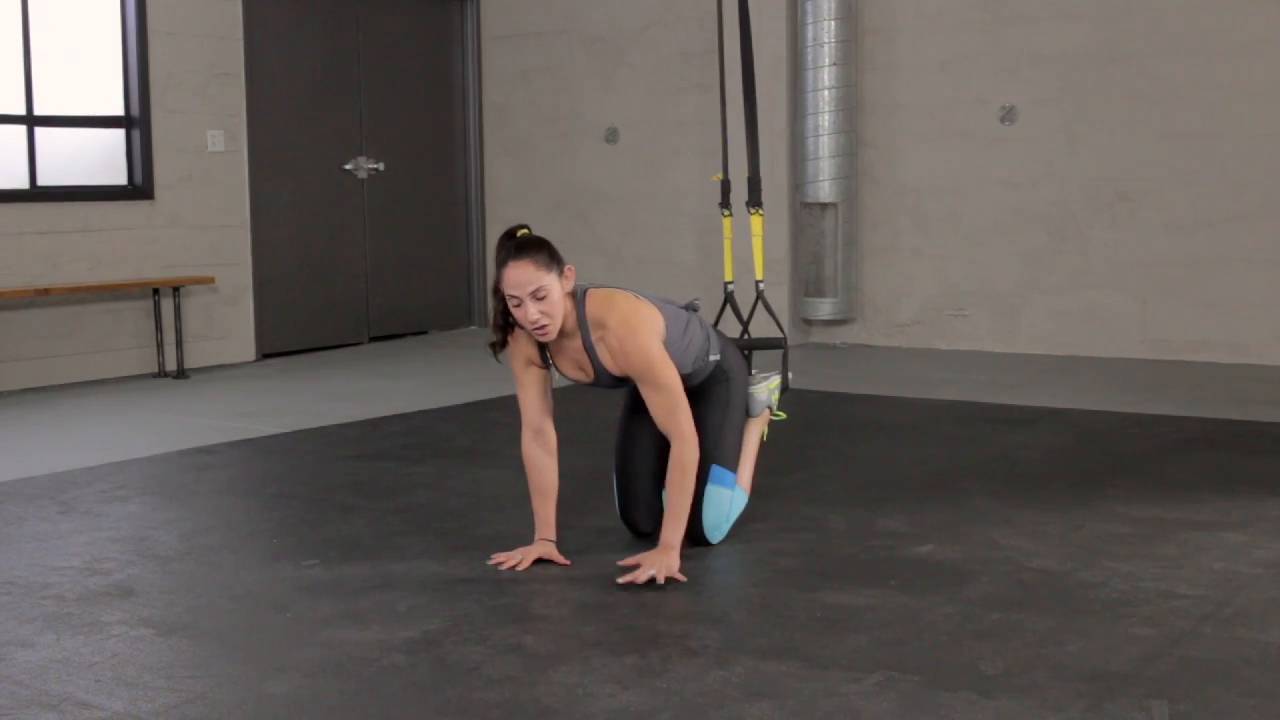
This is also called a TRX Standing Split. Stand facing away from the anchor point with one foot in both foot cradles. Slowly lower your hands to the ground in front of you. You should more or less be on all fours now as you walk yourself back and slowly transition into what will begin to resemble a 3-legged Downward Facing Dog.
Continue to walk your hands toward the back of the room as you play with taking the non-suspended leg off the ground and reach it toward the sky. The leg that is suspended in the Suspension Trainer extends further toward the ceiling. The farther back you walk, the more intense and necessary the core activation becomes. You progress by walking your hands as far back as you can. If you get to this point, rest assured your arms will get worked!
To release out of the pose, slowly walk your hands and the non-suspended leg forward towards the anchor. Once there, carefully bring the extended leg back down to the earth and make your way back on all fours. Once stable, remove the foot from the cradles.
Progression 2
Starting from the TRX Standing Split, press your hands strongly into the floor and drive the back heel forcefully into the foot cradles to bring the non-suspended foot off the floor. Bend the free leg and bring the knee to the chest. Drive the suspended-heel strongly into the foot cradles. Squeeze the belly-button into the spine to engage the core.
To come out of the progression, release the non-suspended leg back down to the ground. Slowly begin to walk the hands and the free leg forward towards the anchor. This will put you back on all fours. After you regain stability, remove the foot cradles.
Progression 3
From progression 2, try lifting the non-suspended leg towards the suspended leg. Keep tension on the straps. Engage the core, continue to press the hands firmly into the earth. Hold for 2-3 three breaths. To come out of the pose, slowly lower the non-suspended leg back down to the ground. Carefully begin to walk the hands and the non-suspended leg forwards towards the anchor. Carefully remove the foot cradles.
TRX for HandstandTRX for Yoga Warrior IITRX for Eka Pada Koundiyasana 2TRX for DancerTRX for Crow PoseTRX for BackbendsTRX for HeadstandsTRX for Warrior ThreeFor more ways to incorporate TRX into your yoga practice, try our TRX Yoga Fusion Workout.
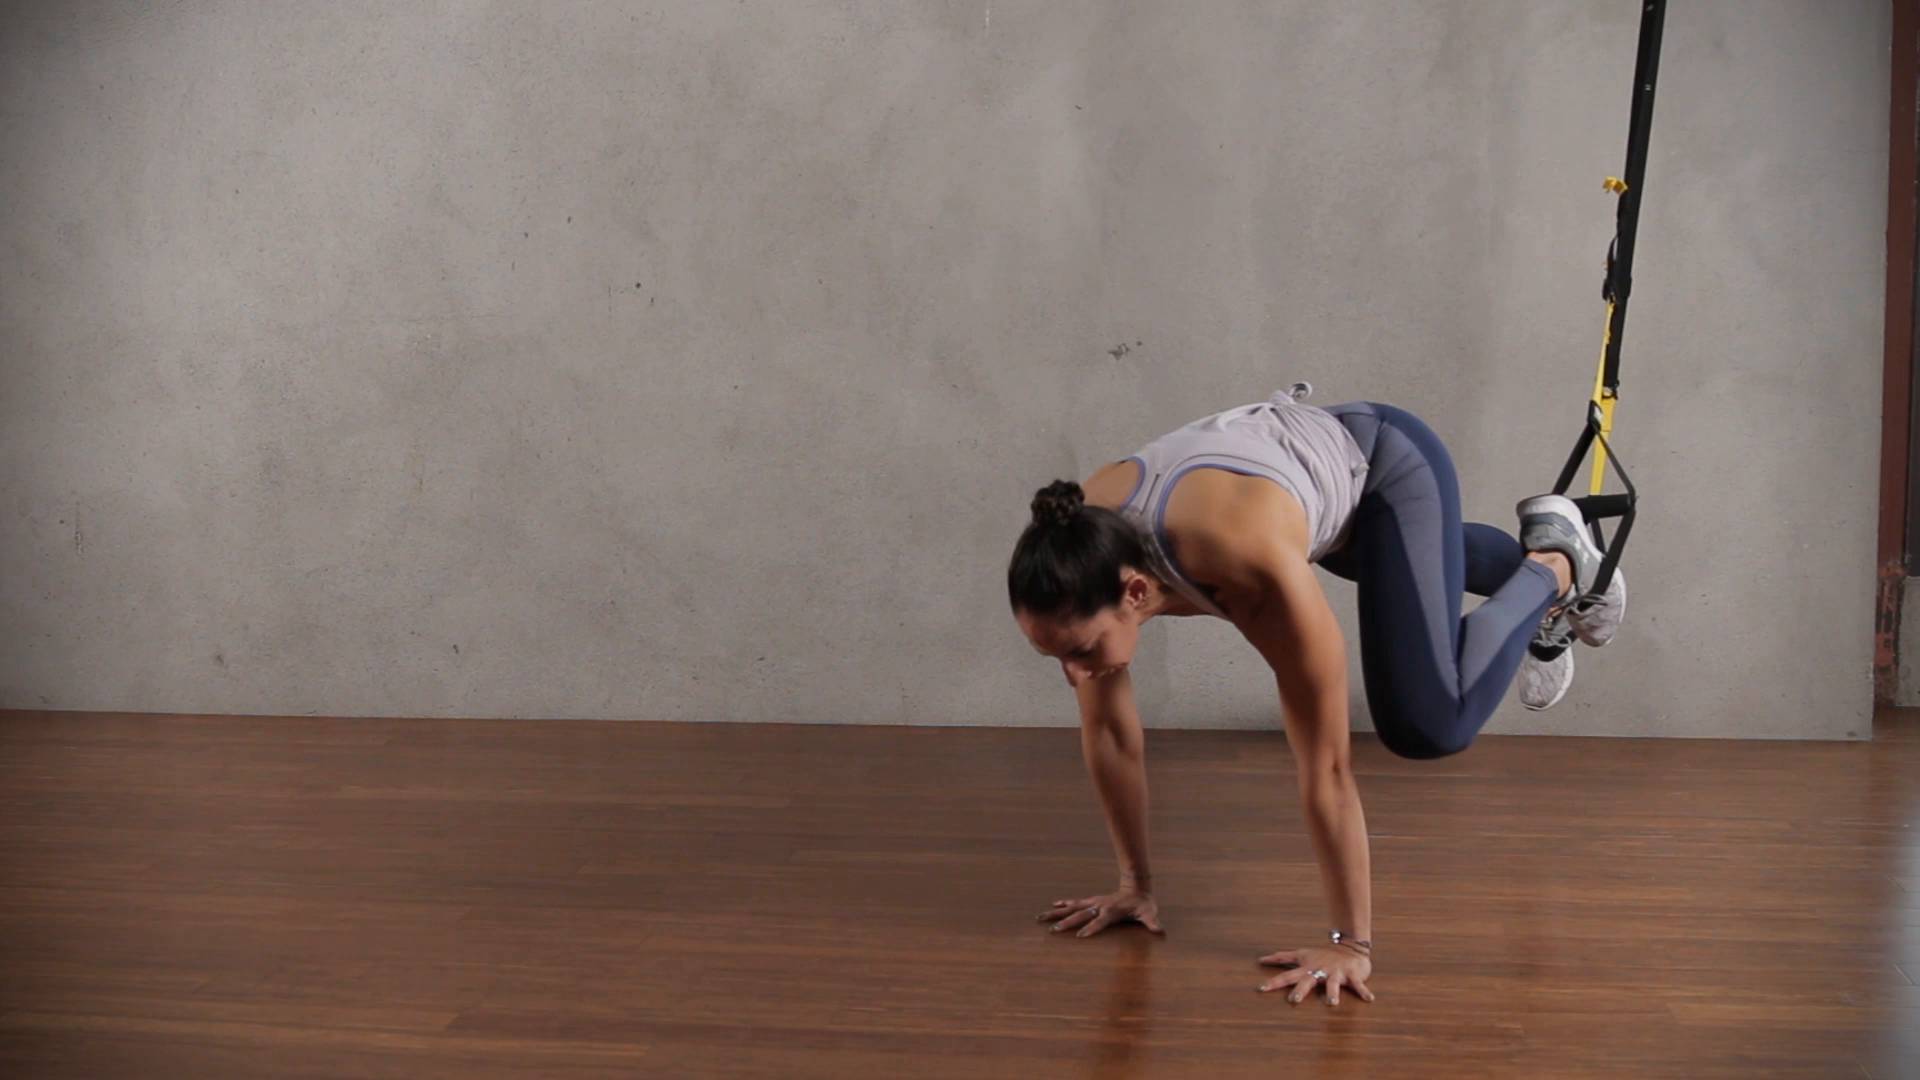
TRX for Yoga: Eka Pada Koundinyasana 2
The TRX Suspension Trainer provides an excellent tool to scale, complement and improve your yoga practice. We’ve partnered with yoga and fitness instructor, and Under Armour athlete Shauna Harrison to show you how to incorporate the straps into your yoga.
Eka Pada Koundinyasa (Pose Dedicated to the Sage Koundinya II) is a graceful yet challenging arm balance pose. The TRX Suspension Trainer helps you get into the pose and assists in helping you hold the pose before you are totally on your own. Even if you already know how to perform EPK2, the straps will help you to get deeper so you can get more out of this beautiful pose.
Progression 1
With the straps adjusted to mid-calf, position yourself on the ground facing away from the anchor point with the feet in the foot cradles. From the plank position, firmly press the hands down into the ground. Bring one knee towards the shoulder on the same side. Return to leg back to the starting plank position. Repeat on the other side. Perform this series a few times so that you can get comfortable and begin to build the upper body strength and balance. To exit this pose, return to the plank position, and release the knees to the ground and carefully remove the feet from the foot cradles.
Progression 2
Progression 2 of this pose is a slight modification of Progression 1. This time as you bring your knee toward your shoulder, add a push up. Repeat on the other side, and repeat the series.
Progression 3
In this progression, place one foot in both foot cradles with your hands in front of you in the plank position, and the free foot resting on the ground. Bring the free knee to the shoulder on that side, bending the elbows as you do. Set the knee on the back of the arm and hold. Continue to press the foot into the foot cradles. If your flexibility and the the strap length allows, you can extend through the foot of the bent leg to bring it closer to straight. To come out of this pose, return to plank position, drop your knees and carefully remove the foot cradles from the foot. To keep yourself balanced, repeat on the other side.
TRX for HandstandTRX for Yoga Warrior IITRX for Eka Pada Koundiyasana 2TRX for DancerTRX for Crow PoseTRX for BackbendsTRX for HeadstandsTRX for Warrior ThreeFor more ways to incorporate TRX into your yoga practice, try our TRX Yoga Fusion Workout.
TRX for Yoga: Crow Pose
The TRX Suspension Trainer provides an excellent way to scale, complement and improve your yoga practice. We’ve partnered with yoga and fitness instructor, and Under Armour athlete, Shauna Harrison to show you how to incorporate the straps into your yoga practice.
Arm balances like Crow can be difficult and intimidating at first, and the Suspension Trainer can really help you get comfortable balancing before you are totally on your own. Even if you already have an excellent Crow pose, this sequence will help you fine tune and further refine this beautiful position.
Progression One: This progression is basically Crow with your feet in the TRX foot cradles, directly under the anchorpoint. Use this modification to get into Crow correctly and safely, so you can develop your strength and balance.
Progression Two:With your feet still in the foot cradles, walk your hands away from the Suspension Trainer and practice drawing your knees to your triceps. This is an excellent way to work on using your core to control your balance.
Progression Three: With your feet still in the foot cradles, walk your hands away from the Suspension Trainer. Practice drawing your knees to your triceps one at a time, then pushing them back in a slow and controlled motion.
Try incorporating this sequence into your practice or just practice this sequence when you can’t make it to class, and be sure to check the rest of our TRX for Yoga series:
TRX for Handstand TRX for Yoga Warrior II TRX for Eka Pada Koundiyasana 2 TRX for Dancer TRX for Crow Pose TRX for Backbends TRX for Headstands TRX for Warrior Three For more ways to incorporate TRX into your yoga practice, try our TRX Yoga Fusion Workout.
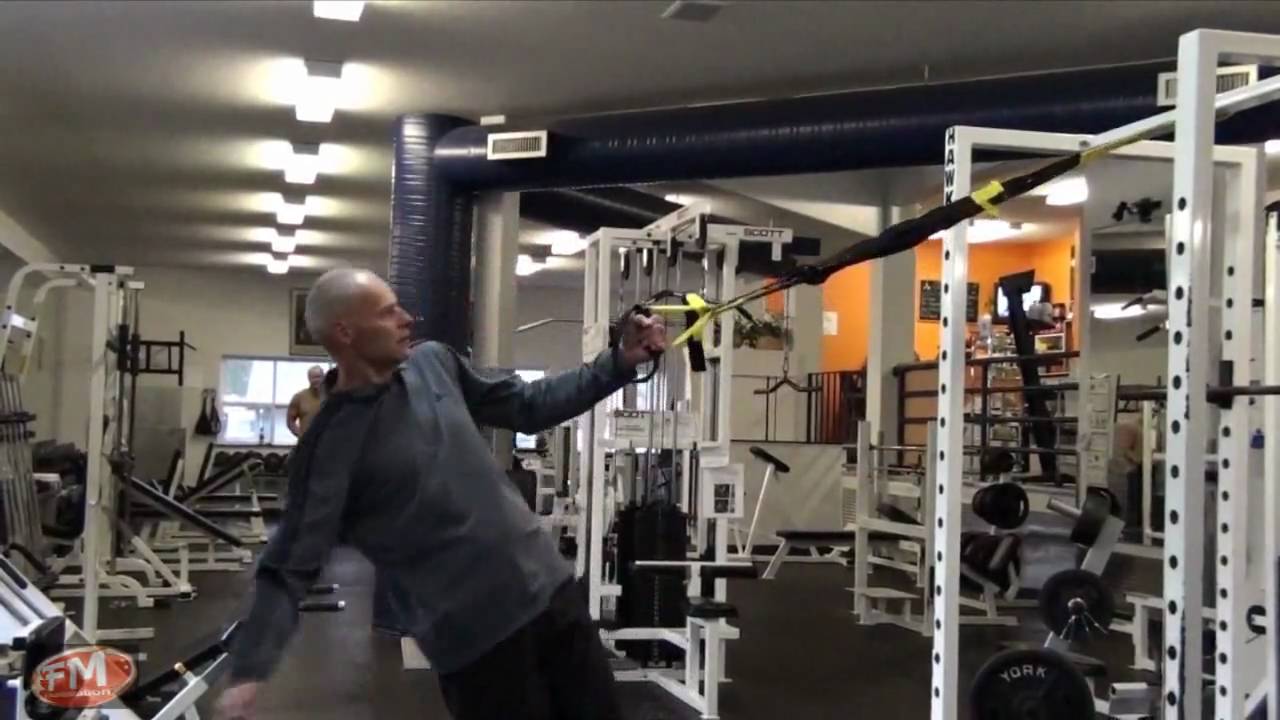
TRX for Water Skiing
Check out this TRX sequence for water skiing, used by Pro Jason McClintock, perfect for warming up and activating the shoulders and back before a session on the water. If you’ve spent any time water skiing, you know your body can take a beating. Between the twisting and turning required to catch some air and the inevitable impact of a fall, the pros know they need to spend adequate time working on not just balance and strength but also flexibility so they stay limber and loose when gliding across the water.
Ontario native Jason McClintock has spent nearly his entire lifetime committed to the sport of water skiing. On skis since the tender age of two, Jason quickly rose to the top in the Canadian Jr. division, earning him positions on many Jr. and Under 21 Canadian teams. With multiple titles under his belt, he advanced to a spot on the Canadian National Team in 2004, skiing both slalom and trick, and helped the team take home the trophy at the World Championships in 2009. With this sort of tenure, Jason has had plenty of time to find out what works with his training.
"The best way to get warmed up before a ski set is by using the TRX Suspension Trainer," says Jason. "The dynamic movements you can do with the TRX are perfect for getting my whole body ready to compete." He also relies on it to help with another important aspect of fitness: cross training, which helps with injury prevention and allows him to push himself and his skiing to the next level. In the video, Jason shows us the exercises he likes to perform to break down tension and get his body warmed up.
The first exercise is a slightly modified version of the TRX Squat Row. “I like this exercise because it incorporates the upper and lower body,” says Jason, “and it hits the arms, back and legs in one simple movement.” (Click here to check out a Cool Combo featuring the TRX Squat Row.) Not sure which exercises best match your fitness level? Take our quick assessment quiz to get personalized workout recommendations tailored just for you.
TAKE OUR TRAINING QUIZ
The second exercise Jason calls "an awesome sequence that hits your back in multiple ways; it involves a bent over row, reverse flies and a transverse rotation." You'll recognize the TRX Golf Rotation in this combination, which helps increase hip and spine mobility and rotation. The last exercise, performed during the cool down at TRX classes here at TRX HQ, is great for really opening up your chest and hip flexors (perfect for those of us who sit for long periods of time).
Jason is currently competing in the 2011 Water Ski World Championships in Dubna, Russia. In between competition, no doubt he will be relying on his TRX to help keep him charging across the wake.
You can read more about Jason and his TRX Training by checking out this article in the August issue of Water Ski magazine.
TRX for the Love of the Run: Hip and Ankle Mobility for Runners
In this first installation of our For the Love of the Run series, professional runner and sub-four-minute-miler David Torrence and TRX Head of Human Performance, Chris Frankel, show you how to improve your posture as well as develop your ankle and hip mobility.
As a runner mastering your mechanics will make you faster, more efficient and will help to reduce your risk of injury. This program will help you break down your run into foundational movements to perfect your technique, improve your mobility, and add strength and power to your stride.
MOBILITY:
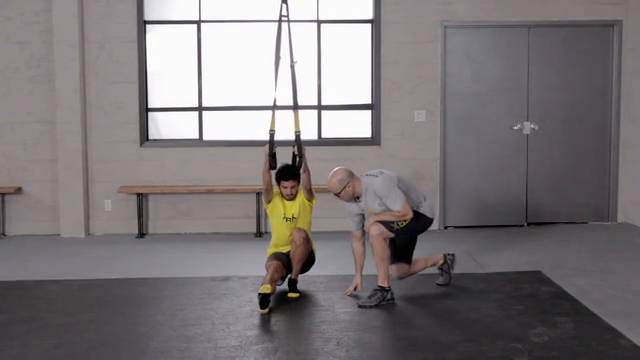
TRX Squat Row Sequence:Logic:This exercise will help develop integrated core strength, as well as hip, ankle and shoulder mobility. These are all critical components for your running foundation, especially as you begin to fatigue after a long or hard effort.
Set Up:Stand facing the Suspension Trainer with your feet facing forward, hip-width apart, holding the handles out in front of you. Brace your core and engage your glutes and hamstrings as though you are performing a plank while standing up.
Movement:Drop your hips down and back, while pushing your knees out, bringing your butt as close to your ankles as you can. When you get to the bottom, pull yourself forward with your hands while keeping your feet firmly planted on the ground.
Return:Let your weight rock back until you are back at the bottom of your squat position. Then drive your hips forward to return to your standing plank.
TRX Single-Ankle Mobility Drill: Logic:You flex and extend your ankle every time your foot hits the ground when you run. Improving your ankle mobility will enhance your stride from the ground up. This exercise isolates each ankle so that you can identify any imbalances between your left and right side.
Set Up:Stand facing the Suspension Trainer with your feet pressed together, holding the handles out in front of you. Brace your core and engage your glutes and hamstrings as though you are performing a plank while standing up.
Movement:Drop your hips down and back, while pushing your knees out, bringing your butt as close to your ankles as you can. When you get the the bottom, extend one leg out and pull yourself forward and back. You should feel as though you are pivoting back and forth on your ankle.Repeat on both sides.
Return:Bring your feet back together and drive your hips forward to return to your standing plank.
CORE STABILITY:
TRX Plank:Logic:Developing a strong plank will help you keep your chest upright and open to improve your breathing and arm drive.
Set Up:Start on the ground on your hands and knees with your feet in the foot cradles and your hands placed under shoulders.
Movement:Plank up into a pushup position keeping your hands directly under your shoulders. Brace your core and make sure your ears, shoulders, hips, knees and ankles are all in line.
Return:Lower your knees to the ground.
TRX Body Saw:Logic:Now that you can perform a plank, challenge your core stability and incorporate some integrated shoulder mobility to improve your arm-drive mechanics.
Set Up:Start on the ground on your hands and knees with your feet in the foot cradles and your hands placed under shoulders.
Movement:Plank up into a pushup position keeping your hands directly under your shoulders. Brace your core and make sure your ears, shoulders, hips, knees and ankles are all in line. Slowly rock forward and back just a few inches. Stop before you feel any strain on your lower back.
Return:Lower your knees to the ground.
Incorporate this sequence into your pre-workout routine, to mentally and physically prepare you to get the most out of your run.
Recommended Workout Sequence:Squat Row: 5-10 repsSingle Ankle Mobility: 5 reps on each leg, switch sidesPlank: 3-5 10-second repsBody Saw: 3-5 Reps
TRX for Spinal Fusion
More than 150,000 people undergo lumbar spinal fusions each year to help alleviate lower back pain. Want to find safe, effective exercises following spinal fusion? Take our quick assessment quiz to get a personalized training plan designed for post-surgery rehabilitation. If your or one of your clients is in the latter group, read on as Dr. Perkash addresses a question posed by a member of the TRX Community on whether the TRX Suspension Trainer could be used after undergoing spinal fusion surgery.
TAKE OUR TRAINING QUIZ
Question:
Can you address rehab using TRX related to spinal fusion? I am a trainer who is 11 weeks post op. I also have spinal disk degeneration. I use TRX regularly, and my surgeon agrees that TRX will be quite beneficial, as does my physical therapist. But I would like your opinion on whether using the TRX during my recovery would be a smart thing to do.
Answer:
Spinal fusion surgery involves “fusing” or connecting two or more bony spinal segments (vertebrae) using implanted hardware such as screws and rods, or with bone or synthetic bone products. Spinal fusion surgery can be performed in the lumbar spine for a variety of reasons, including elimination of pain from painful, abnormal motion (e.g., instability known as a spondylolisthesis), severe scoliosis, low back pain due to degenerative disc disease, as well as other entities such as fractures.
Many patients after lumbar spinal fusion surgery regain full function and have no specific restrictions six to 12 months after surgery. Others, however, continue to have limitations in their activities of daily living or recreational activities. For these reasons, it is impossible to accurately generalize about all patients with spinal fusion surgery. However, virtually all patients eventually benefit from an exercise program involving core stabilization exercises as well as cardiovascular exercises. It is important to discuss the timing and specific limitations of an individual’s rehabilitation program with the patient’s spine surgeon. Many individuals will eventually have no restrictions and can fully participate in all core stabilization exercises including using a TRX fully, while others may have limitations that the spine surgeon may impose either temporarily or permanently.
Many physical therapists, under the guidance of a spine surgeon or spine rehabilitation specialist, can teach patients specific exercises for the lumbar spine after surgery including applications with the TRX. I would encourage anyone who has had or is having spinal fusion surgery to consult with his/her spine surgeon for specific recommendations and limitations regarding his/her situation at any point in time. The most common path after surgery is a directed rehabilitation program under the guidance of a physical therapist during the first six to 12 months after surgery, followed by an independent home/gym exercise program indefinitely thereafter.
For those who have been cleared by their spine surgeon to participate in all activities without restrictions, the following TRX exercises may be appropriate to achieve the goal of core strengthening:
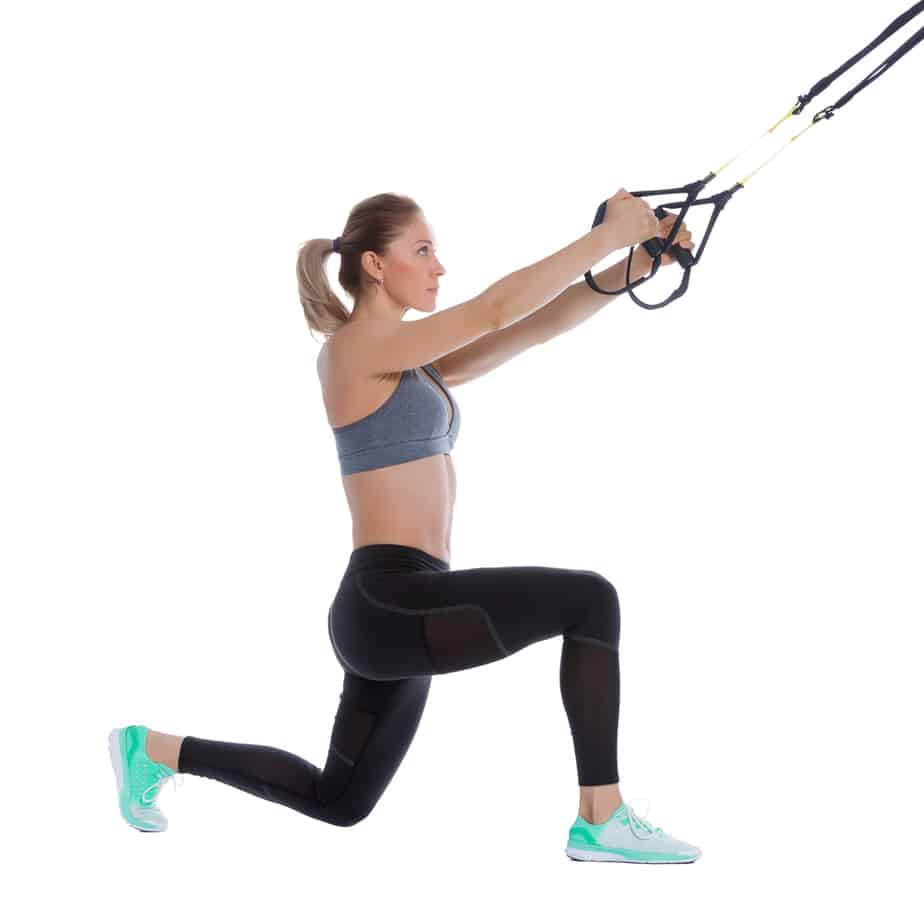
TRX Step Side Lunge
TRX Step Back Lunge
TRX Balance Lunge
TRX Crossing Balance Lunge
TRX Hamstring Curl
TRX Hamstring Runner
TRX Plank
TRX Side Plank (with or without Hip Drop)
TRX Crunch
TRX Oblique Crunch
TRX Squat
TRX Single Leg Squat
TRX Low Row
TRX Overhead Back Extension
TRX Standing or Kneeling Roll Out
TRX Hip Hinge (Wide Stance or Single Leg)
For more on how TRX Suspension Training bodyweight exercise is a safe, scalable and effective solution for you or your patients, visit our Sports Medicine page and download our White Paper. Also, be sure to check out our TRX Biomechanics: Healthy Back DVD, creating in partnership with Corrective Exercise Specialist Justin Price and featuring an easy-to-follow series of targeted stretches and strength training exercises to help you regain muscular balance in your back.
NOTE: Any medical information in this blog is of a general nature and not a substitute for the advice of a medical professional. If you need medical advice, see a doctor.