News
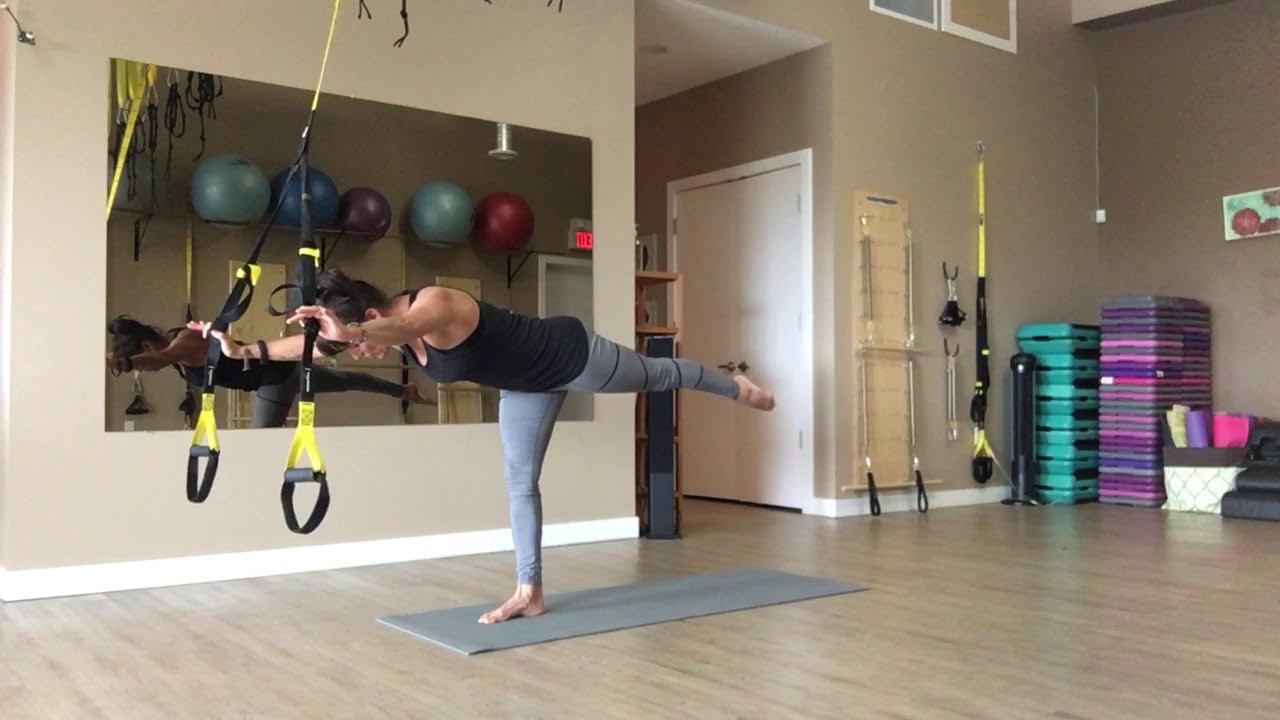
Rip Training Basic Principles
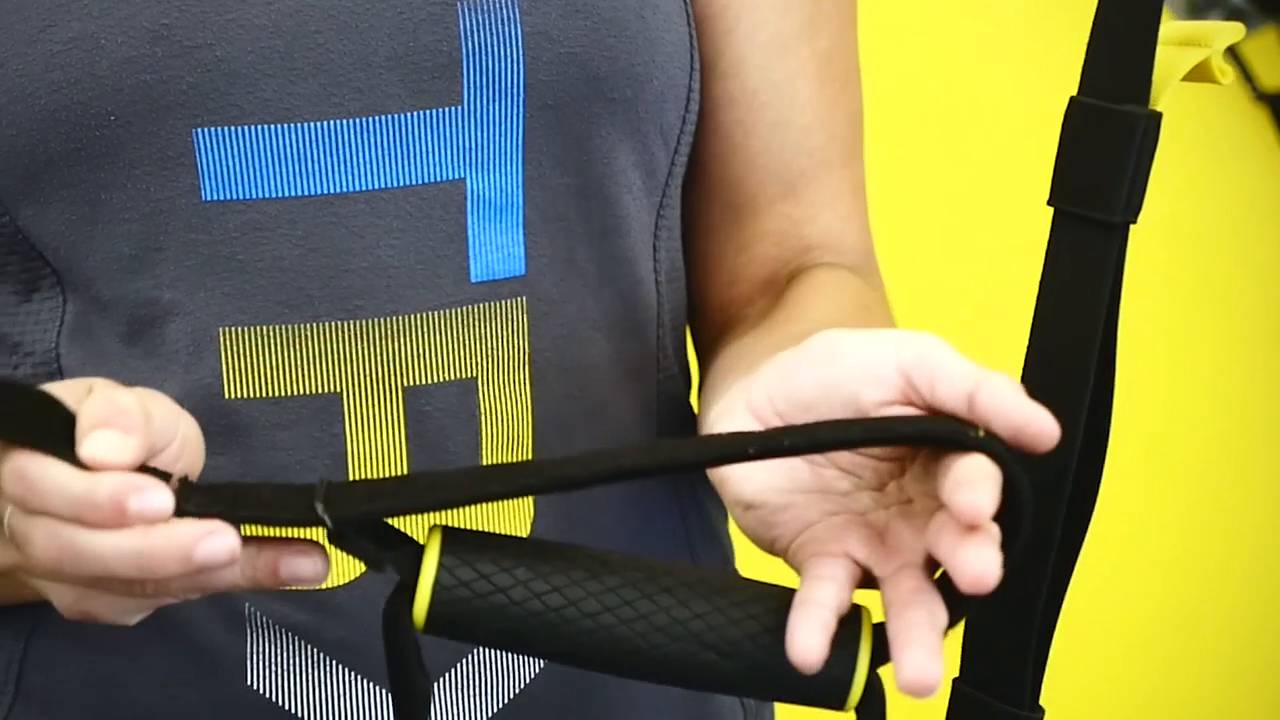
Learn how to progress and scale your TRX Rip Training workouts with TRX Director of Rip Training Pete Holman. Want to make sure you're using the right progressions for your level? Take our quick assessment quiz to get personalized recommendations for your Rip Training journey. In this video, we focus on the ability to control and produce rotational power, a unique component of Rip Training because of its utilization of asymmetrical loading and elastic resistance.
TAKE OUR TRAINING QUIZ
Rotational forces are seen in everyday life (i.e., lifting a child into a car seat) and in sports (i.e., driving a golf ball, hitting a tennis ball, etc). Depending on the task, it is necessary for the body to control rotation and maintain a neutral spine (planking) posture or produce rotation through the hips and thoracic spine. By controlling and producing rotation, we are able to mitigate the risk of injury to the back and reduce energy leaks, which helps with power transfer.
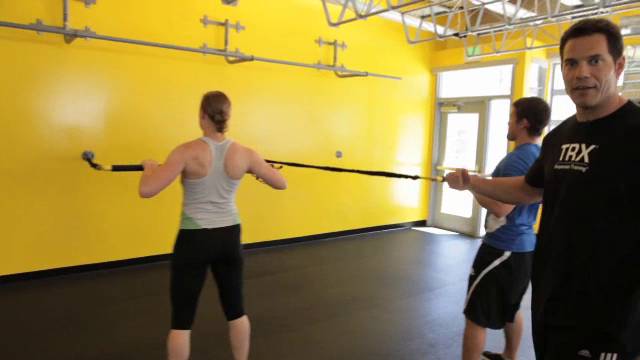
To illustrate how you can control and produce rotation on the Rip Trainer, creator Pete Holman shows us two exercises: the Rip Squat Row and the Rip Punch.
The Rip Squat Row focuses on controlling rotation in the transverse plane and emphasizes muscle recruitment in the posterior kinetic chain. This is a great exercise to help strengthen the back for activities of daily living and also targets muscles (i.e., lumbar erectors, glutes and hamstrings) that are necessary for deceleration during sport.
The Rip Punch focuses on the production of rotational force from the ground up. This exercise helps teach pivot mechanics, which is necessary for most athletes who use the hips to increase power transfer. The Rip Punch is also a move most fitness enthusiasts find aggressive, challenging and fun.
Purchase your Rip Trainer here!
Have you used the Rip Trainer in your workouts? Tell us about it below.
Preventing Low Back Pain
Ahhhh.... The trials and tribulations of back pain - perhaps the most elusive member of the “aches and pains” family. How it feels and where it comes from can vary drastically from person to person. It can be attributed to anything and everything from a singular event (like an athletic injury, a car accident, or pregnancy), to genetics, to a life of sitting all day. It can creep, linger, or strike you like a bolt of lightning. The point is, there’s a long list of types, perpetrators, symptoms, and unknowns. But the one thing we do know is that back pain is a real drag.
Fortunately, there are generic exercises for the relief and prevention of back pain - and the TRX Suspension Trainer lends itself to many of these. Not sure which exercises are right for your specific back concerns? Take our quick fitness assessment quiz to get a personalized plan that considers your current mobility and pain level.
TAKE OUR TRAINING QUIZ
Before we get started, there are a few important rules:
1. If it hurts, stop.
2. If these exercises exacerbate pain then you need to seek professional treatment.
3. Stay in "neutral spine" at all times.
What’s neutral spine?
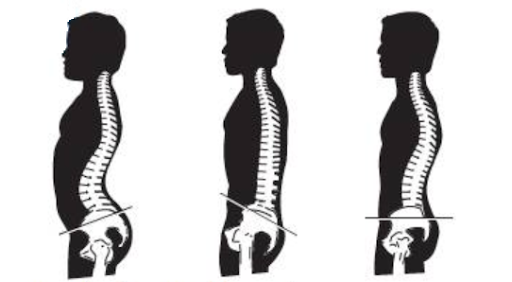
Neutral spine is when the curves of your spine are even and form a natural “S” shape. A neutral spine is the position of vertebral alignment and the safest and most efficient posture to begin and end movement from. All the exercises outlined are designed to test your ability to move or resist moving in different directions, while maintaining a neutral spine. The greater your movement ability in neutral spine, the more you will relieve back pain and prevent it from returning.
In the image below, the first profile represents “too arched”; the second, “too flat”; and the third one is just right. (Goldilocks anyone?)
Moving on....
4 TRX EXERCISES FOR BACK PAIN:
The following TRX exercises are designed to challenge your ability to keep in neutral spine by varying the direction of movement. These exercises are suitable for any back pain. Perform this program 2-3x per week to help relieve back pain, or add it at the end of your regular routine to help prevent back pain.
Let's get started. Here's what you'll need:
TRX® PRO4 SYSTEM
BUY NOW
TRX® HOME2 SYSTEM
BUY NOW
TRX® TACTICAL GYM
BUY NOW
1. TRX Standing Plank
This exercise trains the neutral spine and sets the standard for all other exercises to follow. Set your posture from the ground up by squeezing your thighs, butt, tummy and putting your shoulder blades in your back pocket for total body tension.
Tempo: Hold for 5 seconds, rest for 5 seconds, perform for 2-3 mins. Repeat 1-2 sets. Rest 1 min between sets.
2. TRX Inverted Row
This exercise trains the all of the back muscles without putting huge pressure on the spine.
Tempo: Down for 2 seconds, up for 2 seconds, and hold for 2 seconds.Aim for 6-14 repetitions for 1-3 sets. Rest 1 min between sets.
3. TRX Resisted Rotation
This exercise activates your spinal rotation muscles without rotating your spine, and so helps you to resist rotation.
Tempo: Out for 2 seconds, hold for 2 seconds, and return for 2 seconds. Repeat 12-15 times for 1-3 sets. Rest 30 seconds between sets.
4. TRX Quadruped
This exercise trains the small stabilizing muscles of the spine.
Tempo: Move one leg to horizontal and hold for 10 seconds. Alternate each leg for 10 reps each. 1-2 sets with 1 min rest in between.
To learn more about movement based training, check out TRX Academy, a progressive curriculum based on foundational movements.
About the Author:
Ross Eathorne is an experienced Personal Trainer who has specialized in corrective exercise since 1996. Ross’ interest in rehabilitation started because he did not want a spinal stress fracture sustained at age 15 to prevent him from competing and participating in sports. Since then he has completed many specialist courses and represented New Zealand in 10 World Sports Aerobics Championships, completed several ultra marathons, outrigging races and played veterans rugby. He has developed a series of apps that emphasize quality content and programming and has authored books on topical issues such as fat loss, movement and mobility.
Power Up with the Superhero Workout!
To prep for her new role as Wonder Woman in the upcoming Superman-Batman movie, Fast & Furious star Gal Gadot has been using TRX in her workouts to help her develop a super-human, on-screen physique. We thought we’d bring back one of our favorite superhero-inspired workouts from TRX Master Trainer Jonathan Ross so you could get in on some of the action.
Iron Man Squats (15 reps)Face the anchor point and grasp on to the foot cradles. With your feet hip-width apart, press down firmly onto the foot cradles as you lower down into a squatWolverine Lunges (10 reps low & 10 reps high) Standing facing away from the TRX with arms bent and palms faced down. Extend arms wide with palms faced out into a “Y” as you lunge forward. Press back to the start position and alternate feet.
Batman Cape Throw (8 reps per side)Stand facing away from your anchor point and put the TRX in single-handle mode. Grab onto the TRX with one hand and put the opposite knee on the ground. Stand and sweep your TRX arm over your head and return down to the original kneeling position with the TRX arm crossed over your chest, as if covering yourself with a cape.
Neo Row (6-8 reps per side) Fully shorten the TRX and put it into single handle mode. Face the anchor point. Keeping your hips and shoulders aligned lean back holding onto the TRX until your knees are bent at 90 degrees. Extend your arm out back over your head towards the floor. Drive up with your hips and press through your heels until you are back in the starting position.
Spiderman Crunches (5 reps)Put your toes in the foot cradles. Lift the hips so you are in push up position. Perform a push-up. At the end of the push-up movement, lift hips up and pull both knees to the elbows.
Morpheus Reverse Row (12 reps) Start facing away from the TRX. Grab onto the handles with arms extended back towards the anchor. Cross your arms behind your lower back stacking one handle on top of the other. Gently lean forward until your arms are fully extended and repeat.
Wonder Woman Flys (10 reps per side)Place your wrists in the foot cradles and face away from the anchor point. Bend your elbows at 90 degrees, palms turned inward make a fist with your hands. Lean forward, moving one arm out away from the center of the body keeping the elbow is in line with the shoulder and holding the other arm steady. Bring the arm back to the start position. Repeat other side.
Daredevil: Rooftop to Rooftop (6-8 reps per side)Put your toes in the foot cradles and face the ground in the prone position. Assume a push-up position where the tailbone is the highest point. Swing one leg out away from the center of the body while the other stays suspended and still. Alternate working leg.
Jonathan Ross, ACE Personal Trainer of the Year, Discovery Health Fitness Expert, TRX Master Trainer and creator of the TRX Super Hero workout, brings a fresh perspective on fitness to the industry (www.AionFitness.com). His personal experiences help him to create exercise strategies that deliver big results for clients.
Part 2: The Evolution of the TRX Foundational Movements - Rotate to Twist
If you read up on part one of The Evolution of the TRX Foundational Movements, you were introduced to our evolved TRX Foundational Movement pyramid, which introduced four new foundational movements: bend, twist, step, and crawl. You learned that understanding the movements--and what should be stable and what should be mobile when performing them--enhances your ability to coach clients in the gym to achieve results with the added bonus of helping them move better (and safer) in everyday life. We also discussed the inspiration behind this movement evolution and presented the first of the seven-to-11 movements, the Hinge to Bend.
If you missed part one of this series, you’ll want to click on over and give it a read as the info presented there will make it easier for you to digest what awaits you here, which is all about the Rotate to Twist.
Rotation Evolved
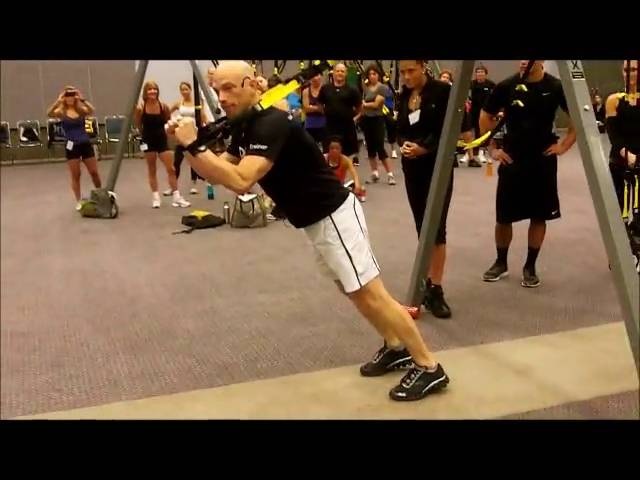
If you’re up to speed on the TRX Coaching Methodology and the TRX Foundational Movements, you’ll know that rotation—cylindrical rotation of the torso to minimize risk and emphasize hip power transmitted through the torso—has been a part of the lexicon from the beginning. The Power Pull (pictured below), for example, is a staple rotational TRX move. But rotation is a movement pattern that also exists frequently outside of the gym - for instance, something as simple as getting your kids out of the car, or moving the milk from the kitchen counter to the refrigerator, are common examples of daily rotational activities.
Now it’s time to expand on rotation to provide your athletes with a new challenge, or as we like to call it, Changing the Condition. Changing the Condition simply means that you apply the standards of similar exercises using different equipment, movement variations or unilateral iterations; adding reps; evolving the complexity; or increasing power, ie, Rotate to Twist.
What Is the Twist?
Twist refers to the dissociation of the transverse plane motion between shoulders and hips. It’s termed the "X-factor" in rotational activities like swinging a golf club, throwing a round-house kick, and other similar ballistic, rotation-based moves.
Twisting can also occur from the ground up such as when kicking a soccer ball or from the top down, like tossing a football. It is a way to further wind up the body’s muscle and fascia to create more power and is similar to what happens when a rubber band is stretched (being careful to over stretch the band). The greater the stretch, the greater the power when released. When a golfer is able to increase their X-Factor, the body’s viscoelastic properties are maximized, making it much easier to send the ball farther through the air. It could mean the difference between a birdie or a double bogey.
Twisting Considerations
In order to twist properly, the individual should possess mobility in the cervical spine and foot (midtarsal or transverse arch). Adequate mobility allows for greater power production and protects the sensitive mid-cervical spine and posterior ankle joints from damage.
Twisting should occur around a tight axis—excessive trunk sway in the sagittal and/or frontal planes will decrease power output potential. A golfer with too much side-to-side trunk shift will leak energy resulting in a less powerful swing.
The Keys to Proper Twisting
Now that you have a good understanding of the twist, we can dive into how to ensure that you and your clients know how to execute the movement safely and effectively. This is boiled down to two keys, “Share the Load” and “Utilize Progressive Loading.”
1. Share the Load
Twisting should occur throughout all segments of the body, from the top of the spine to the bottom of the foot. Unfortunately, due to postural dysfunction resulting from questionable movement habits and training methods, many people experience stiffness in areas that need to be mobile in order to twist optimally. To enhance twist potential, mobility training should emphasize the upper cervical spine, thoracic spine, hips, and the foot/ankle.
Side tip: If your mobility know-how is lacking, you might want to consider looking into some of our TRX Education courses. For instance, in our TRX Suspension Training Course you will have the opportunity to experience a mobility-based workout. Additionally, we will continue to layer in new mobility exercises into each progressive course’s exercise library.
Also, if you’re planning on heading to IDEA World 2019 this June, check the TRX Success Formula track. We have a great line up of sessions that will expand on this topic.
2. Utilize Progressive Loading
Smart movement progression is a vital component of any successful client or athlete training program. Keep in mind that with speed and power comes risk. Pushing too hard too fast can result in excessive soreness, pain, or injury. Make sure to use caution; allow the body time to adapt to increased forces and the mind to fully absorb the mechanics of how to properly execute them.
A Note on Skill Development
The TRX Foundational Movement System is based on the concept that movement is a skill that needs time and proper coaching to build. You can’t expect to pick up a guitar for the first time and bust out “Sultans of Swing.” Before you can do that, you need to understand notes and chords, and take plenty of time to practice and perfect them. The same goes for movement. To perform any movement—especially those that feature higher level condition changes like the Twist—the athlete must develop the skill through careful and measured progression. They should display rotational mastery before increasing the intensity with a Twist. Focusing on the development of human movement as the fundamental building block of fitness, performance, and durability is what drives our motto, “Make Your Body Your Machine.”
Check out the continued evolution of our TRX Foundational Movements where we introduce LUNGE to STEP.
-----
To learn more about movement-based training, check out our TRX Education schedule here.
Pilates Workout for TRX
Two of my absolute favorite ways to train are Pilates workouts and TRX Suspension Training.
For decades I was driven by Pilates – committed to a daily routine to strengthen my core, maintain flexibility, and develop overall total body coordination. Pilates helped me build a solid foundation from where anything else seemed possible. It is an amazing system for both general fitness and athletic performance.
Ten years ago TRX arrived on the scene and it quickly became an important addition to my toolbox. The straps not only helped me to off-load my bodyweight but provided great variation to my practice, additional challenges and extra fun! The TRX straps are a perfect addition to the Pilates repertoire. I find it a win win with my own routine and with my clients!
Here I share some simple variations using the straps with 6 classic pilates mat-based exercises; the Hundred, Roll Up, Shoulder Bridge Prep, Side Kicks, Swan and Spine Stretch Forward. Enjoy them!
These moves are ideal for all levels, and our quick fitness assessment can help you find the perfect starting point for your core training journey. Start today building your strong and flexible core – whether you're just beginning or looking to advance, you'll feel successful right from the start. Get personalized exercise recommendations that match your current fitness level and goals.
TAKE OUR TRAINING QUIZ
Straps: fully lengthened for all exercises
Hundred
Focus: endurance of the spine in flexion while pumping the arms and breathing for 100 counts.
Adjustment: Fully lengthened, heels in straps
Position: Ground facing anchor with head under anchor
Start: Arms long by sides hovering off mat, upper body flexed, legs in table top
Movement: inhale pumping arms for five counts, exhale continue pumping arms for five counts and extend one or both legs out – repeat for 10 times
Roll Up
Focus: segmental articulation of the spine from neutral through flexion
Adjustment: Fully lengthened,
Position: Ground facing anchor with head under anchor
Start: Hold handles, palms down, arms extended long overhead, legs ether bent or extended out straight
Movement: inhale, bend elbows pulling straps to chest exhale, roll spine off mat , lengthening arms and reaching over legs, keep spine round inhale, begin rolling back exhale continue rolling bending elbows then lengthening them back out to the start position - repeat for 10 times
Shoulder Bridge
Focus: glute activation with stability of the spine in neutral.
Adjustment: Fully lengthened, heels in straps
Position: Ground facing anchor with head under anchor
Start: Arms long by sides, legs in table top
Movement: inhale to lift hips up off mat exhale to lengthen one or two legs out long inhale, bring legs back to table top exhale, lower hips to mat- repeat for 10 times
Side Kicks
Focus: maintain torso stability while mobilizing the hip joint.
Adjustment: Fully lengthened
Position: Ground facing side
Start: both legs hinged at hip and extended out long, top foot in both straps (or go to single handle mode) bottom arm bent with head resting on arm or hand, top arm bent with hand on mat
Movement: inhale swing top leg forward two times pulsing the leg exhale, swing top leg back maintaining form - repeat for 10 times
Variation: to increase the challenge, lift torso up off mat when top leg swings back
Swan
Focus: segmental articulation of the spine from neutral through extension
Adjustment: Fully lengthened,
Position: Ground facing away from anchor with head under anchor
Start: Hold handles, palms down, arms extended forward, legs shoulder distance apart, laterally rotated
Movement: inhale, bend elbows rotating palm to face body exhale, pull straps toward chest, extend spine off mat inhale, lower the body back down, lengthen arms back to start position - repeat for 10 times
Spine Stretch Forward
Focus: stretching of the entire spine and hamstrings
Adjustment: Fully lengthened
Position: Sit facing the anchor
Start: legs extended long, feet under anchor, hold handles, palms down, arms extended long
Movement: inhale, press into handles exhale, flex spine forward reaching arms over legs inhale, stay for the stretch exhale, roll back to start position – repeat 10 times
All of these exercises are great for doing pilates with your TRX suspension trainer.
If you don't have a suspension trainer, pick one up today.
TRX® PRO4 SYSTEM
BUY NOW
TRX® HOME2 SYSTEM
BUY NOW
TRX® TACTICAL GYM
BUY NOW
For more inspiration for your next class, you can find pilates-inspired TRX workouts at TRX Training Club!
About the author: PJ O'Clair is a Senior Master course instructor for TRX® Training, a Master Instructor for Merrithew Health & Fitness and owner of ClubXcel and Northeast Pilates, an award winning STOTT Pilates(r) Licensed Training Center. She is the recipient of the prestigious IDEA “Program Director of the Year” award for 2008. PJ continues to be a sought-after speaker and consultant at fitness conferences and spas worldwide – and has written numerous articles for industry publications.
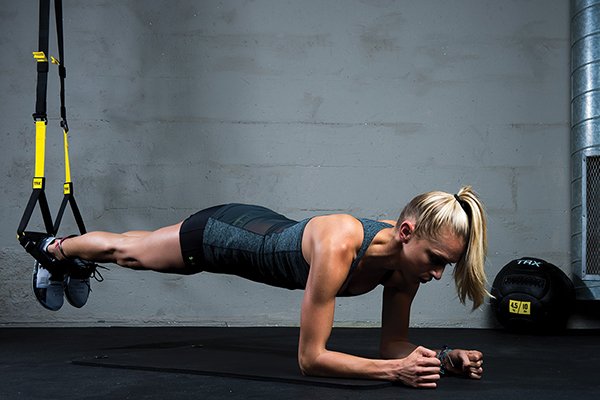
No Fooling: The Plank Is the Most Important Position to Master in TRX
Pop quiz: Which TRX Suspension Trainer exercises incorporate the plank?
(A)TRX Chest Press
(B)TRX Body Saw
(C)TRX Squat
(D)All of the above
(E)A and B only
(F)None of the above
The correct answer is D. Want to test your TRX knowledge further? Take our quick assessment quiz to find gaps in your understanding and get personalized learning recommendations. Now let's discuss why and bust a few TRX myths along the way.
TAKE OUR TRAINING QUIZ
Myth 1: You only plank when doing TRX abdominal work.
The TRX Suspension Trainer is an all core, all the time tool. You don’t want to simply go through the motions of a push (like a TRX chest press), or a pull (like a TRX row); you always want to start and finish each move with an active plank. To really nail that plank, it’s important to practice. Even before you incorporate your plank into your TRX Suspension Trainer exercises, you want to learn what “right” looks and feels like.
Myth 2: Holding a plank longer means that I’m getting stronger
This one’s firmly in the maybe category. According to Miguel Vargas, Training and Development Manager for TRX, how long you can plank is secondary to how well you can plank. Vargas says he would rather see people hold six perfect planks for ten seconds each than one sloppy plank for 60 seconds. If you can hold a perfect plank for a full minute, pat yourself on the back.
Myth 3: The length of my TRX Suspension Trainer straps doesn’t affect my plank.
To maximize each of your exercises, Vargas says you need to adjust the Suspension Trainer to the recommended length to achieve your full range of motion. When you’re doing a row, make sure the straps are fully shortened to find the proper angle for the move. (If the straps are too low, you could drag your shoulders on the ground on more difficult rows.) Conversely, when you’re doing a push or chest press on the straps, you want the straps to be fully lengthened so you can increase the load by getting deeper under your anchor point.
Myth 4: The angle (or vector) is the only variable in plank-based movements
What a lot of people don’t realize is that plank-based exercises on the TRX Suspension Trainer aren’t solely dependent on the load (i.e. resistance). You can also adjust your difficulty level by challenging your stability. If you’re doing a chest press and you’ve mastered the active plank, Vargas suggests raising one leg off the ground, or chasing your active plank with a single arm push, pull, or plank. As you play with those plank variables, you’ll discover that your core has to work harder to achieve the same quality of movement you executed with two arms or legs.
Myth 5: Planks don’t apply to TRX Squats
Surprise! Standing is vertical planking. Each time you drive back up to standing position in your TRX Squat, you are resuming your plank. That doesn’t mean that you need to squeeze your glutes and lats while walking around your home or office, but practicing those squeezes with your TRX Suspension Trainer will establish the pattern that your standing position at the start and finish of a squat is a plank. When you add load to your squat—whether it’s with dumbbells at the gym, picking up your kids, or accepting a heavy box from a courier, your body will know how to respond.
Myth 6: How I hold my feet doesn’t matter for a TRX plank
A lot of people overlook proper foot form once they place their toes in the foot cradles, but flexing the ankle and pushing your heels against the Suspension Trainer handles will improve your TRX Plank. According to Vargas, driving your heels against the handles mimics an active standing plank, and creates more stability. When your toes are pointed in the foot cradles, you can also fall into a dip, which can trigger lower back pain. Flexing the ankle supports proper form.
The plank is the basis of hundreds of movements in TRX and in life, which means that you’ll move and feel better if you take the time to perfect it.
Part 1--High Intensity Interval Training (HIIT) from Mike Boyle
Recently on his blog, world-renowned strength and conditioning coach Mike Boyle tackled a concept that some of you may be familiar with: high intensity interval training, or HIIT for short.
HIIT is a form of cardio exercise performed in short and intense bursts (intervals) to encourage fat loss. If you're serious about maximizing your time spent working out so you burn fat while building endurance, continue reading as Mike tells you how to HIIT.
Every fat loss article we read espouses the value of interval training for fat loss. The term high intensity interval training (HIIT) is thrown around so much that many people just assume they know what it is. However, among all of the recommendations I see to perform HIIT, very few articles contain any practical information as to what to do or how to do it. The focus of this article will be not why, as we have already heard the why over and over, but how. How do I actually perform HIIT?
To begin, we need to understand exactly what interval training is. In the simplest sense, interval training is nothing more than a method of exercise that uses alternating periods of work and rest. The complicated part of interval training may be figuring out how to use it. How much work do I do? How hard should I do it? How long should I rest before I do it again?
Interval training has been around for decades. However, only recently have fitness enthusiasts around the world been awakened to the value. The recent popularity of interval training has even given it a new name in the literature. Interval training is often referred to as high intensity interval training (HIIT), and it is now the darling of the fat loss and conditioning worlds. The truth is, you can also do low intensity interval training (LIIT). In fact, most people should not start with HIIT but LIIT. HIIT may make you vomit if you don't work into it.
Research Background
In case you have been in a cave for the last decade, let's quickly review some research. A recent study, done in Canada at McMaster University (often referenced as the Gibala Study after lead researcher Martin Gibala) compared 20 minutes of high intensity interval training, consisting of a 30 second sprint followed by a four minute rest, with 90 to 120 minutes in the target heart rate zone. The result was amazing. Subjects got the same improvement in oxygen utilization from both programs. What is more amazing is that the 20 minute program only requires about two minutes and 30 seconds of actual work.
A second study that has become known as the Tabata study again shows the extreme benefits of interval training. Tabata compared moderate intensity endurance training at about 70 percent of VO2 max to high intensity intervals done at 170 percent of VO2 max. Tabata used a unique protocol of 20 seconds work to 10 seconds rest done in seven to eight bouts. This was basically a series of 20 second intervals performed during a four minute span. Again, the results were nothing short of amazing. The 20/10 protocol improved the VO2 max and the anaerobic capabilities more than the steady state program.
Further evidence for the superiority of higher intensity work can be found in the September/October 2006 issue of the ACSM Journal. Dr. David Swain stated "running burns twice as many calories as walking." This is great news for those who want to lose body fat. I am not a running advocate, but we can put to rest another high intensity (running) versus low intensity (walking) debate.
Do the math. Swain states that a 136 pound person walking will burn 50 calories per mile and proportionally more as the subject's weight increases. In other words, a 163 pound person would weigh 20 percent more and, as a result, burn 20 percent more calories. This means that expenditure goes from 50 to 60 calories, also a 20 percent increase. Swain goes on to state that running at seven mph burns twice as many calories as walking at four mph. This means a runner would burn 100 calories in roughly eight and one half minutes or about 11 calories a minute. The walker at four miles per hour would burn 50 calories in 15 minutes (the time it would take to walk a mile at four MPH).
That's less than four calories per minute of exercise. This is less a testament for running and more a testament for high intensity work versus low intensity work. More intensity equals greater expenditure per minute.
In Part 2 and Part 3 of this series, Mike looks at primary ways to perform interval training and then examines the efficacy of performing interval training on various pieces of cardio equipment (treadmill, stationary bike, etc).
If you want your own HITT workouts to try, click here.
Mike Boyle is co-owner and content editor for strengthcoach.com, one of the world’s leading resources for performance enhancement information. He is Strength and Conditioning Coach with the US Gold Medal Olympic Teams in Women’s Soccer and Women’s Hockey and also for the Ice Hockey team at Boston University. The author of Functional Training for Sports and Designing Strength Training Programs and Facilities, Mike has appeared in well as over 20 instructional DVDs. He currently owns and operates Mike Boyle Strength and Conditioning, one of the nation’s first and most successful private strength and conditioning companies.
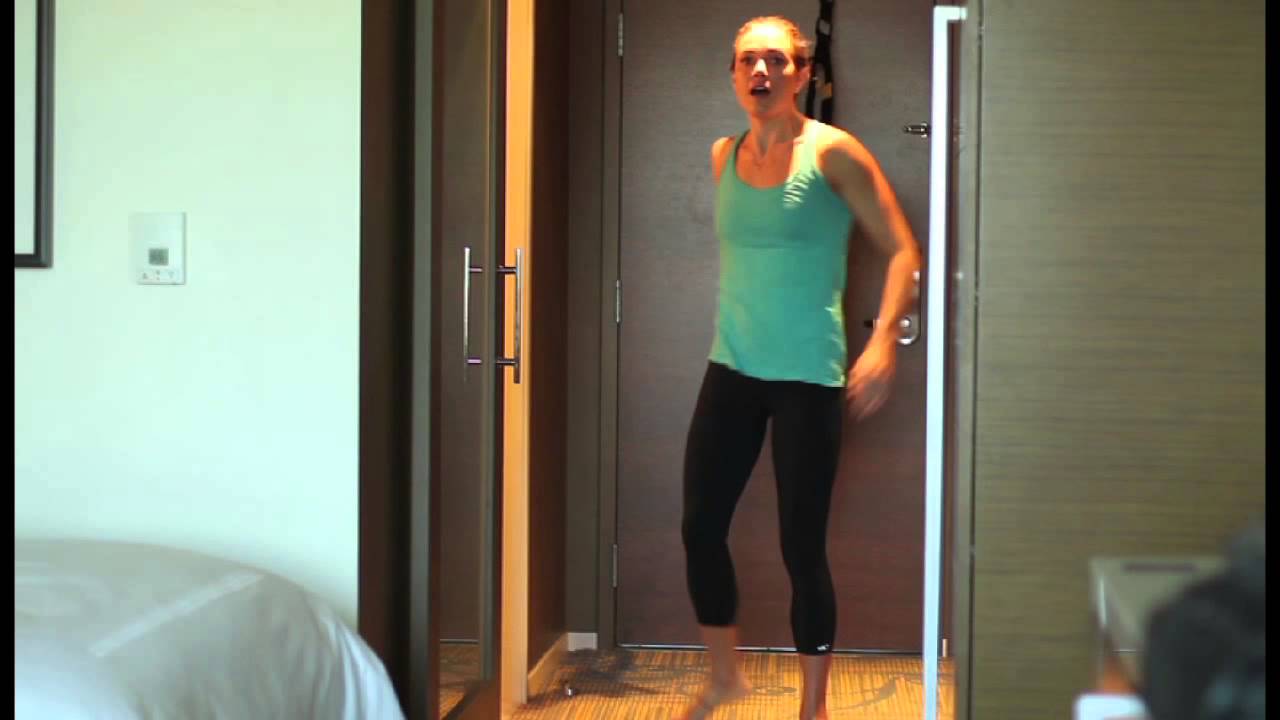
Natalie Coughlin's Hotel-Room Workout
Working out on the road can be challenging. You never know what kind of equipment or space you’ll have access to with the limited time that you have. In this video, Champion swimmer Natalie Coughlin shows you her favorite TRX exercises that you can perform right off any hotel room door. Don’t forget to pack your TRX whenever you travel, so that you’re training doesn’t have to take a vacation too.
NEW - TRX PRO SUSPENSION TRAINER
As a Senior Instructor at TRX, one of the perks of my job is getting to test new products with my clients. Over the past few months, I’ve been doing that with our new TRX Pro Suspension Trainer. To give you some context, the Pro has always been one of TRX’s premium products, due to its durability - built for high-volume use (believe me, this thing can take a beating), locking carabiner (so no one steals your straps), and the rubber handles that give you added grip when you’re turning up the intensity. What I’m trying to say, is the TRX Pro that we’ve always sold is the best Suspension Trainer out there.
Until now... Enter the NEW TRX Pro.
Our BEST just got BETTER!
UPDATE 1: ADJUSTABLE FOOT CRADLES (WITH ADDED PADDING)
I’ll start with, what I consider to be, the most game-changing update - adjustable foot cradles. Over the years, I’ve seen many a small foot go flying through the foot cradles during mountain climbers, TRX crunches, etc... This has always been a pain point. Those days are over. Now, the members of the “itty bitty foot committee” can easily and quickly adjust the size of the foot cradle and be on their way to the perfect plank.... And the same goes for those with big feet.
For all our yogis out there - and trainers who are teaching TRX for Yoga - the adjustable foot cradles will allow you and your students to comfortably and safely do any sort-of barefoot training. There’s also an extra layer of padding that feels oh-so-nice when you’re trying to achieve that yogi zen. So go on, kick off those shoes and get after it.
UPDATE 2: ANTIMICROBIAL HANDLES (w/ Microban® Technology)
Any germaphobes out there? Rest easy, we’ve got you covered (but not in bacteria ... okay bad joke;-). Some days I teach as many as six classes a day, and the straps will be handled by over 100 members. That’s a whole lotta germs—and a lot of sanitizing between sessions for me. With the new Microban antimicrobial technology infused into the handles, I feel a lot better about protecting my clients and my instructors — especially going into flu season.
UPDATE 3: PADDED TRIANGLES
At first glance, this may appear to be the most lackluster update, but I gotta tell you, doing a TRX sprinter start has never felt cushier (no more annoying rubbing on the forearms). Working your butt off on the straps can already be a painful experience (in a good way), no need to add discomfort to the mix.
UPDATE 4: FRESH NEW LOOK
We can all tell ourselves that it doesn’t matter how something looks, as long as it works well. But let’s be real, at the end of the day, looking good is always a nice little extra (why else would your clients let you boss them around for an hour? ;-). The new grey highlights, pops of yellow, and other little touches, look super slick.
So there it is in a nutshell, the new and improved TRX Pro Suspension Trainer. Once you start training with it, you’ll know what I mean when I say: TRX’s BEST just got BETTER.
-STAY FIT SON-
Miguel Vargas
TRX Senior Instructor
GET YOUR NEW TRX PRO SUSPENSION TRAINER TODAY!