News
The Best Fitness Gift for Grandparents
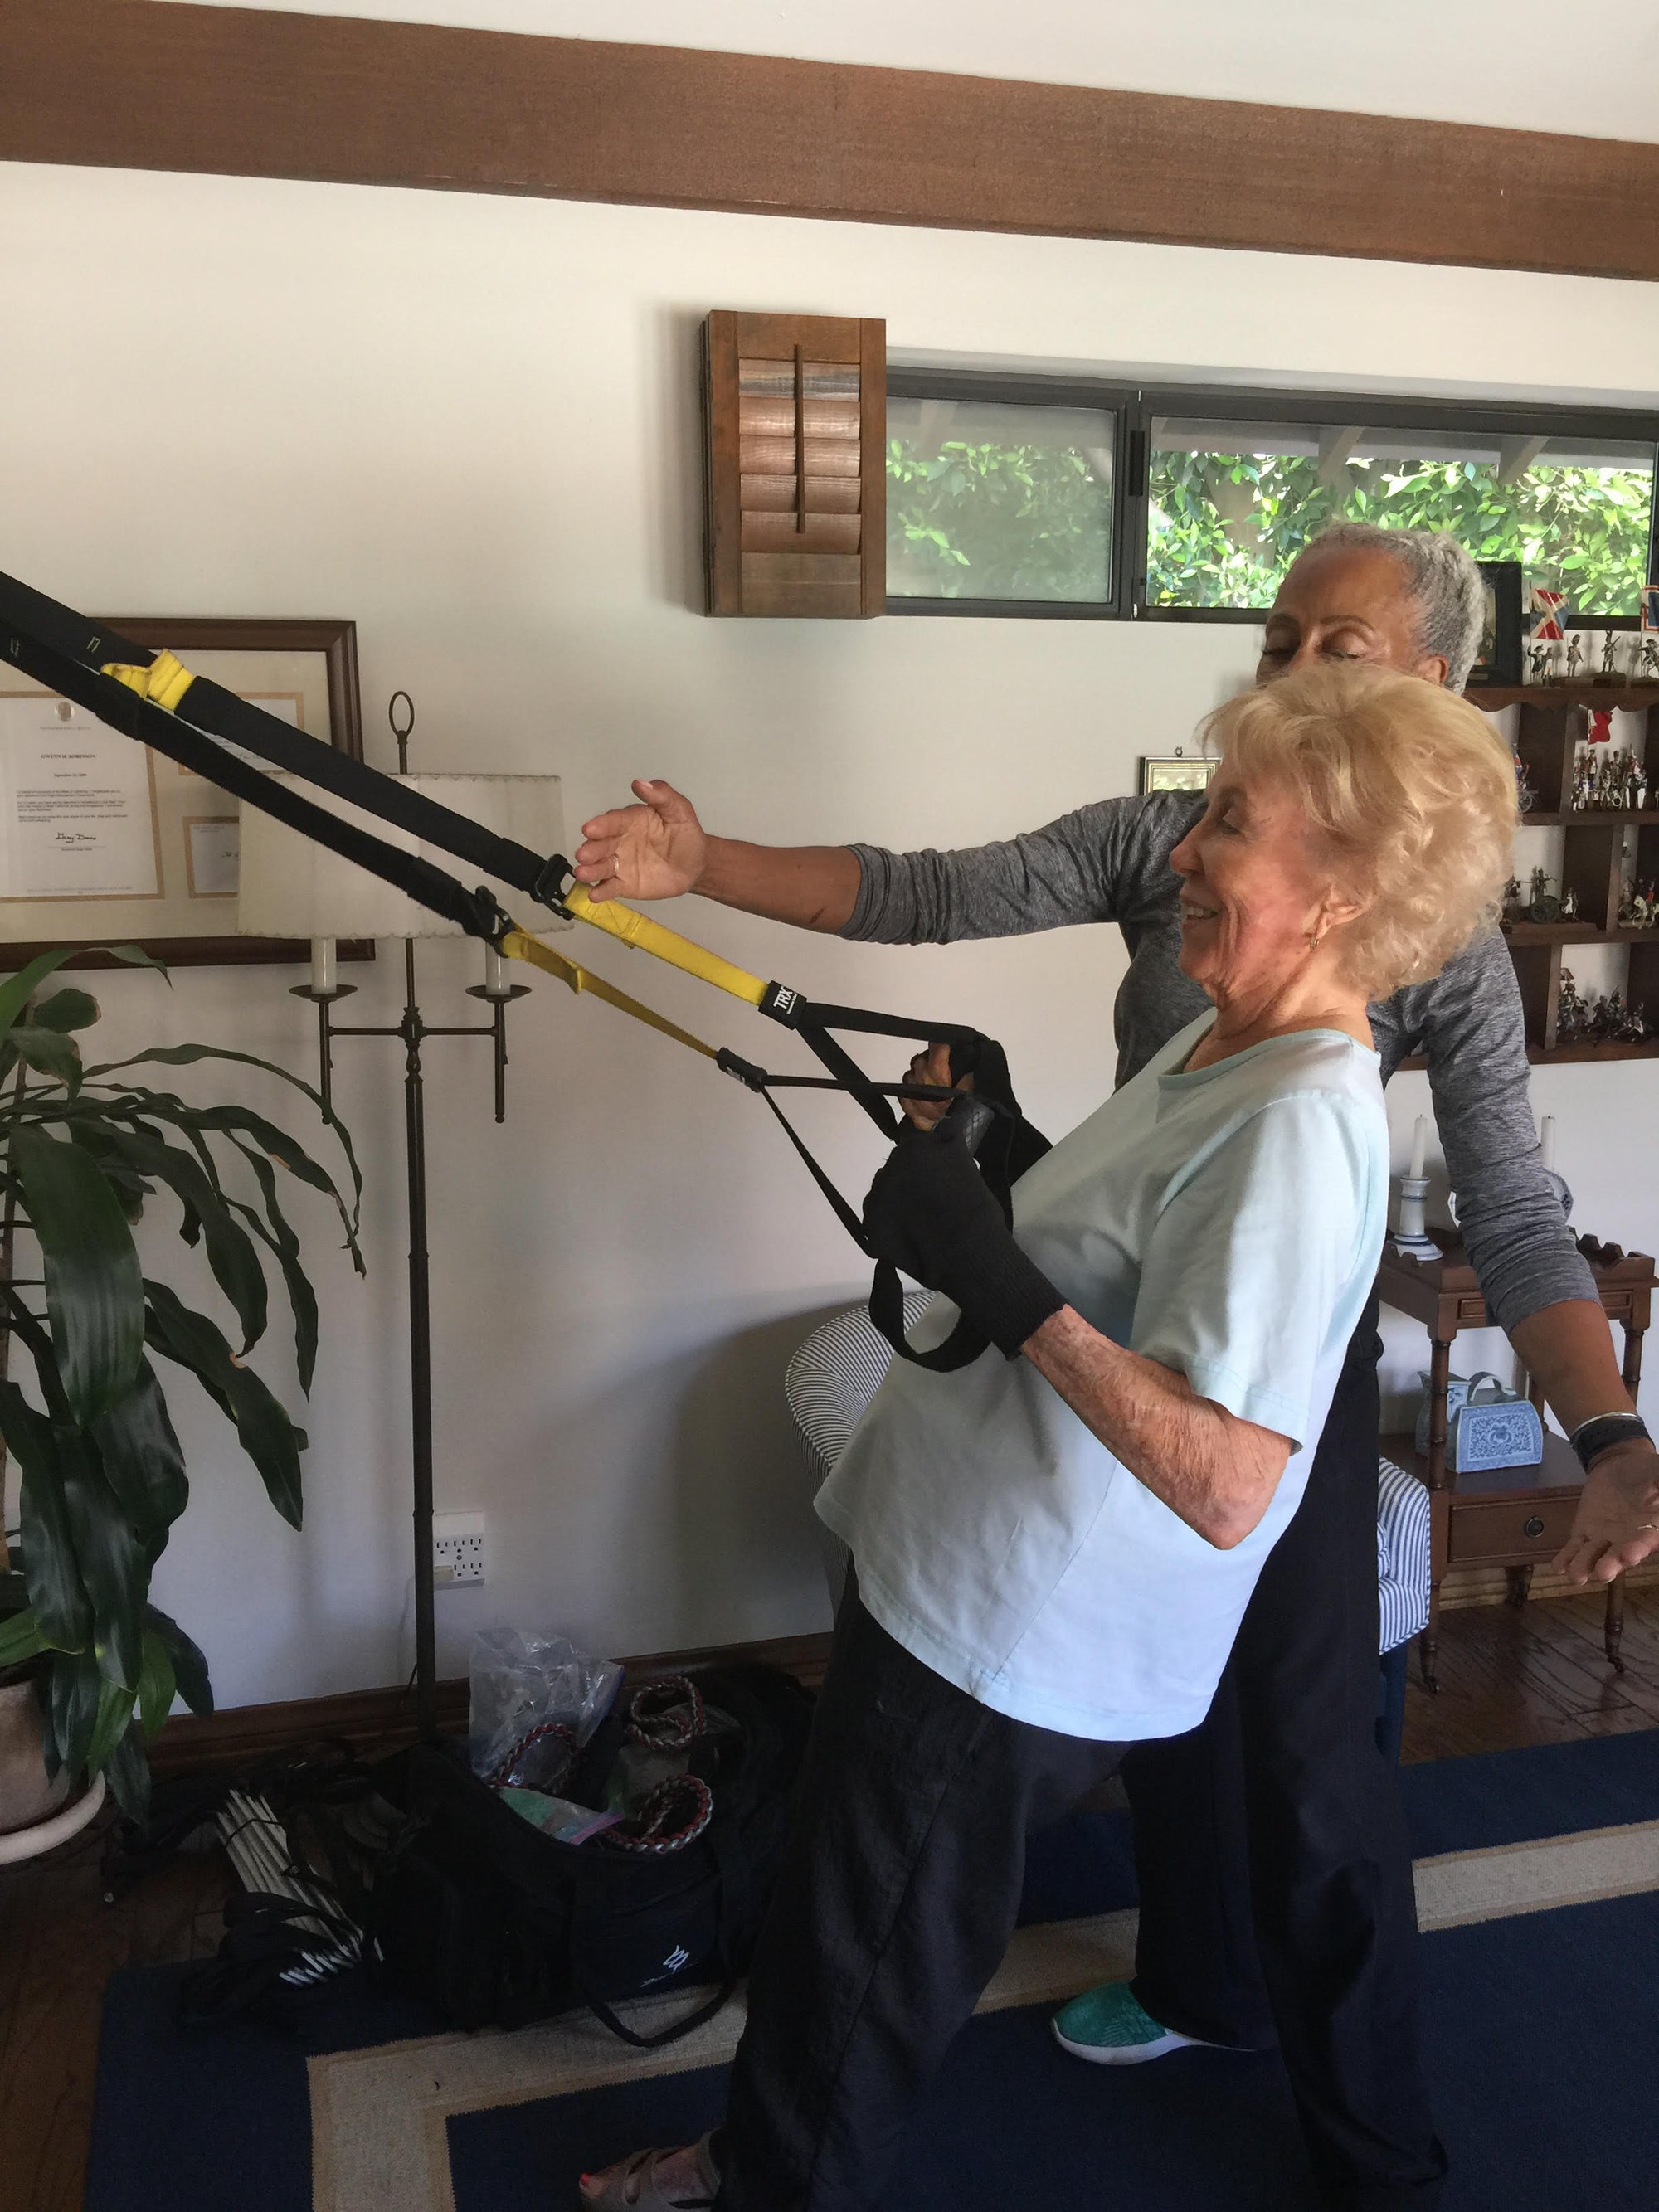
Selecting a gift for a grandparent is nerve-wracking. You want to find something useful, novel, and considerate that doesn’t create more clutter. And if it helps improve their quality of life? That’s a pretty satisfying bonus. It’s rare to find something that can meet all those criteria, but the TRX Suspension Trainer checks every box. Here are five reasons why the Suspension Trainer is the best fitness gift for a grandparent.
First, the Suspension Trainer saves time and money. TRX’s Home2 System comes with everything necessary for a full-body workout. It’s easy to set up on a door, tree, or pole, and—if you’re shopping for a tech-savvy senior—the TRX App is full of pre-programmed workouts to try with the tool.
Second, this is a compact, yet comprehensive tool. TRX fans love the Suspension Trainer because they can literally use it anywhere. It comes with a mesh carrying pouch, and it weighs less than two pounds, so it’s easy and practical to pack in a suitcase.
Third, the Suspension Trainer works for every athlete at every fitness level. It’s just as effective for someone trying to improve balance and mobility as it is for an 85-year-old Supreme Court justice who works out regularly with a trainer. (Yes, Justice Ruth Bader Ginsburg uses TRX in her workouts.)
Fourth, this is a “no excuses” tool. Let’s face it: cold or rainy days can interfere with the best of workout intentions. If your grandparent has a habit of skipping the gym, bring the gym to your grandparent. You don’t have to empty a room or drill a mount into a wall to set up a TRX home gym.
Finally, strength training is really important for senior citizens. It can delay age-related muscle loss, strengthen bones, improve mobility and function, prevent falls, and help combat depression and cognitive decline. A Wake Forest University study published last year found that strength training was more effective than cardio for older adults.
Grandparents are a gift, and you want them to live long, active lives. But good health takes effort and the right tools: As your grandparents age, the TRX Suspension Trainer can help them stay stronger and mobile longer. (TRX even has workouts specifically designed for older adults.) The Suspension Trainer is a present they’ll use time and again, which is why it’s the best fitness gift for grandparents.
And if you’re still shopping for other folks on your holiday list, check out the Ultimate TRX Holiday Gift Guide for more ideas.

5 TRX Skills for Training Beginners
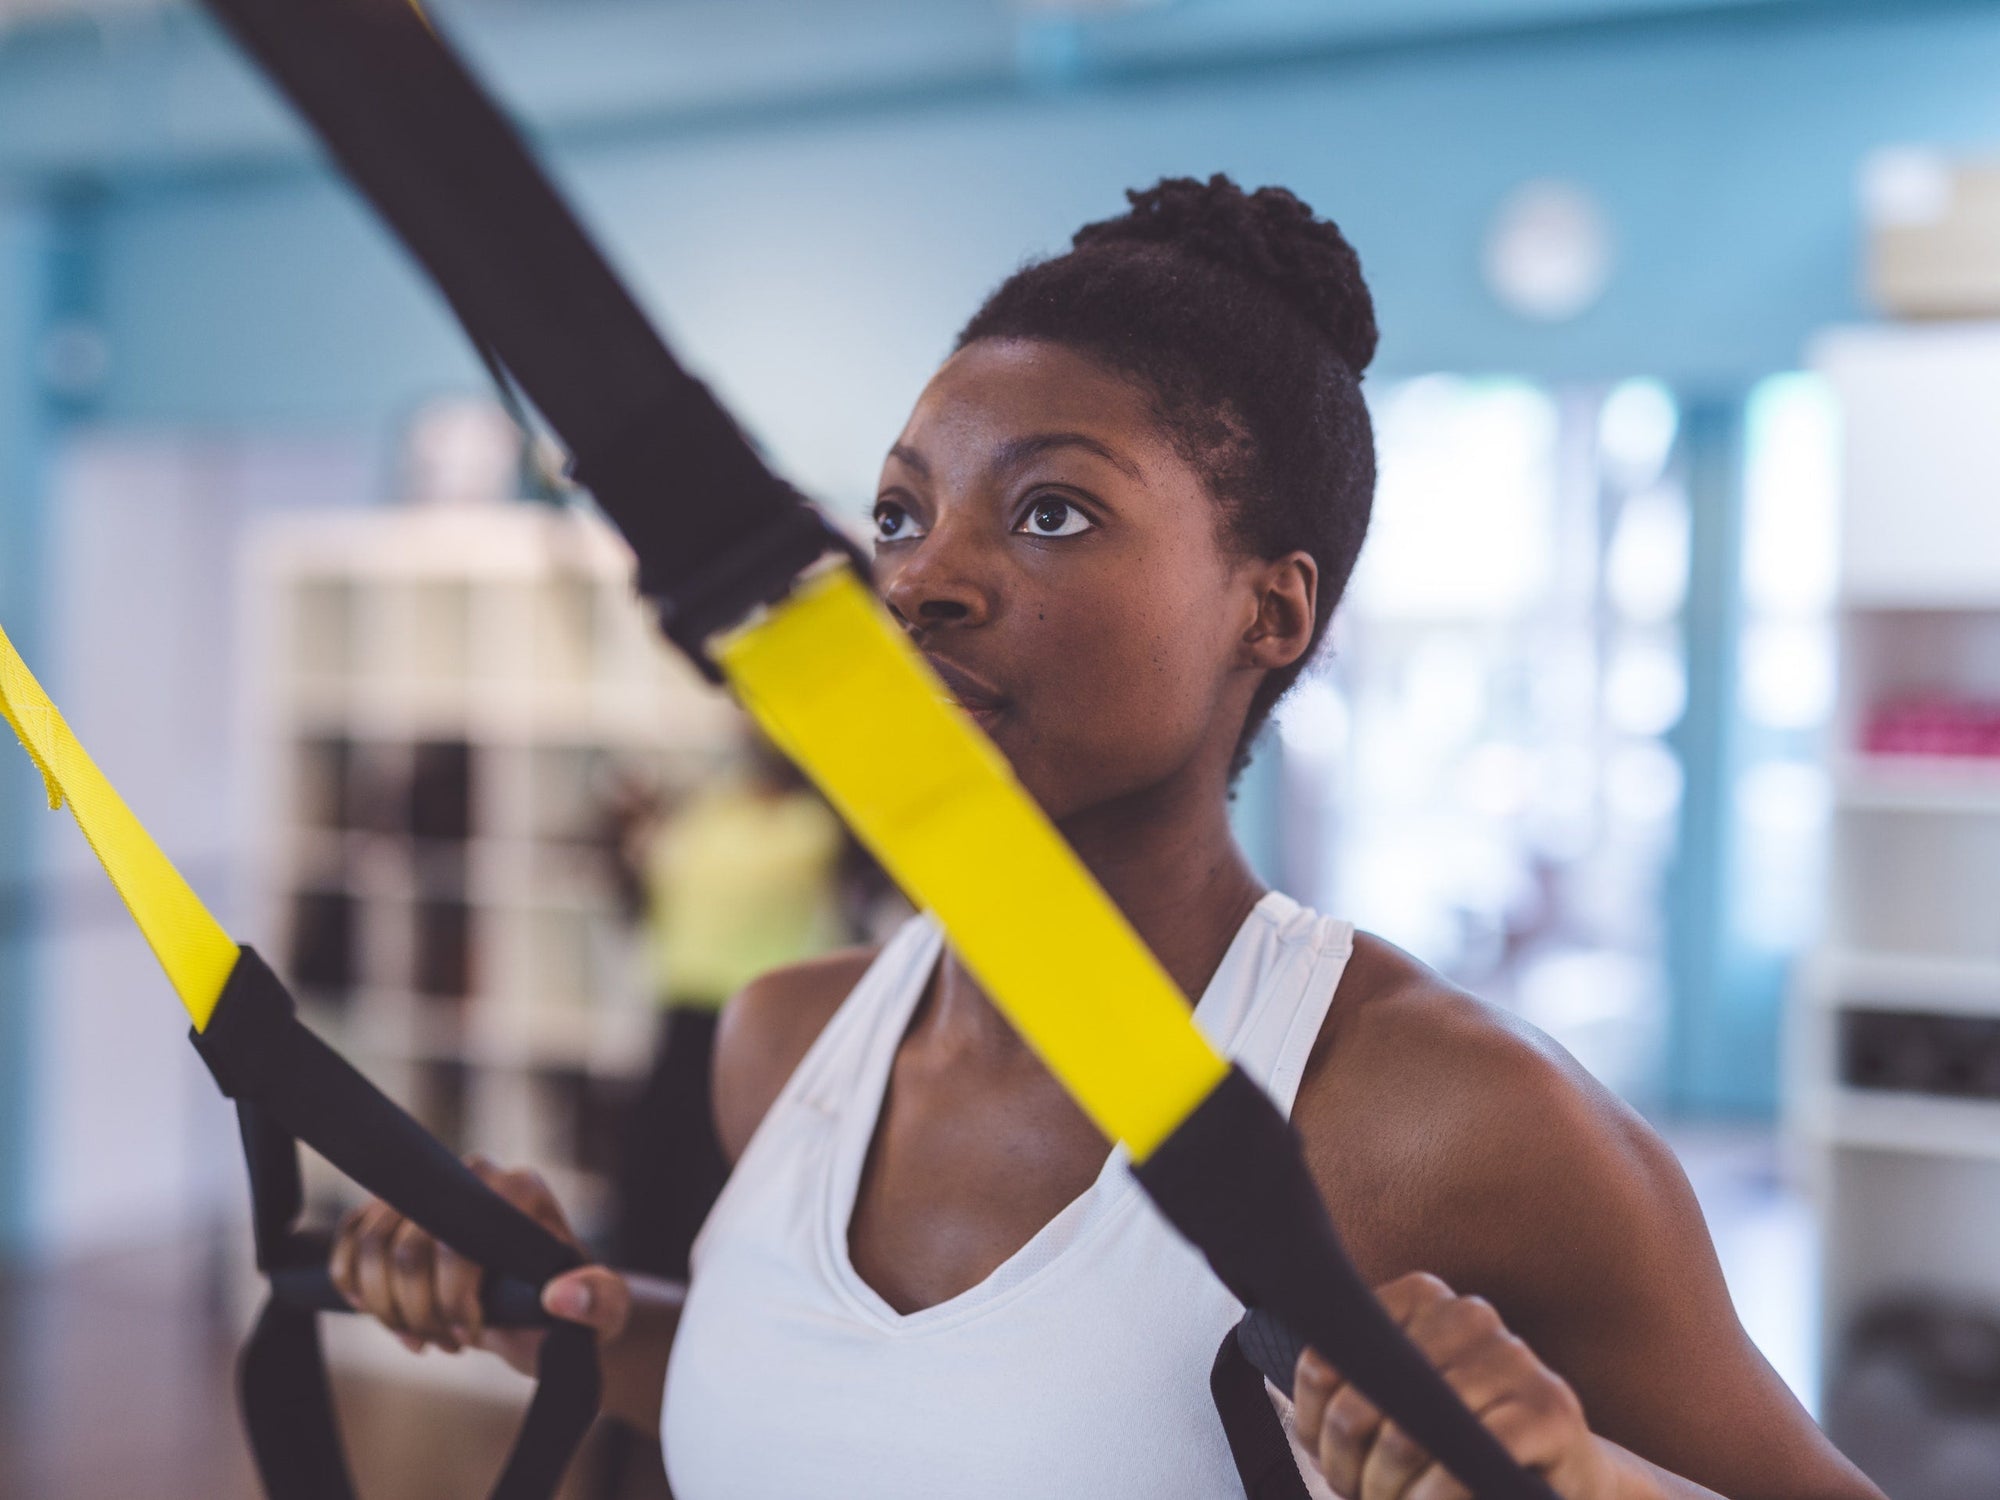
Teaching clients the fundamentals starts with reliable personal trainer tools that adapt to every skill level. When you start coaching a new client, it's important to make sure they have a handle on the basics. Take our quick form assessment quiz to get personalized tips for teaching these fundamentals. To help, we're going over five TRX skills every beginner should know to get the most out of their TRX Experience.
TAKE OUR TRAINING QUIZ
Adjusting the Straps
The TRX Suspension Trainer is the most versatile fitness tool on the market, but that doesn’t mean that every client intuitively understands how to adjust the straps. If you’ve ever taught a TRX group class, you know that even some long-time TRX devotees struggle with adjusting the Suspension Trainer.
Particularly if you’re working with clients virtually, take a few minutes to go over how to set up the Suspension Trainer, adjust the strap length, adjust the foot cradles, and place toes and heels in the foot cradles. Those basics will make transitions between moves smooth and stress-free.
TRX Low Row
The moving plank is at the core of most TRX exercises that start standing facing the anchor point. The TRX Low Row is one of the easiest ways to teach proper form for the moving plank because it targets lats, traps, and rhomboids—muscles that tend to be more developed, even in beginner clients.
In addition to teaching the moving plank, you can use the TRX Low Row to demonstrate how to progress and regress an exercise by adjusting the standing width and angle relevant to the anchor point.
TRX Squat
The Suspension Trainer can be a full-body fitness tool on its own, or it can be the training wheels equivalent for strength training—especially when it comes to squats.
Many new clients falsely believe they know how to squat, and correcting bad form can be challenging. (No client likes hearing they’re wrong.) Teaching Suspension Trainer squats gives you leeway to teach proper form because you’re working in a new modality. Establishing that technique early will not only pay off when you introduce variations on the squat, but also when your client attempts weighted squats off the straps.
TRX Chest Press
Much as the TRX Low Row is a great way to coach the moving plank for the standing facing the anchor exercises, the TRX Chest Press is the best introduction for exercises standing facing away from the anchor. In addition to playing with progressions and regressions, this is also a good move to demonstrate the offset stance for clients who are pregnant or coping with injuries.
TRX Plank
Want to give your new clients a benchmark challenge? Put them in a TRX Plank!
In addition to serving as the base component for a number of TRX exercises—like crunches, runners, pikes, and more—the TRX Plank is excellent for creating body awareness. It gives you an opportunity to coach your clients through the differences that engagement in different muscle groups can make to overall form.
Most TRX newcomers struggle with their planks in the beginning, so this is a smart way to help clients measure their progress. Time how long the client can hold a basic TRX Plank in your first session, then set a goal to increase that duration in each successive meeting.
Anyone can search the internet for a workout plan or download a list of exercises, but a trainer offers expertise and feedback on a client’s form. Coaching your clients through the Suspension Trainer basics at the beginning will give them a foundation for long-term success.
To learn more about TRX tips and tricks for coaching clients, check out TRX Education.

The 4 Best Kettlebell Exercises for Beginners
The biggest obstacle to breaking in new workout gear is usually deciding where to start. So let’s alleviate that decision paralysis right now. When you’re looking for ways to begin working with your TRX Gravity Cast Kettlebells, turn to these four beginner moves.
But first, Kettlebells 101
A kettlebell has more parts than you might expect for a solid chunk of metal, and learning what to call all of the whatsits will help you understand basic kettlebell exercises.
Think of the top grip of a kettlebell as a giant “C.” The center bar of the grip is called the handle, while the curves at the sides of the handle are known as the corners. The tips of the “C”—where the kettlebell connects to the bulb that accounts for most of the weight—are known as the horns. The horns connect to the bell, and the flat bottom of the bell is called the base.
TRX Kettlebells are gravity-cast with a smooth, powder-coated finish to ensure that the burn you feel comes from your workout, not from friction in your grip.
Speaking of workouts, let’s get down to business.
Hey! I want to do a Turkish Get-up!
Don’t we all?
Patience, young padawan. You have to nail the fundamentals before you progress into the advanced moves. It’s also important to remember that moving with a kettlebell may feel awkward when you’re getting started. That’s because a kettlebell is designed to engage in its own trajectory of movement that complements your movement.
Think of it like walking with a full glass of water: with each step, the water is going to engage in its own pattern of movement; maybe even slosh over the glass. Similarly, a kettlebell’s handle is meant to rotate as an axle inside your grip. One of the reasons that kettlebell workouts are effective is your body has to respond to and counterbalance the kettlebell’s independent momentum.
In other words, it’s best to start with the simple exercises to understand how exercising with a kettlebell feels before charging into the advanced challenges.
Let’s give it a go.
The Kettlebell Deadlift
Start with your feet hip-distance apart, and your TRX Kettlebell on the ground in front of your toes. Hinge at your hips, pushing your butt back as you do, and try to minimize the bend in your knees. Grab the kettlebell handle by the corners, and start your return to a standing position. As you straighten your body, you’ll be powering that lift through the posterior chain. (That’s the official name for the muscle groups in your backside.)
Continuing to grip the kettlebell by the corners, and repeat that hinge-and-extend motion. Focus on keeping your back flat and your shoulders pulled down and back. You don’t have to touch the kettlebell to the floor with each rep; if your hamstrings are tight, your terminal point for the deadlift might be around your shins or ankles. That’s okay!
Goblet Clean
In this move, you’ll change your grip on the kettlebell while maintaining fluid motion.
Start again with feet at hip-distance and the kettlebell slightly in front of your toes. Squat down and grab the kettlebell by the corners. Your palms should be facing your legs.
There are two elements to think about as you return to full extension: first remember to power that standing motion from your posterior chain.
Second, as you lift the kettlebell, use the momentum to propel your grip change. Drop your elbows toward your hips. As your elbows drop, your palms will slide to the horns of the kettlebell and lift the kettlebell in the process. (This is one of those exercises where the smooth finish of the TRX Kettlebell really pays off.) The kettlebell should be by your chest at the top of this motion.
When you repeat the exercise, dropping back into your squat, slide your grip back to the corners.
Dead Stop Swing
Start in your deadlift position: Feet hip-width apart, and the kettlebell slightly in front. When you hinge to grab the handle, your hands should be slightly in front of your shoulders.
To set the shoulders and the upper back, imagine you’re trying to snap the kettlebell handle in half. Hike the kettlebell from the floor into the backswing position, so the corners of the handle hit your upper thighs, just under your crotch. Pop your hips forward, swinging the kettlebell up to shoulder height, before letting gravity return the kettlebell back to your upper thighs.
Because this is a Dead Stop Swing, it’s a punctuated motion. The kettlebell trajectory for each rep goes floor, thighs, shoulder, thighs, floor.
Kettlebell Swing
Once you’ve got the hang of the Dead Stop Swing, it’s time to move on to the Kettlebell Swing. Start in your deadlift position. Hinge at your hips and reach forward to grab your kettlebell by the handle. Hike the kettlebell into the backswing position.
This time, the kettlebell’s trajectory will be a pendulum motion between the upper thighs and the shoulder. This movement is still being powered by your posterior chain, so focus on hinging and thrusting through your glutes and hamstrings instead of lifting with your shoulders.
All together, now!
You’ve got four kettlebell exercises for beginners to get your routine started, so why not combine them into a workout? Try this one on for size!
30 seconds: Kettlebell Deadlifts
15 seconds: Rest
30 seconds: Goblet Cleans
15 seconds: Rest
30 seconds: Dead Stop Swing
15 seconds: Rest
30 seconds: Kettlebell Swing
15 seconds: Rest
Repeat the entire kettlebell circuit for a second round, and you’ve got a solid workout in less than 8 minutes.
And if you’re ready for even more kettlebell instruction, check out the full library of on-demand kettlebell workouts from TRX Training Club. With more than 30 workouts (and counting), there’s always an option to keep your training on track. Never tried TRX Training Club? Your first week is free, so get started today.
The 5 Best Foods to Eat after a Workout
Studies show that eating the right foods within 30 minutes of a workout can reduce inflammation, replace glycogen stores for future workouts, and repair muscle damage. Want personalized nutrition recommendations for your workout routine? Take our quick assessment quiz to get a customized post-workout meal plan. While many people turn to processed recovery drinks to refuel, the best recovery foods come in the form of whole foods. Here are five of my favorites.
TAKE OUR TRAINING QUIZ
1) Eggs: Protein is critical when bouncing back from a workout, and eggs are a perfect source. In fact the quality of egg protein is the highest of any whole food product. They contain, with varying amounts, 13 essential vitamins and minerals. Eggs are one of the only foods that naturally contain Vitamin D, which is critical for bone health and immune function.
2) Cherries: Exercise naturally involves muscle damage, inflammation, and oxidative stress that often results in aches and pains. Tart cherries, which contain concentrated amounts of anthocyanins, seem to help with all three issues. Findings suggest that tart cherry juice has the ability to reduce muscle pain and weakness after intense strength training, as well as after long-distance running.
3) Ginger: Ginger has been used for centuries as a painkiller. It is a rich source of powerful antioxidants that include gingerols, shogaols and zingerones. It has also been shown to help decrease inflammation. In fact, a study in the Journal of Pain shows that ginger may aid in reducing muscle soreness. Athletes who ate ginger were found to experience less delayed-onset muscle soreness compared to those who did not.
4) Grains: You have probably have heard about the importance of eating carbohydrates before a workout, but consuming them after is equally important. Carbohydrates replenish your depleted glycogen levels, giving you energy and helping your body fight fatigue. Quinoa, oats, brown rice and other whole grains are top options.
5) Salmon: Research suggests that the omega-3 fatty acids found in salmon may help reduce post-exercise muscle inflammation. Specifically, it appears that they lower the amount of prostaglandin, a naturally produced compound in the body that can trigger inflammation. Additionally, salmon is packed with lean protein, which is essential in cell generation and promotes muscle repair. Looking for vegetarian sources of omega-3s? Walnuts, chia, and flax seeds are all good sources of these fatty acids.
Most people don’t realize the importance of refueling their bodies after a vigorous training session. My clients often tell me that they don’t feel like eating after working out. A subscription meal service like Sun Basket makes it easy to get a healthy meal on the table fast. Experiment by including some of the above ingredients in your post-workout meal. . . Your body will thank you when it's time for the next training session.
5 Great Recipes You Should Eat After a Work Out
Salmon with tomato ginger chutney and cardamom rice
Warm quinoa salad with sour cherries and shiitakes
Turkey ginger meatballs in shiitake mushroom broth
Paleo sour cherry and mixed nut granola
Steak and eggs with tomato cauliflower “rice”
Kaley Todd is Sun Basket’s registered dietitian and the culinary nutritionist. Her goal is to inspire consumers to adopt healthy eating patterns that are easy, attainable, fun and enjoyable. She provides the tools and guidance to make healthy eating convenient, affordable and delicious.
Do your next workout with our TRX equipment:
TRX® PRO4 SYSTEM
BUY NOW
TRX® HOME2 SYSTEM
BUY NOW
TRX® TACTICAL GYM
BUY NOW
Take It Outside: TRX Moves of the Week
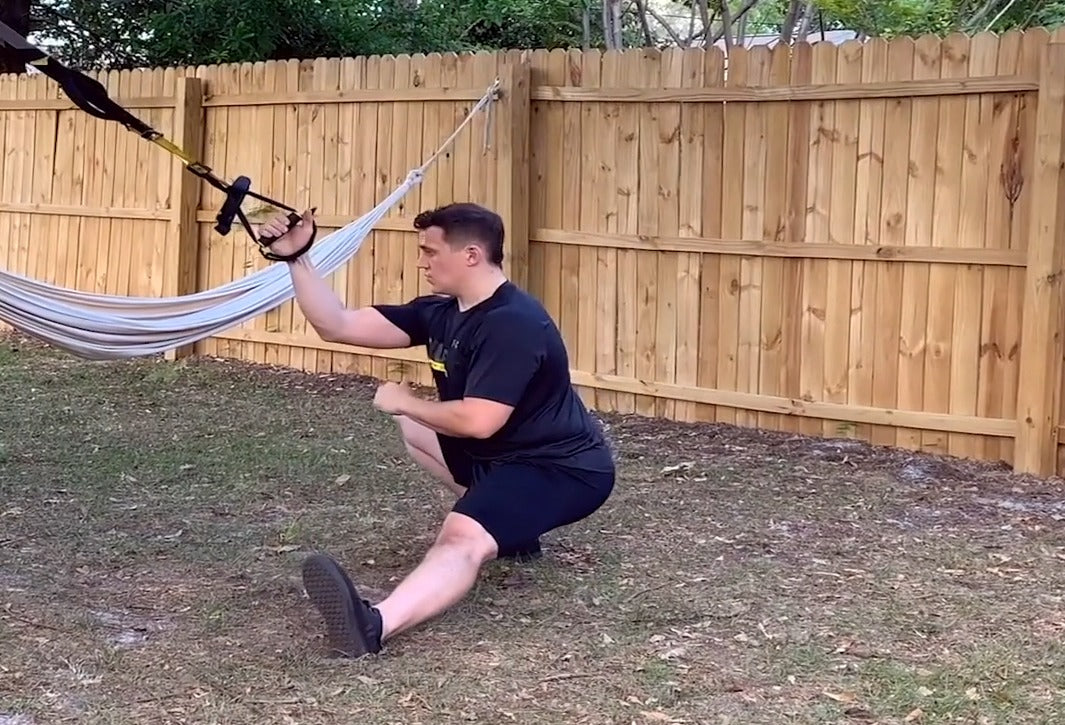
Ready to take your TRX Moves of the Week outside? This week, TRX Educator and Unconventional Strength owner Jesse Grund is setting up shop in his back yard to share three of his favorite TRX exercises.
If you’re a long-time fan of the TRX Door Anchor set-up, but you’re curious about venturing into the great outdoors, Grund is sharing everything you need to know about setting up your Suspension Trainer on a tree or basketball pole.
When setting up on a vertical anchor point like a tree, light pole, or basketball goal, take the strap, wrap it horizontally around the post or tree trunk, and thread the small-looped end through the wider loop of the Suspension Anchor. (Pro-tip: The Suspension Anchor is the short yellow strap. Don’t confuse it with the Door Anchor, which has black pillow-like cushion on one side.) Give the end of the Suspension Anchor a tug in the direction you’ll be working to ensure the anchor is properly secured. Clip the carabiner from your TRX Suspension Trainer through that narrow loop on the Suspension Anchor, and you’re ready to work.
Grund’s exercise picks this week are full body movements that guarantee effort from every muscle group: a TRX Overheard Squat to Y-Fly, TRX Squat to Bicep Curl, and the TRX Power Pull to Cossack Lunge. For all three of these moves, your TRX Suspension Trainer should be adjusted to mid-length, and you will stand facing the anchor point.
TRX Overhead Squat to Y-Fly
Grip the Suspension Trainer handles with your palms facing down, and your body locked in a standing plank. To increase the weight-load, take a step forward; to reduce it, take a step back. Keeping your arms and body straight, pull the handles overheard, so your hands are reaching straight above you. Next, with your upper body and core engaged, drop into a squat. While you lower and raise up from the squat, keep your arms straight above you; don’t release your upper body tension. Once you’ve returned to the standing position, lower your arms down to chest level, and repeat the move.
TRX Squat to Bicep Curl
For this move, Grund is keeping the squat, and swapping out the Y-Fly for a TRX Bicep Curl. Once again, start with straight arms and your palms facing down. This time, you’ll begin by bending your knees and dropping your butt toward the ground for your squat. Keep your weight planted in your heels, and use your glutes and hamstrings to drive back up to your standing position. Once your legs are straight, flip your palms up toward the sky, and—keeping your elbows high and steady on an imaginary shelf—pull the handles toward your temples or ears before gradually releasing back down to straight arms. Remember, your body should remain in a straight line from your ears to your hips to your heels while you do that bicep curl. Flip your palms back to the ground to repeat the combo.
TRX Power Pull to Cossack Lunge
Convert your Suspension Trainer to single-handle mode by threading the free handle through the triangle of the handle you’re using. Start with your single handle in your right hand, your hips squared to the anchor point, and your right arm fully extended. (For this move, pay extra attention to your core engagement to keep your hips from rocking.) The first half of this move is a single-arm row. While executing the row with your right hand, you’ll reach your free left hand to the top of the Suspension Trainer. Your right elbow should remain close to the right side of your rib cage through this move.
As you lower down from that Power Pull, keep your left heel planted and step your right foot out to the right side. Sink down on the right leg, while keeping the left leg straight for a side lunge. Planting your right foot into the ground, drive back up to your standing position, and bring the right foot back to its original position before repeating the rep.
Don’t forget to balance out the sides by repeating the TRX Power pull to Cossack Lunge on the left side. Remember, when you’re holding the handle in your left hand, your right heel will stay planted and your left foot will step to the side for your lunge.
Inside or outside, TRX is here to challenge you to stay healthy and strong. For more moves from Jesse Grund and TRX pros from around the world, be sure to follow TRX Training on Facebook and Instagram.
Summer HIIT Workout: TRX Summer Salutation Series
Crank up the heat on your summer body with this short, sweet and sizzling-hot HIIT workout you can do anywhere. Excellent for anyone who doesn’t have much time but still wants to get great results, this high-intensity interval training workout gets your heart rate up and your waistline down.
Perform each exercise for 60 seconds resting only to transition to the next exercise. Perform the entire sequence one to three times through.
TRX Sprinter StartStand facing away from the anchor point holding the handles with your hands next to your chest and the straps under your arms. Walk your feet back until your body is at a 45-degree angle. Reach back with one leg until your working leg is bent at a 90-degree angle. Drive through the ball of your working foot to return to the start.
TRX Inverted Row Face the TRX Suspension Trainer with your chest directly under the anchor point, holding on to the handles with your palms facing each other. Bend your knees to 90 degrees, brace your core and squeeze your glutes. Draw your shoulder blades together and use your lats to pull your body up until your hands are at the side of your rib cage. Slowly lower your body back down to the start position.
TRX Hamstring RunnerLay on your back with your heels in the foot cradles, directly under the anchorpoint. Press your heels down and brace your core to lift your hips up. Imagine your are performing a plank on your back. Use your hamstring to pull one heel toward your butt, while keeping the other leg straight. Engage your core the entire time. Send your heel back to the start position in one slow and controlled motion and repeat on the other side.
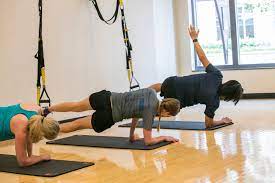
TRX Atomic Push UpStart in a pushup position with your feet in the foot cradles of the Suspension Trainer, directly under the anchor point, and your hands under your shoulders. Brace your core and perform a pushup. When you reach the top of the push up, pause for a moment and perform a TRX crunch, drawing your knees toward your chest and pikeing your hips up slightly. Pause for a moment at the top, then lower your hips back down and straighten your legs to return to the start position.
TRX SkatersStand facing the TRX Suspension Trainer holding the handles with both hands in front of you and your feet together. Jump to your right side and land on your right foot. Control your momentum by letting your knee bend as you land. Hop rapidly from side to side.
Click here to get more great HIIT workouts
HIIT workout with the TRX Rip Trainer
High Intensity Interval Training on the TRX
Part 1 High Intensity Interval Training (HIIT) Workout from Mike Boyle
Surf Stronger with TRX Training
With the Rip Curl Pro Search taking place at San Francisco's Ocean Beach this week, we had a chance to speak with Surf Stronger head coach Scott Adams who's been at the competition to see all the action. Take our quick surf fitness quiz to get customized exercises for improving your performance in the water. Surf Stronger is the leading force in surf specific strength and conditioning programs, and Adams, a former collegiate runner, Ironman competitor, certified strength and conditioning coach, and avid surfer, is a huge proponent of the TRX Suspension Trainer for enhancing performance in the water.
TAKE OUR TRAINING QUIZ
“The TRX is perfect for surfing because it’s such a bodyweight based dynamic movement sport,” Adams says, “practically every exercise is going to involve something that will benefit you, with either a core demand or an aligning of the body.”
The face of competitive surfing has changed. Five years ago when Adams was just starting Surf Stronger, it would take some serious convincing to get any surfer to “train” for surfing, but as the level of competition has risen, so has the necessary level of athleticism. These days, Adams says most of the top pros are incorporating some sort of auxiliary work. Adams’ brand of functional strength training for surfing specifically incorporates movements that map to and compliment the way the body is going to move while surfing, instead of isolating a specific muscle group.
“[You’re] not segmenting the body but using the body as a whole, as resistance, and then incorporating dynamic movements.” He likes using the TRX because he says it increases proprioception, lighting up the neuromuscular pathways that his athletes use in the water.
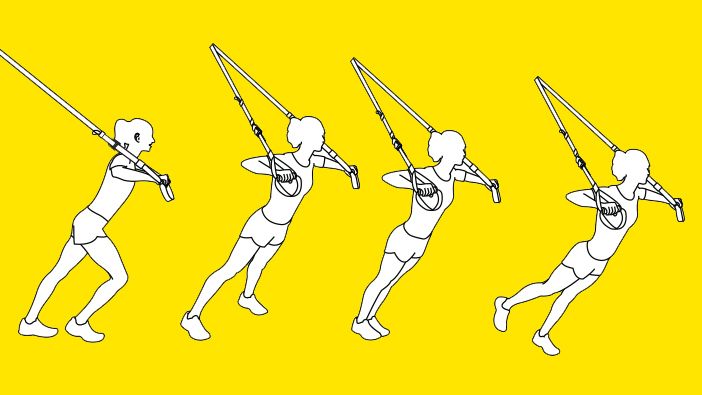
One of Adams’ favorite TRX exercises is TRX Power Pull, which he has modified to incorporate a squat at the bottom. “With surfing, there is so much compression and decompression of the legs. This exercise maps directly to the way you generate speed or land maneuvers while you’re surfing, by compressing the body and then decompressing up the face of the wave,” This movement engages the transverse plane with rotational resistance, which is similar to the way the body is loaded while performing a powerful bottom turn. At the top of the TRX Power Pull, you are incorporating the lats and shoulders, which translates well to paddling and popping up.
Another benefit Adams sees to TRX Training is that virtually every exercise requires bodily alignment and stabilizing from the core in order to remain balanced. Once an athlete has mastered the basic progression, he can instantly challenge his balance by altering his stability, usually by lifting up an arm or a leg. Adams will often have his athletes perform stability work on the beach as part of a warm up before a session for preactivation.
Surfing is not only a sport that requires core strength, stability and explosive power, but also muscular endurance, especially at the elite level we have been seeing at the Rip Curl Pro Search. A typical ASP tournament lasts several days, during which competitors will surf in multiple heats. Adams doesn’t directly train this endurance in a traditional way, by incorporating a cardio-endurance element (like swimming, biking, or running) rather he builds their durability with functional strength training on the TRX. The result is that they are less taxed while surfing and then able to stay in the water longer.
“A well trained surfer can surf more.” Adams says, “You can surf longer sessions, surf more often, and catch more waves. Ultimately, if you can surf more, you will get more time to hone your surfing skill and that is what will make you a better surfer. We sum it up with our phrase: Better fitness equals better surfing.”
The TRX Suspension Trainer is uniquely beneficial to surfing.Buy your TRX Suspension Trainer here.
Stability Principle Progressions, Ask the Professor
Strength Performance Network recently caught up with Chris Frankel, TRX Director of Human Performance at the 2010 NSCA National Conference in Orlando, Florida. In the video, Chris provides a great example of how to break down a standard movement (here, the TRX Chest Press) and challenge various muscle groups simply by making a few modifications to your foot position.
This is what we call the Stability Principle™, which involves the relationship between your center of gravity (COG) and your base of support. Short definition: Stability is maximized with a large base of support and the COG positioned in the middle of the base. As the base of support decreases or the COG moves outside the base of support, stability decreases.
First ProgressionChris illustrates the Stability Principle™ by having the athlete first perform a TRX Chest Press in an offset stance. If you're new to exercise or working with an individual who is deconditioned or unstable, this should be the starting position. Using an offset stance during the TRX Chest Press puts the emphasis on the lower body exercise. If you change your mental approach to the movement, you can make this an upper body exercise that puts more emphasis on your chest, shoulders and arms.
Second ProgressionTo increase resistance with more stability, bring the forward foot back into a wide stance. This is the second progression. The body angle is in a deeper position, and a wide stance provides good stability while engaging the core further.
Third ProgressionTo decrease stability at the same body angle (resistance), bring the feet close together for the third progression. Now the COG rests on a smaller base of support, and active core control is required to maintain stability.
Fourth ProgressionThe last progression is a single-leg stance, which reduces support and is appropriate for more advanced users. Many people find the movement easier to perform on one foot or another. It’s important to note these discrepancies and work to correct them. For all of the progressions, experiment with foot placement until you find the optimal range of movement and resistance level.
By using Stability Principle and a four-step progression as outlined above, Chris shows us how you can take what is typically just a chest exercise and turn it into a core and hip exercise, with an additional focus on resisting rotation. You can apply this approach to any Suspension Training bodyweight exercise.
Get your TRX Suspension Trainer here.
As the resident TRX Professor, Chris Frankel draws from over 25 years of experience as a strength and conditioning coach. He earned an MS in Exercise Physiology from the University of New Mexico, where he is currently completing his doctorate in Exercise Science. Before taking the position of Director of Programming at Fitness Anywhere, Chris was an instructor in the Department of Health, Exercise and Sport Sciences at the University of New Mexico.
Slam Your Way Into Circuit Training
TRX Training
“Aren’t they the same thing as medicine balls?” asked the unassuming gym-goer on more than one occasion. Quite the contrary. As many of us know, Slam balls are a perfect addition to your cross training gear collection for building explosive power and endurance when the rubber hits the road [errrr gym floor].
Originally referred to as “d-ball” for dead ball, slam balls literally drop dead when slammed on the ground. Thus, slam balls add an additional element of work to your training, as you have to hinge, squat, and thrust the slam ball back up off the floor, whilst maintaining a strong core and proper form. For these reasons, it is no surprise that slam balls have become a popular addition to the rapidly expanding high intensity training (HIT) programs that are popping up everywhere.
Below are some fun and effective exercises that can be done on their own or integrated into your circuit workouts.
Front Slam (slam ball’s primary use): Simply pick the ball up and slam it to the ground. When performed correctly, this movement engages your whole body and is the perfect exercise for building speed and explosiveness. We like to use this move to teach deceleration, like landing from a jump. Just picture your worst enemy and blow off some steam.
Start with the ball on the floor between your feet; body in an athletic “ready” stance, feet about shoulder width apart
Keeping a neutral spine, squat down and pick up the slam ball
As you come up from your squat, use strength in your legs and hips to thrust and push the ball above your head - reach as high as you can, elbows fully extended, ball directly overhead and momentarily find your tall plank.
Initiate the move by driving your hips back and slam the ball down to end back in either a hinge or squat position, you can hold this position for a second to check form, you don’t have to worry about the ball bouncing back up and hitting you in the face!
Keep the core engaged and spine tall as you pick the ball up from the floor and repeat
Slam Ball Jump: Think front slam with some added oomph.
Start with the ball on the floor between your feet; body in an athletic ready stance, feet about shoulder width apart
Keeping a neutral spine, squat down and pick up the slam ball
As you come up from your squat jump vertically, pressing the ball as high as possible overhead, like rebounding a basketball or blocking in volleyball
As you come down from your jump, slam the ball on the floor and finish in a hinge or squat position
Keep the core engaged as you pick the ball up from the floor and repeat
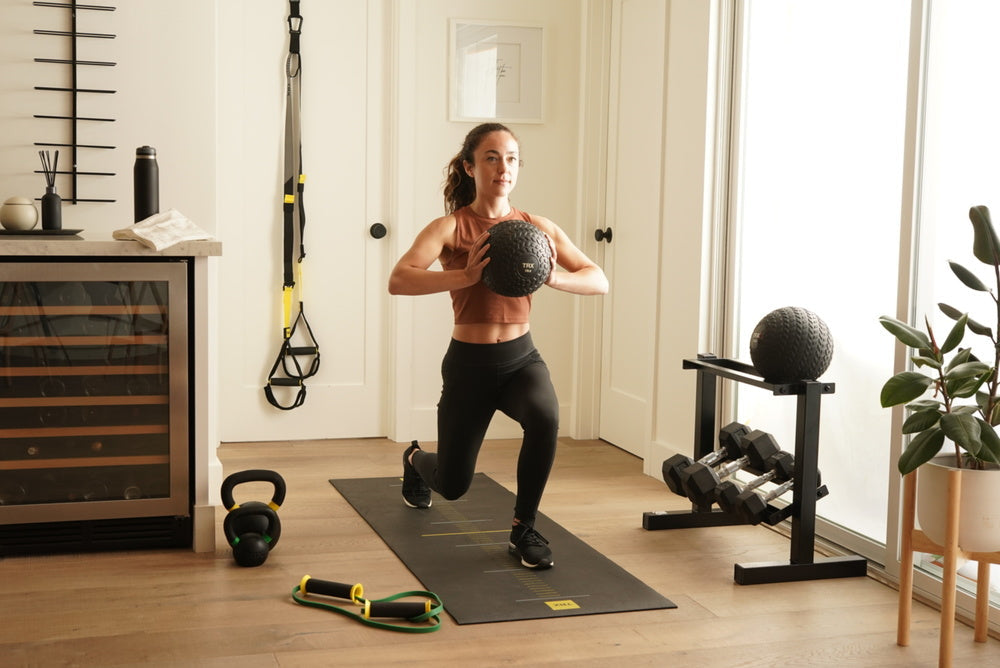
Slam Ball Lunge: Step up your lunge game by adding a slam ball for some extra work.
Stand in an athletic stance, holding the slam ball at your chest
Step forward, gently lowering your back knee towards the ground
As you step forward fully extend your arms in front of you
Be sure to keep your knee in line with your toes, shin of your front leg vertical
Drive back to original position, maintaining a tall torso and repeat with opposite leg
Slam Ball One Arm Chest Pass: Grab a partner for this one - you should be about 4 - 6ft away from each other.
Stand feet shoulder width apart in an athletic stance, with the ball at your chest
Pivot on your left foot while rotating your shoulders and hips to the right.
Moving your hips and shoulders together like a cylinder, rotate rapidly back to the left, push the ball out towards your partner with your right arm Your partner will catch the ball, do the same movement and push it back to you
Continue these movements for a few reps and then switch sides
Slam Ball Side Slam: Who doesn’t love oblique work?...Or at least the after effect.
Start with the ball on the floor between your feet; body in an athletic ready stance, feet about shoulder width apart
Without rounding your back, squat down and pick up the slam ball
As you come up from your squat, use strength in your legs and hips to thrust and push the ball above your head
Rotate to one side, pivoting your back foot
As you pivot, slam the ball down at your side and towards the inside of your front foot
Bend your knees and sink down as you slam the ball down
Without rounding your back, pick up the slam ball, maintaining the same body position, return to start and repeat on the other side
Click here to learn more about TRX Slam Balls (Note: discounts on TRX Slam Ball Bundles available for commercial customers.
BRING TRX EDUCATION TO YOUR COACHES WITH THE TRX FUNCTIONAL TRAINING COURSE
Ensure your training team is using the standards of movement to properly incorporate Functional Training Circuits into their Personal Training, Small Group, and Group sessions.