News

Lower Body Workout: 15 Minute Fitness with Basheerah Ahmad and TRX
If you want an incredible butt, leg and hamstring workout give this 15-minute, lower-body blast a try. Want to find the perfect lower-body exercises for your fitness level? Take our quick assessment quiz to get a personalized TRX training plan. Celebrity trainer Basheerah Ahmad designed this short, super-effective TRX workout to strengthen, tone and shape your legs and lower body. Scalable to any fitness or strength level, this workout provides a challenge for everyone, whether it's your first time on the suspension trainer, or you're a seasoned TRXer.
TAKE OUR TRAINING QUIZ
Perform each exercise for 60 seconds with 30 seconds rest in between each exercise. When you are finished with all five exercises, repeat the entire sequence, for a perfect 15-minute workout. For the single-leg exercises, perform the first round on one leg and the second round on the other.
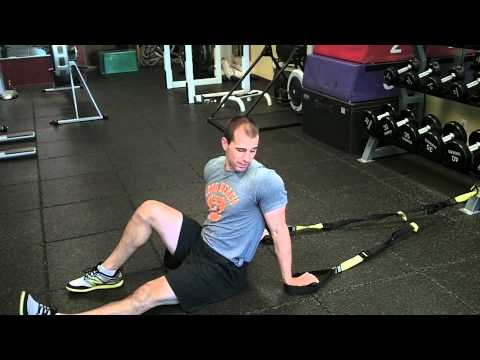
TRX Hamstring CurlsLay on your back with your heels in the foot cradles, directly under the anchorpoint. Press your heels down and brace your core to lift your hips up. Imagine your are performing a plank on your back. Use your hamstrings to bend your knees and pull your heels in toward your butt. Engage your core the entire time. Send your heels back to the start position in one slow and controlled motion.
TRX Hip PressesLay on your back with your heels in the foot cradles and your knees bent to 90 degrees, directly over your hips. Press your heels down and engage your core to thrust your hips up until they are in a perfect line with your knees and shoulders. Lower hips down in one slow, controlled motion to return.
TRX Squats Stand facing the TRX Suspension Trainer with the handles in your hands and some tension on the straps. Keep your weight in your heels and focus on engaging your core as if you were performing a standing plank. Lower your hips down and back until your knees are bent just below 90 degrees. Keep your chest up, engage your core and drive your knees out as you go down. Drive through your heels and extend your hips to stand back up.
For an extra challenge, try centering one foot with the anchor point and performing a single-leg squat. Just remember to switch side the second time through.
TRX Mountain ClimbersStart in a push up position with your toes in the foot cradles and your hands directly under your shoulders. Brace your core and draw one knee towards your chest while keeping your other leg straight. Allow your hips to pike up a little as you reach the top of the movement. Straighten your leg and lower your hips to return to the start position. Repeat with the other leg.
TRX LungesStand facing the anchor point and hold handles with your palms facing each other. Lift one leg so that your thigh is parallel to the ground and your knee is bent to 90 degrees. Drive your leg back and lunge down until the thigh of your working leg is parallel with the ground. Drive through your heel and squeeze your glutes to stand up.
If you want more fat-burning, muscle-toning workouts from Basheerah and TRX be sure to watch the rest of the 15-Minute Fitness Workout series, here.
Let's Move
FIT DOESN'T CARE ABOUT THE RULES.
IT ONLY CARES THAT YOU SHOW UP.
The world thinks fitness has to be at the right place, the right time, with the right look, that it should come naturally or not at all.
But fit doesn't care about that. It doesn't care about what you wear, how you look, how you show up, whether you're young or old, fit or not, have kids, haven't worked out a day in your life. It only cares that you show up. That you put the effort in. And that you move in the way that moves you.
Because movement is what binds us together. It's millions of people, making fit happen every single day.
And you're invited.
So what are you waiting for?
#TRXLetsMove
Low TRX Anchor Point
Highlighting yet again the versatility of the TRX Suspension Trainer, Doug Balzarini is back, showing us five exercises you can do on the TRX when it’s anchored from a low anchor point. These are great when you’re in a vertically challenged space or for those times when you just want to switch things up a bit. As we always say, it’s nice to have options. And with the TRX, they're truly endless.
1. TRX Posterior Chain Y RaiseAt first look, people may mistake this movement for an abdominal exercise. At Fitness Quest 10, they actually cue this exercise as a pulling movement, therefore activating the backside of the body, especially the posterior shoulder muscles. Try to maintain a neutral spine throughout the movement with no lumbar flexion. To do this, apply pressure into the cradles to ensure backside activation and a tall, neutral spine.
2. TRX DragonflagMade popular by Bruce Lee, this exercise is one that requires a lot of core strength and stability. When you’re at the “top” of the movement, make sure you are supporting your weight with your upper back and not your neck. Again, apply pressure into the handles to help stabilize the body. Use a slow, controlled movement when lowering the legs and try to maintain a neutral spine without arching your back.
3. TRX Single Leg Hip ExtensionBegin supine with your head near the anchor point, one handle held with both hands, and the opposite strap around one heel. Initiate the movement by pushing your heel into the strap and extending at the hip. As you lift up onto your back, stabilize your body by bracing your torso and using your hands with the off handle. Slowly lower back down to the floor without arching your back.
4. TRX Split Squat VariationsUtilizing the low anchor position while performing split squat variations allows you to use the handles to aid with balance and really maintain an upright posture throughout the movement. Facing the anchor point, get into a “lunge” or split squat position and lower down for the desired number of reps. Lifting the back leg will really engage the quad muscle of the front leg and challenge your balance.
5. TRX Pistol to Single Leg DeadliftStart with a similar setup to the split squat position (#4). This is a compound movement that combines a single leg squat and single leg deadlift. When performing the single leg squat (pistol), try to keep your weight on the heel to the mid foot and off the toes while maintaining an upright posture. After each pistol rep, hinge from your hip, maintain pressure in the TRX handles, extend your heel towards the back wall and lower down into a deadlift or “balance reach” position with a neutral spine throughout the exercise.
Using the TRX with a low anchor point expands your exercise options. Take our quick assessment quiz for personalized variations that match your fitness level and equipment setup. Try these five moves and share your experience below.
TAKE OUR TRAINING QUIZ
Doug Balzarini works at Fitness Quest 10 (www.fq10.com) as a personal trainer, strength coach and Operations Director for Todd Durkin. A Massachusetts native, he earned his Bachelor’s degree in Exercise Science with a minor in Business Management from Westfield State College. Since moving to San Diego, he has completed some graduate work in Biomechanics at SDSU, obtained an ACE Personal Trainer certification, the NSCA-CSCS certification, a Spinning certification, TRX instructor training, EFI Gravity instructor training and FMS training. He has also appeared in eight fitness videos, written numerous fitness articles, completed a MMA Conditioning Coach certification program and has competed in multiple grappling tournaments.

Learn How to Activate Your Glutes with TRX
One of the hottest topics of discussion in the fitness industry recently has been centered on how to optimize glute function. As we begin to recognize the massive role this muscle group plays in most movement, it is no wonder that it is one of the largest muscle groups in the human body. The glutes are heavily involved in movements like the golf swing, throwing and striking actions along with running, jumping and direction changes. This huge posterior power center is in many ways the key to producing smooth and powerful movement.
Before we look at how to optimize their function we must first understand how they act in normal movement if they are contributing properly. If we were to look into any anatomy text we would be sure to find the following:
Muscle Name
Origin
Insertion
Joint
Concentric Action(s)
Gluteus Maximus
Ilium (posterior crest)Sacrum (posterior)Lumbar Fascia
Femur (gluteal line)Tibia (lateral condyle)
Hip
extensionexternal rotationabductiontransverse abduction
Gluteus Medius
Ilium (external process below crest)
Femur (greater trochanter)
Hip
abductiontransverse abductioninternal rotationexternal rotation (during abduction)
Gluteus Minimus
Ilium (below gluteus medius)
Femur (greater trochanter)
Hip
abductiontransverse abductioninternal rotation (during abduction)
On the surface this chart seems to sum up the glutes as a group. It covers where they start and finish, what joint they cross and what they do. The reality is that this is only the beginning of the true picture and in many ways is somewhat misleading as to how the glutes actual function. While they certainly can perform all of the actions described above, a more important piece of information is what they actually do in day to day function.
How do they do it? From which position do they move from? Do they act in a primarily eccentric or concentric way? What actions do the glutes use to load in order to truly explode?
It is this final point that potentially has the most bearing on our approach to activate them so that they are truly firing at full capacity. One of the most important characteristics to understand about every muscle is that they have to load in all three planes of motion before they can unload maximally. The human body has evolved in such a way as to capitalize on the unwavering affect of gravity to assist it in this function. This is especially true for the glutes and we need only look as far as a simple step for proof.
While our anatomy chart provides us an excellent overview of how the glutes act concentrically and in an open kinetic chain, it fails to take into consideration that one of the primary functions of the group is to eccentrically decelerate the forces generated by gravity and ground reaction. The following is an example of how the body is designed to load the glutes in three planes of motion.
As the foot strikes the ground, the impact force causes the calcaneous to roll inward into eversion setting off a chain reaction that goes all the way up the leg.
The talus that sits on top of the calcaneous has no choice but to fall down and in.
This causes the tibia (that sits on top of it) to internally rotate.
This movement also drives the femur into internal rotation to an extent that even though the action of pelvis would create external rotation, the femur is rotating in the same direction faster which causes this internal rotation in the hip.
This chain reaction of shock absorption continues up into the pelvis and through the body but we will stop for now at the hip.
The strong and fast internal rotation of the femur must be decelerated eccentrically by the function of the glute. As this is happening, the hip is also going through adduction and flexion, both of which further load the glutes, demanding them to decelerate these actions as well. At this point in gait it is safe to say that the glutes have been stretched and loaded eccentrically in all three planes of motion and should be in a very excited state and ready to fire.
So what if they don't?
A common approach is to lie down and, using a focused and cognitive isolation method, work the glutes through all of their concentric actions. While this will certainly fire the glutes, it will not necessarily translate into normal function in a standing position as everything changes when your foot hits the ground. This means that while an exercise may be effective for increasing strength and causing a burn, it does not necessarily equate to the increased coordinative function and timing that the body uses in natural movement.
So how can we train this functionally?
Our strategy is seeded in our understanding of how the glutes load naturally and capitalizing on this natural reaction by emphasizing one or more of these elements. We know that in gait the glutes load eccentrically in three planes of motion.
Internal rotation of the hip in the transverse plane.
Flexion of the hip in the sagittal plane.
Adduction of the hip in the frontal plane.
It is important to note that all of these actions occur in a closed kinetic chain environment with the foot on the ground. So how can we accentuate these actions to increase the natural loading? By using other parts of our body to drive us further into these positions, accentuating the load and forcing the "proprioceptors to turn the muscle on".
Let's take the common lunge as an example. Traditionally this exercise is done with the torso in as upright a position as possible with hands either on hips, holding dumbbells at sides or holding a bar on shoulders. Regardless of the implement or the load, the torso has most always been coached to stay upright and positioned over the hips.
Our goals are simple.
Increase internal rotation of the hip.
Increase flexion of the hip.
Increase lateral flexion of the pelvis.
If we are trying to accentuate glute loading, we can achieve this by adapting the traditional lunge using a bilateral reach with the hands toward the ground as though we were lunging forward to pick something up that is in front of our lunging leg. This reach drives the pelvis to rotate forward and increases hip flexion. This action increases the stretch or loading of the glutes and causes them to forcefully and eccentrically decelerate the movement which also results in a more forceful explosion out of the lunge with reach position. We can increase loading further by adding resistance such as a medicine ball or light dumbbells.
Lunge with Forward ReachWe can apply the same technique using a different arm driver to accentuate the frontal plane load in the lunge. In this case we are trying to increase adduction of the hip of the stepping leg by increasing the lateral flexion of the pelvis. Take a lunge step forward with the right leg. As the foot hits the ground, reach as far to the side with the left arm as possible at hip height. This reach will cause a displacement of the center of gravity which is countered by a lateral flexion of the pelvis. This increases the adduction of the lead leg, putting the glutes under stretch, increasing the demands on them to decelerate the movement and loading them more effectively.
Lunge with Side ReachWe could achieve the same effect by using a leg driver in a crossing balance lunge.
Crossing Balance LungeIncreasing internal rotation of the hip using an arm driver can be achieved simply by rotating into the lead leg during the lunge.
Lunge with Rotational ReachAnother strategy is to use an unstable surface during a normal lunge such as an Airex pad which will increase the amplitude and challenge of the initial pronation that is described earlier. This causes an even greater chain reaction up the chain to the internal rotation of the hip above.
We can use similar techniques from a squat stance to help increase the loading of the glutes from this position.
Squat with Rotational Reach and with Side ReachBelow is a simple exercise plan that lists the exercises outlined above and puts them into a basic structure. Be sure to start with a single set and light load before progressing.
Exercise
Sets
Reps
Lunge with Forward Reach
1 to 2
10 to 12
Lunge with Side Reach
1 to 2
10 to 12
Crossing Balance Lunge
1 to 2
10 to 12
Lunge with Rotational Reach
1 to 2
10 to 12
Deep Squat
1 to 2
10 to 12
Squat with Rotational Reach
1 to 2
10 to 12
Squat with Side Reach
1 to 2
10 to 12
Now that we have got the glutes firing to full capacity, our end goal is to bring this neuromuscular learning back to regular function. We can do this by slowly approximating our drivers back until we are getting the same peak activation without the assistance of the drivers. Once we have discovered the amplitude required to fully activate our target muscle successfully, we need to gradually reduce this amplitude over time until we are able to perform the basic actions while still maintaining good glute involvement. We can look at this process of approximation using the Crossing Balance Lunge as an example. If driving the free leg as far to the other side of the ground leg in a deep lunge causing a much exaggerated lateral flexion of the pelvis is on one end of the continuum, driving the free leg straight back which results in very average pelvic lateral flexion is on the other. The key is to start at the one end of the continuum (in this case the lateral leg driver) and slowly work toward the other.
To begin, we might have to drive the foot far to the other side of the ground leg in a deep lunge to feel the kind of activation that we are looking for. As we progress, we should slowly use more oblique angles until we are able to get full activation even when driving the leg straight back. The effectiveness of this type of training is tremendous, not only in activating the target areas but also in increasing range of motion, strength and balance for you and your athletes.

Kari Pearce Shares Her Weekly Recovery Routine
For the average fit person, post-workout recovery might include a light walk to cool down from a run, toe touches after a HIIT class, or hanging onto a TRX Suspension Trainer™ after a resistance-training session. Perhaps there’s a little foam rolling or an Epsom salt bath if it was a particularly tough day. An elite athlete, by contrast, commits hours each week to recovery. For CrossFit star Kari Pearce, that recovery time includes a combination of stretching, foam-rolling, massage, and more.
Pearce trains as least three hours a day, six days a week, and her workouts end with a 10-minute cooldown, a 10-15 minute stretch, foam-rolling, and mobility work. “Since I was a gymnast, I do a lot of stretches similar to that.” She also incorporates ROMWOD, (range of motion workout of the day), which she describes as similar to yoga for CrossFit. She’ll even use her TRX Duo Trainer™ to stretch. “I just hang on and relax. [It] helps loosen up my back and shoulders, especially after a lot of weight lifting.”
While some cooldown work has to immediately follow exercise to maximize the benefits, Pearce points out that foam rolling is a recovery method that athletes and amateurs alike can squeeze in throughout the day. Noting that she uses her foam roller whenever she can find time, she says she tries to squeeze in 10–15 minutes—and up to 30 minutes—after a workout. “It depends on how much time I have, how my body’s feeling; the more sore it is, the more I try and foam roll. Even just 5–10 minutes will go a long way.”
Another way that Pearce’s recovery routine may look like your own? Epsom salt baths.
During her standard training schedule, Pearce works in Epsom salt baths about two times a week, (depending on her schedule), along with a weekly ice bath or cryotherapy. Before a major competition like Regionals or the CrossFit Games, Pearce may ramp up to daily Epsom salt soaks. She complements that muscle relief home remedy with weekly appointments for active release massage and acupuncture.
To top off her active forms of recovery, Pearce swears by a good night’s sleep. “Sleep is very important to me. I try to get eight to nine hours a night,” she says. In fact, sleep is such a big part of her training regimen that she’s partnered with ReSt (Responsive Surface Technology), a smart mattress company. Through an app, the ReST bed monitors her sleep, and automatically adjusts her mattress firmness to help her sleep better.
Kari Pearce may have a team of coaches, experts, and partners guiding her workout recovery, but at the end of the day, she still gets sore just like the rest of us. “Especially right now, since we’ve ramped up the training volume and intensity, my body’s sore,” she says. “You never don’t get sore. You get stronger, so you lift heavier weight. You get better, so you move faster. You get sore because you’re pushing a little bit harder and you’re pushing your body to the limit. No matter how fit you are, you’re pushing those boundaries.”
JUST IN: NEW TRX® GEAR
TRX Training
hr class="blog-card__divider">
With spring right around the corner, we’re all looking for ways to hit refresh on our workouts. What better way to boost your motivation than a line of fresh new gear to round out your TRX® Suspension Training method and setup? We curated this line to focus on what everyone’s been asking for—COVID safety options, easy setup, and a new, improved mat made to handle your highest intensity workouts.
TRX Fac
We offered this as a limited-edition gift but we brought it back for the long haul. Now you can sweat without worry thanks to our soft, stay-put face mask featuring a breathable performance fabric.
TRX High-Impact Mat
The foundation of every workout. Our plush, non-slip mat is not only the optimal thickness for cushioning high-impact moves, it features handy lines on the surface to better gauge where you should be when performing Suspension Trainer™ moves.
TRX Door Hinge Mount
Want an option other than your door or drilling into your walls? Our new TRX Door Hinge Mount rests perfectly in most door hinges—just pop out the hinge pin and slip in the anchor to give yourself the perfect place to attach your TRX® Suspension Trainer™. Best part? It’s so low-profile it can stay there forever.
Stay on the lookout for more gear down the road! But in the meantime, put your new gear to good use with our TRX On-Demand workouts. P.S. Expect really cool updates (coming soon).

Injury rehab with TRX
Build’em up with the TRX
The TRX can play a pivotal role for newer clients lacking strength and athletes coming back from injury. Want to find the right progression path for your fitness level? Take our quick assessment quiz to get a personalized training plan that builds confidence and strength gradually. With the TRX Suspension Trainer, you're able to un-load certain exercises, which allows the client/athlete to progress gradually. Doing so builds strength and confidence in the process.
TAKE OUR TRAINING QUIZ
I've often found my new clients to be:
1. Afraid of the gym
2. Out of shape and weak
3. Lacking confidence
The last thing these clients need is a personal trainer throwing weight on their back and setting them up to fail. If they aren’t physically or mentally ready for certain exercises, that’s ok! Simply scale it down and build them up. I love showing my newer clients how much fun training can be with the right exercises performed at an appropriate level of difficulty. The following is a list of my top TRX “Building Block” exercises I like to incorporate with my new clients:
1. TRX Low Row 3-4 reps x 10 sets
2. TRX Squat 3-4 reps x 10 sets
3. TRX Elevated Step-Up 3-4 reps x10 sets
4. TRX Chest Press 3-4 reps x 10 sets
5. TRX Side Lunge 3-4 reps x 10 sets
6. TRX Y-Fly 3-4 reps x 10 sets
Staying in the 3-4 reps of 10 sets range ensures a good amount of volume, which will give your clients plenty of practice with the exercise. The more sets your client completes, the stronger they’ll become. And with improved strength, you will notice a distinct increase in confidence. As their strength and confidence grows, your clients will start to view the gym as a place where goals can be accomplished, rather than a place where failure is inevitable.
Similar to working with new clients, injured athletes need positive reinforcement by experiencing success in the weight room. This is possible by progressing gradually and using the TRX to un-load specific exercises. I like to incorporate isometric and eccentric principles in these exercises to expedite strength levels and body awareness. This is a list of my TRX “Back at It” exercises:
1. TRX Squat and TRX Single Leg Squat with a 5-0-1 eccentric tempo (5 seconds on the descent, 0 sec hold, and 1 second return to start position), progress to wearing a weight vest 3 reps x 5 sets
2. TRX Squat Jumps with Isometric 2 count hold upon landing 3 reps x 5 sets
3. TRX Speed Skaters with Isometric 2 count hold upon landing 3 reps x 5 sets
4. TRX Low Row with Isometric 2 count hold at contraction point, progress to wearing a weight vest 3 reps x 5 sets
5. TRX Step-ups with a 1-0-5 eccentric tempo, progress to wearing a weight vest 3 reps x 5 sets
6. TRX Seated Pull-Up with Isometric 2 count hold at contraction point, progress to wearing a weight vest 3 reps x 5 sets
We want to keep the volume on the lower end of the spectrum here since the exercises are using eccentric and isometric principles which will be more demanding on the athlete’s body. As the athlete becomes stronger and more confident with these exercises, you can then adjust the sets and reps, thereby increasing the overall volume.
My intention for these exercises is to help build up your athletes and clients, as well as put a smile on their face for the fun workout you just put them through!
About Coach Thom -
Scott Thom recently completed his second season with the Washington State University men’s basketball program as the team’s strength and conditioning coach/player development. He served in the same capacity at California the previous four years. Prior to joining the staff at California, Scott coached basketball and taught physical education for seven years at Vintage High School in Napa, Calif. Scott received his bachelor’s degree in physical education from Chico State in 2002, a teaching credential in physical education from Sonoma State, and a masters in Coaching and Athletic Administration from Concordia University. He is certified through both CSCS and USAW. Scott writes articles for STACK and Harbinger Fitness.
Instagram Account- @CoachScottThom
Improve Your Lacrosse Shot with Paul Rabil and TRX
While most runners are focused on fast intervals, hill repeats and getting their long runs in, there is an often overlooked but crucial training element to consider. This element is one of the best ways to get faster with minimal effort, yet most runners view it as an afterthought. Yes, as the title suggests, I’m talking about flexibility. Now, most runners are at this moment, rolling their eyes and thinking, “Yup, I’ve heard this one before” but before you click out, take a moment to consider the following:
Stride Frequency
Stride Length
Everything we do technically and aerobically directly affects these variables and ultimately influences the all important equation below:
Stride Frequency x Stride Length = SPEED!!!
What you might not realize is just how much increased flexibility can influence these variables. Now we know that the ideal stride frequency for most runners is about three foot strikes per second (or 90 rpm). If this sounds fast to you, then this is the first thing you will need to work on. Once you have created the neuromuscular ability to hold this turnover, it will be time to take a good hard look at stride length.
So how big of a difference will these elements make? Have a look at the following two examples:
Example #1
3 foot strikes per second (90 rpm) and a stride length of just under 55” gets you a 40 min 10 k
2” more per stride and that 10 k time drops to 38:30!!
Example #2
A stride length of 51.5” with a turnover of 85 rpm (2.83 foot strikes per second) gets you a 45 min 10k
Moving up to 90 rpm (0.17 more foot strikes per second) shaves 2.5 minutes off your time!!
These are BIG DIFFERENCES!!
So how does flexibility help? Let’s have a look at stride frequency.
If you look at the photo below of Kenesa Bekele, take note of how much quadriceps mobility he demonstrates as he pulls his left heel under his body. This allows him to create a shorter lever in his leg so that he can pull it forward faster, which gives him an effortless and more efficient turnover.
Stride length is of equal importance. Hip and calf mobility directly influence stride length. If either are tight, they will inhibit the movement and shorten stride length. This means that if we can just get these tight structures out of the way of the motion, it is very likely that we have some “free speed” waiting for us on the other side that our present conditioning level will support.
There are some great stretches to address these specific issues in the TRX Essentials: Flexibility DVD, and the entire thing also works very well for addressing many of the imbalances that can lead to injuries in runners. The DVD offers a tremendous full body stretch that also can be done as a flowing movement prep for any athletic activity.
Beyond what is in the DVD, three additional stretches that work perfectly for runners are featured below. Try these out prior to your next run, and see if your running stride feels a bit easier.
1) TRX Kneeling Quad StretchThis is an amazing exercise to help create mobility through the entire anterior line and increase stride length.
2) TRX Pigeon PoseA fantastic stretch that addresses the glute and piriformis and provides a stretch across the thoracolumbar fascia into the contralateral lat. This stretch serves to alleviate the tightness that often develops along this line and helps to prevent injury and promote smooth and obstruction free running, which promotes increased stride frequency.
3) TRX Sprinter Start Calf StretchThis stretch addresses the classic mobility problem of inadequate ankle dorsiflexion in runners that often results in a pre-mature heel lift, added stress on the calf and plantar fascia and can shorten the stride.
For a complete flexibility program to add to your training regimen, check out the TRX Essentials: Flexibility DVD.
Good luck with your race season and may a PR await you at your next finish line!
Fraser Quelch is Director of Programming and Education for TRX. He is also a featured fitness author and a competitive ironman triathlete.
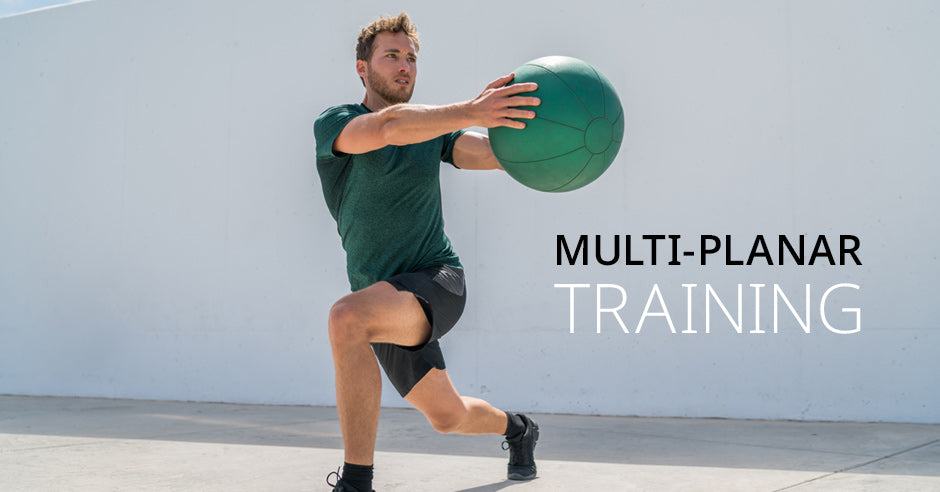
Improve Performance Through Multi-Planar Training
While this program seems well-put together at first glance
Since the beginning of the modern era of physical training, the accepted thought process on program organization has been a body part approach where the body is divided into its major muscle groups and trained accordingly I E. chest back legs shoulders etc. This arrangement has been an easy, understandable way to segment programs and hasbrought good results, especially when applied towards a bodybuilding style program.
But has this organizational strategy come with the cost? Consider thefollowing:
The human body works to produce movement... period.To this end it makes every attempt to use many muscles in concert to create action as efficiently and effectively as possible.
Life demands that we are able move freely through space and not within the confines of a machine or other restrictive motor pattern. To this point, isolated exercises contradict the nature of how the body has evolved to move.
Most traditional strengthening programs heavily favor sagittal plane movement. This is a training environment that promotes one dimensional motor patterns, an inability to move effectively in any given direction, and in many cases joint dysfunction.
Muscle based programs in many cases, unwittingly contribute to muscle imbalances, poorly developed firing patterns, and general movement deficiency in the untrained planes.
Imagine for a moment that there are no individual muscles. No simple groups to target. What if all we had to work with were our various joints and the movements that they are capable of? Want to explore training based on movement patterns rather than isolated muscles? Take our quick assessment quiz to get a personalized plan that focuses on functional, multi-planar exercises. Letting go of our traditional muscle-based approach to strength training and understanding how the body actually moves are the first steps to integrating a planar training approach to program design.
TAKE OUR TRAINING QUIZ
The central nervous system (CNS) coordinates the muscles in concert to produce specific movements. It does this by using something called motor engrams. These are movement programs that we have developed for all general actions. Familiar movements build detail ontothese programs, creating highly developed and refined motor engrams. These well-practiced programs run smoothly at many different speeds and can be executed successfully in changing environments (i.e. off balance, rushed, or form an unusual position).
Unfamiliar movements have incomplete or rough engrams. These programs are a work in progress and can often go awry. We have to slow down and be very cognitive about the action in order to control it properly and we tend to be much less successful. These unpracticed actions often feel "uncoordinated" and in the event that a situation demands that we run an unfamiliar program at higher speed, the chances of failure of injury increase dramatically.
Training using a movement or planar approach results in a complete workout that not only will involve every muscle group around the major joints (the goal of those looking for aesthetics), but will also work though every motor plane, giving balanced training that will help to improve many of our traditionally rough movement patterns, increase overall function and reduce the chance of injury. Integrating more complex and coordinative multi-planar movements into the program will build further on this new foundation to stimulate the CNS to create and refine motor engrams that will then be applied to sport and life.
Let's go back and review the planes of motion. These elements are often the first things taught in basic fitness courses but sadly are promptly forgotten as there was no emphasis placed on applying them. As the body moves through space, it uses any combination of three planes of motion. These are as follows.
Sagittal Plane of Motion:
Movement forward and back, or through the mid-line of the body. An example of sagittal plane movement is a biceps curl or a step forward lunge.
Frontal Plane of Motion:
Movement side to side or along the frontal plane, such as abduction and adduction. Exercises that work through the frontal plane are the dumbbell lateral raise or side lunge.
Transverse plane of Motion:
Movements that include horizontal abduction or adduction or rotational actions. Examples here are the bench press or a cable wood chop.
Below is an example of a traditional, full body strength training program that is representative of the industry standard. It is comprised of 22 exercises (5 for legs, 3 for chest, 3 for back, 3 for shoulders, 2 for biceps, 2 for triceps and 4 for the core). It could be divided up by muscle group over a two or three day period. The point is to evaluate the exercise selection. View the program while considering only the first two columns.
Traditional
"Body Part" Based Training Program
MuscleGroup
Exercise
PrimaryJoint(s)
MovementPlane(s)
Legs
Squats
Hip, Knee & Spine
Sagittal
Legs
Lunges
Hip & Knee
Sagittal
Quadriceps
Leg Extension
Knee
Sagittal
Hamstrings
Leg Curl
Knee
Sagittal
Calves
Standing Calf Raise
Ankle
Sagittal
Chest
Bench Press
Shoulder & Elbow
Transverse
Chest
Incline Dumbbell Press
Shoulder & Elbow
Transverse
Chest
Dumbbell Flies
Shoulder
Transverse
Back
Close Grip Pull Up
Shoulder & Elbow
Sagittal
Back
Seated High Row
Shoulder & Elbow
Transverse
Back
Bent Dumbbell Row
Shoulder & Elbow
Sagittal
Shoulders
Military Press
Shoulder & Elbow
Frontal
Shoulders
Lateral Dumbbell Raise
Shoulder
Frontal
Shoulders
Front Dumbbell Raise
Shoulder
Sagittal
Biceps
Dumbbell Curl
Elbow
Sagittal
Biceps
Preacher Curl
Elbow
Sagittal
Triceps
Lying Triceps Extension
Elbow
Sagittal
Triceps
Cable Press Down
Elbow
Sagittal
Core
Stability Ball Crunch
Spine
Sagittal
Core
Oblique Crunch
Spine
Transverse
Core
Leg Raise
Spine
Sagittal
Core
Chest Raise
Spine
Sagittal
On the surface it appears to be well-balanced and would result in good aesthetic results. Now take into consideration the last 2 columns of information. The key stats are as follows:
Hip is primarily involved in only 2 of 22 exercises
Shoulder is primarily involved in 9 of 22 exercises
Spine is primarily involved in only 5 of 23 exercises
Elbow is primarily involved in 9 of 23 exercises more than the Hip and theSpine combined
15 (68%) occur in the sagittal plane
2 (9%) occur in the frontal plane, both at the shoulder joint.
5 (23%) occur in the transverse plane, but the majority of these were also at
the shoulder and none at the hip.
While this program seems well-put together at first glance, the glaring imbalances are apparent under the "planar lens". While likely to create great aesthetics, by not utilizing a planar approach during the planning phase, this program is also poised to reinforce an inability to move effectively in the frontal or transverse plane with the lower body, act in the frontal plane with the trunk and contribute to muscle imbalances, joint tightness and movement dysfunction.
So how is a planar program planned?
Below are the basic guidelines.
Base the program around the major joints of the body. Begin with joints that have significant multi-planar movement capabilities (hips, shoulders, and trunk) and progress through to the uni-planar joints (knees, ankles, elbows).
In most cases the uni-planar joints will be trained as part of the bigger movements associated with the multi-joint actions used to train the hips, shoulders and trunk. Any gaps left in the program can be filled in using smaller more targeted exercises that are normally associated with movements at the knees, ankles and elbows.
Focus on providing an exercise for every plane of motion (sagittal, frontal, transverse), in every direction (flexion, extension, abduction, adduction, R-rotation, L-rotation) in which a joint is capable of moving.
Emphasize movements that integrate multiple joints
Integrate functional actions that require full body and joint stabilization.
As the ability of the client increases, use an increasing number of multi-joint and multi-planar movements or movement combinations. These complex actions require a more coordinative effort from the client but will result in highly trained movement abilities and time efficient programs.
Add isolation exercises after complex actions have been programmed to ensure that all planes of motion at each joint are being moved through, or to target a specific area of weakness / focus.
Integrate different equipment modalities if possible. There are increasingly amazing arrays of functional training tools that emphasize multi-planar movement. Strategically utilizing a variety of these maximizes their strengths while providing varying environments for the body to work in.
Do not think about muscle groups. If you focus on the joints and planes of motion, the muscle groups will take care of themselves.
The program below uses a planar approach to break down the body, ensuring balanced training for every joint across all planes of movement. The program is written to integrate traditional exercises with functional actions, and utilizes some of the innovative equipment mentioned above. The approach promotes the aesthetic improvements that are associated with first traditional program and creates a heightened state of bodily readiness and function for movement in sport and in life. Below the program is an easy to use checklist to track what movements have been included in the program.
Planar
Training Program
Exercise
Major Joint(s)
Plane(s) of Motion
Direction
Body Part(s)
Squat
Hip
Sagittal
flexion / extension
Legs
TRX Suspended Lunge
Hip
Sagittal
flexion / extension
Legs
Lateral Lunge
Hip
Frontal
adduction
Legs
Hip Abduction
Hip
Frontal
abduction
Legs
Lateral Step Up
Hip
Frontal, Transverse
adduction, horizontal. exten.
Legs
Transverse Plane Lunge
Hip
Transverse
horizontal flexion / exten.
Legs
Close Grip Chin Up
Shoulder
Sagittal
extension
Back
Incline Dumbbell Press (narrow)
Shoulder
Sagittal
flexion
Chest
Wide Grip Pull Up
Shoulder
Frontal
adduction
Back
Military Dumbbell Press
Shoulder
Frontal
abduction
Shoulders
TRX High Row
Shoulder
Transverse
horizontal extension
Back
Chest Press
Shoulder
Transverse
horizontal flexion
Chest
Prone Chest Raise
Trunk
Sagittal
extension
Core
TRX Suspended Pike
Trunk
Sagittal
flexion
Core
Lateral Trunk Flexions
Trunk
Frontal
lateral flexion
Core
TRX Side Plank with Reach
Trunk
Frontal, Transverse
lateral flexion & rotation
Core
Cable Wood Chops
Trunk
Transverse
R & L rotation
Core
Heavy Ball Diagonal Rotations
Trunk
Transverse
R & L rotation
Core
Planar
Training Program Movement Checklist
Joint
Planeof Motion
Movement
CheckBox
Hip
Sagittal
Flexion
??
Extension
??
Frontal
Abduction
?
Adduction
??
Transverse
Horizontal Flexion
?
Horizontal Extension
??
Shoulder
Sagittal
Flexion
?
Extension
?
Frontal
Abduction
?
Adduction
?
Transverse
Horizontal Flexion
?
Horizontal Extension
?
Trunk
Sagittal
Flexion
?
Extension
?
Frontal
Right Lateral Flexion
??
Left Lateral Flexion
??
Transverse
Right Rotation
???
Left Rotation
???
The key stats are listed below:
The hip is primarily involved in 6 of 18 exercises
The shoulder is primarily involved in 6 of 18 exercises
The trunk is primarily involved in 6 of 18 exercises
The knee is involved in 5 of 18 exercises
The elbow is involved in 6 of 18 exercises
The ankle is secondarily involved with all of the lower body movements exceptone
6 (33%) occur in the sagittal plane
7 (39%) have frontal plane elements
7 (39%) have transverse plane elements
If this planar training program is evaluated under a body part based lens, we find an even distribution of exercises for all body parts using 4 less exercises. The exception to this is while the biceps, triceps and calves are not targeted specifically, they are very much involved in many of the more compound movements. If we wanted to address these components specifically it is very easy to add in specific exercises after the main part of the program is complete.
In comparison to the first sample program, it is clear how a planar approach results in a much more complete and effective training plan that facilitates both aesthetic improvement and supports human movement and improves athletic development and functional fitness. This program could easily be made shorter and more coordinatively challenging and functional by integrating more multi-joint and multi-planar exercises. In this case the approach and evaluation process is the same but made a little more complicated due to the complexity of these types of actions.
A planar approach to training organization is challenging at first. It represents a major shift away from the way the fitness industry as a whole has been conditioned to think. While considering its validity, it is important to remember the adage of functional training... "The body knows only movement, not muscle." ...and ask the question "Why then are we training using a muscle based approach?"
Those who attempt this shift will be rewarded with effective programming that works on an entirely new level.